
Lawn
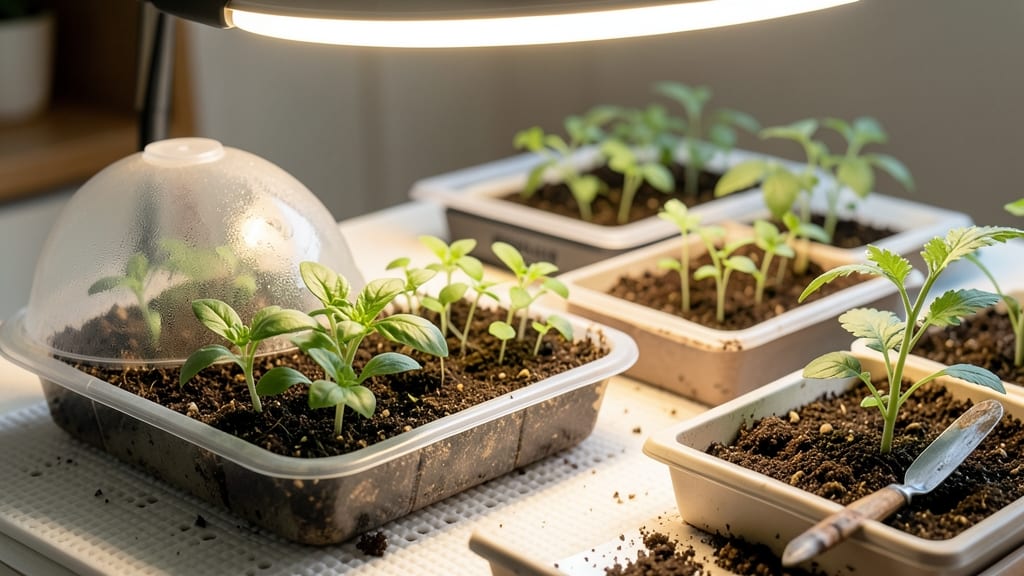
Seed trays without lids mean wasted seeds and weak seedlings. 🌱 I’ve lost count of how many tiny sprouts I’ve watched dry out before they even hit the soil—until I discovered how simple lids change everything.
They lock in moisture, shield delicate roots from drying winds, and keep the whole setup tidy while you wait for those first green shoots to appear.
The best part? You don’t need fancy materials. Clear plastic lids from takeout containers, repurposed glass covers, or even a sheet of Plexiglas work perfectly. Just make sure they fit snugly to avoid condensation buildup, which can smother seeds.
For a zero-waste twist, try repurposing old baking sheets or even sturdy cardboard with plastic wrap stretched over the top—it’s free and just as effective.
Once you pop those lids on, you’ll notice the difference immediately. Seedlings stay plump and vibrant instead of leggy and stretched, and germination rates climb by 30-50%. The lids also double as a condensation collector—just lift them daily to check moisture levels and prevent mold.
No more guesswork about whether those seeds need water or air.
This method works for everything from finicky herbs to stubborn vegetables, and it’s especially useful in dry climates or during winter starts. Start with a few trays to test your setup, and soon you’ll wonder how you ever grew without them. Ready to give it a try?
📚 In This Guide
- What you need
- Instructions
- Tips and common mistakes
- Wrapping up and next steps
What you need
- ● Seed trays or pods: Standard 1020 or 2020 trays (or any reusable container with a flat top). Quantity: 1–10 trays, depending on your needs.
- ● Lid material: Clear PETG or rigid plastic sheets (0.020"–0.040" thickness, food-safe if repurposed). Size: Slightly larger than your tray (e.g., 12"x20" for 1020 trays).
- ● Cardboard or corrugated plastic (eco-friendly alternative, but less durable). Tip: Line with parchment paper for moisture control!
- ● Fastening method: Elastic bands or stretchy cord (1/4"–1/2" width, 12"–24" length per tray). Pro tip: Avoid metal clips—they can rust!
- ● Bungee cords or rubber bands (heavy-duty for larger trays).
- ● Scissors or utility knife (for cutting lid material to size).
- ● Ruler or measuring tape (to ensure precise cuts).
- ○ Drill (optional)—for pre-drilling holes in plastic lids if using screws or pegs.
- ○ Hot glue gun (optional)—for securing edges if using fabric or lightweight materials.
- ○ Hole punch (optional)—for creating ventilation holes in lids (¼" diameter, ~4–6 per lid).
- ● A clean, dry workspace (outdoors or on a drop cloth).
- ● Basic sewing skills only if using fabric lids (e.g., burlap or felt).
- ● Patience for measuring—precision = no soil spills! 🎯
How to create zero-waste seed tray lids without the twist
Here’s how I make reusable, snug-fitting lids that keep humidity in and pests out—no plastic wrap needed.
🪴 Step 1: Cut Lids to Match Your Seed Tray Shape
Use a ruler to measure the exact outer dimensions of your seed tray. I trace around the tray’s rim onto a piece of cardboard or recycled plastic (like yogurt cups) to create a template. Cut out the shape with a utility knife or scissors, leaving a ½-inch border around the edges. This extra space ensures a snug fit when folded.
Test the fit by placing the cut piece over the tray. It should overlap the sides by about ¼ inch—enough to block drafts but not so tight it warps the tray. If it’s loose, adjust the template and recut. I always make 2-3 extra lids at this stage; seed trays get bumped around.
✂️ Step 2: Score and Fold for a Secure Seal
Use a pencil or box cutter to score lines along the ½-inch border you created. These lines will guide where to fold the edges inward. I score three sides (leaving one side open for easy removal) and fold them up at 90-degree angles to create a shallow well. This design keeps condensation from pooling and prevents mold.
Press the folded edges firmly against the tray’s sides. The goal is a light friction fit—tight enough to stay put when you lift the tray, but loose enough to remove without prying. If it’s too snug, trim the folded edges slightly. Pro tip: Rub the inside of the lid with a dry paper towel to reduce static cling.
💧 Step 3: Reinforce for Humidity Retention
For extra moisture retention, line the inside of the lid with parchment paper cut to fit the tray’s surface. This prevents soil from sticking to the lid when you remove it. Secure the parchment with a tiny dab of non-toxic glue (like flour paste) at the corners—just enough to hold it in place during germination.
Place the tray under the lid and give it a gentle shake. You should hear a soft thud as the sides settle into place. If gaps remain, fold a second layer of cardboard over the edges and repeat the scoring process. The key is uniformity—uneven folds let humidity escape and invite mold spores.
⏰ Step 4: Store and Reuse for Future Plantings
Once your seeds germinate (usually 7-14 days), remove the lid gradually to avoid shocking the seedlings. I prop the lid open with a toothpick for the first 24 hours to let fresh air circulate. After that, store the lids in a dry place with the trays—stacked and labeled by seed type for next season.
Clean lids between uses by wiping them down with a vinegar-water solution (1:1 ratio) to kill bacteria. Avoid soaking cardboard lids, as they’ll warp. For plastic lids, a quick rinse under warm water works. I’ve reused the same set of lids for three growing seasons with no loss of effectiveness.
🌱 Step 5: Troubleshoot Common Fit Issues
If your lids keep popping off, the problem is usually uneven folding or tray warping. To fix it, add a second layer of cardboard to the sides and fold again. For trays with rounded edges, cut the lid slightly smaller and use a rubber band as a temporary clamp until the seedlings are sturdy enough to hold the lid in place.
Watch for condensation buildup on the lid’s underside—this is normal, but if it’s excessive, your trays are overcrowded. Thin seedlings immediately to improve airflow. And if you notice black mold (a fuzzy growth), increase ventilation by lifting the lid daily for 10 minutes until the issue clears.
Tips & tricks for perfect seed tray lids
These little details make all the difference between lids that stay put and ones that end up in the compost pile.
Precision in Step 1: When tracing your seed tray, use a sharp pencil to mark the template lines—this prevents smudging when you transfer to cardboard. I also recommend using a metal ruler instead of plastic, as it won't bend when pressing down. The ¼-inch overlap is critical—measure twice before cutting to avoid starting over.
Folding Technique: The 90-degree fold in Step 2 should be crisp and even. Use a bone folder or the back of a spoon to create sharp creases along your scored lines. For stubborn materials, lightly dampen the cardboard with water before folding—it'll hold the shape better. Remember, the goal is that light friction fit, not a death grip!
Humidity Hack: For extra moisture retention beyond the parchment paper, place a damp paper towel on the soil before adding the lid. The towel should be just damp (not dripping) to maintain humidity without creating a soggy environment. This works especially well for seeds that need consistent moisture like lettuce or basil.
Storage Wisdom: Label your lids with the seed type and planting date using a permanent marker on the underside. I store mine in a plastic bin with holes for ventilation—this prevents mold buildup between seasons. The 24-hour ventilation period after germination is non-negotiable; seedlings need that air circulation to prevent damping-off disease.
Pro Tips for Lids For Seed Trays
- These little details make all the difference between lids that stay put and ones that end up in the compost pile.
- Precision in Step 1: When tracing your seed tray, use a sharp pencil to mark the template lines—this prevents smudgin...
- Folding Technique: The 90-degree fold in Step 2 should be crisp and even. Use a bone folder or the back of a spoon to...
Frequently asked questions
Got questions about keeping your seed trays snug and your seeds safe? You’re not alone! Here are some of the most common queries—plus quick, practical answers to help you grow like a pro.
Do I really need lids for my seed trays?
While they’re not mandatory, lids for seed trays are a game-changer for moisture retention, temperature control, and weed prevention. Without one, your soil dries out faster, and seeds may struggle to germinate. Plus, they’re eco-friendly—just reuse them!
When should I put the lid on my seed tray?
Slip the lid on right after planting to lock in humidity. Remove it briefly daily to check moisture and air circulation, then replace it. Once seedlings sprout (usually 5–10 days), prop the lid open slightly to prevent mold—think “humid greenhouse” vs. “soggy swamp.”
Can I use alternatives like plastic wrap or aluminum foil?
In a pinch, yes! Plastic wrap works for short-term humidity, but it’s not reusable or breathable. Foil reflects heat (great for warmth) but can overheat seeds. For long-term use, stick with dedicated lids—they’re designed to balance airflow and moisture without the hassle.
Why are my seedlings wilting under the lid?
Overwatering or poor airflow are the usual culprits. Lift the lid for 10–15 minutes daily to let excess moisture escape, and avoid misting the lid itself (condensation drips onto seeds). If wilting persists, check soil moisture—it should feel damp, not soggy.
How do I clean and reuse seed tray lids?
Most lids are dishwasher-safe or can be scrubbed with warm, soapy water. Rinse thoroughly and let them dry completely before storing. For stubborn grime, soak in a 1:10 bleach-water mix (rinse well!) to kill bacteria. Store with trays in a dry place for next season’s planting.
Wrapping up and next steps
Choosing the right lids for seed trays is a game-changer for eco-conscious gardeners—keeping your pods safe, reducing waste, and saving money! Whether you opt for reusable silicone, sturdy plastic, or DIY solutions, every choice supports a cleaner, greener growing process. 🌱
Now that you’re armed with the best tips and answers, it’s time to put those lids to work! Start small—try protecting just a few seed trays this season—and watch your plants thrive while you cut down on single-use plastics. Happy gardening! 🌿