
Lawn
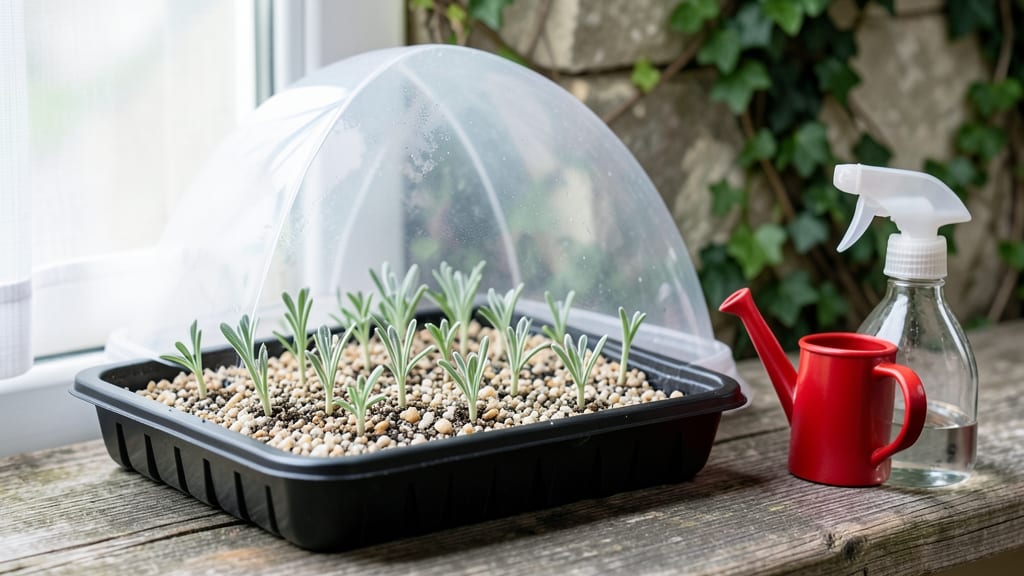
Cold-stratifying lavender seeds unlocks the secret to reliable sprouts instead of disappointment. 🌱 I’ve struggled with patchy germination until I learned the trick of mimicking winter’s chill—it’s what breaks lavender’s stubborn dormancy. The process takes patience, but the payoff is worth it: fragrant purple blooms that thrive for years.
You’ll need just a few supplies: a plastic bag, damp paper towels, and a freezer. The key is consistency—keep those seeds moist but not soggy, and give them 4-6 weeks of steady cold.
Lavender seeds are tiny, so handle them gently; they’re more delicate than they look. Most gardeners overlook this step, which is why so many give up after the first try.
Once sprouts appear (usually in 2-4 weeks after stratification), move them to bright light but avoid direct sun—young seedlings burn easily. The first true leaves signal it’s time to pot them up in well-draining soil.
These little plants grow slowly at first, but with proper care, they’ll reward you with silver-green foliage and those iconic lavender blooms by next summer.
This method works for all lavender varieties, whether you’re growing English lavender, Spanish lavender, or even the rare French lavender. The secret? Cold stratification turns unreliable seeds into dependable starters. Let’s get those sprouts growing!
📚 In This Guide
- What you need
- Instructions
- Tips and common mistakes
- Wrapping up and next steps
What you need
- ● Lavender seeds: 1–2 teaspoons (about 5–10g) of high-quality, organic lavender seeds (e.g., Lavandula angustifolia or Lavandula x intermedia). Choose seeds labeled for germination.
- ● Cold-stratification supplies: A paper towel or dampened coffee filter (1–2 sheets, depending on seed quantity).
- ● A ziplock bag (quart-sized) or airtight container.
- ● Ice or a refrigerator (set to 35–40°F (2–4°C)).
- ● Germination setup: A small seed tray or shallow container (6–8 inches wide) with drainage holes.
- ● Potting mix: 1–2 cups of well-draining, sterile seed-starting mix (avoid garden soil—it’s too dense!).
- ● Spray bottle (for gentle watering).
- ○ Grow lights or sunny windowsill: A full-spectrum LED grow light (optional but ideal) or a south-facing window (6+ hours of sunlight daily).
- ● Fine-mesh screen or cheesecloth (to cover the tray and retain moisture while allowing airflow).
- ○ Heating mat (optional, for faster germination—set to 70–75°F (21–24°C)).
- ○ Humidity dome (optional, to create a mini greenhouse effect).
- ● Plant labels (to track stratification dates and sprouting progress).
- ● Pruning shears (for future trimming once sprouts mature).
Step-by-Step instructions for cold-stratifying lavender seeds
Here’s the foolproof method I’ve used to break lavender’s stubborn dormancy—no guesswork, just reliable sprouts.
🌱 Step 1: Prepare Seeds with a Warm Soak
Lavender seeds have tough outer coats that need softening before germination. Fill a small bowl with lukewarm water (not hot) and add the seeds. Let them soak for 12-24 hours—this mimics natural rain softening the seed coat. You’ll see them swell slightly, which means they’re ready for stratification.
After soaking, drain the seeds in a fine-mesh strainer and let them air-dry for 1 hour. This prevents mold while keeping the seed coat pliable. I like to spread them on a paper towel in a single layer, just until they feel dry to the touch but aren’t brittle. Skipping this step risks uneven germination or moldy seeds.
💧 Step 2: Mix Seeds with Moist Sand or Perlite
In a clean container, combine the dried seeds with an equal part coarse sand or perlite. This creates the ideal cold-stratification medium—it drains well but holds enough moisture to keep seeds hydrated. Moisten the mix lightly with a spray bottle until it feels like a damp sponge. You want it damp, not soggy; squeeze a handful—water should drip out slightly but not pool.
Stir gently to distribute the seeds evenly. I use a small plastic bag with a zipper for this step because it’s easy to monitor moisture and keeps everything contained. Label the bag with the date and variety (if known). This mix will stay cold and moist for the next 4-6 weeks, breaking dormancy gradually.
❄️ Step 3: Stratify in the Refrigerator
Place the sealed bag in the refrigerator’s crisping drawer (the coldest section, around 35-40°F). This mimics winter’s natural cold period, which lavender seeds require to germinate. Check the bag weekly—if the mix feels dry, spritz it lightly with water. If it’s too wet, open the bag for 30 minutes to air it out. Overly wet conditions invite mold, while dryness halts germination.
After 4-6 weeks, remove the bag and let it sit at room temperature for 24 hours to acclimate. This gradual warming mimics spring’s arrival. You’ll know stratification worked when you see tiny green sprouts peeking through the sand—this usually happens within 1-2 weeks after removing the bag from cold. If no sprouts appear after 2 weeks, repeat the cold treatment for another 2-4 weeks.
☀️ Step 4: Plant Sprouted Seeds in Light, Well-Draining Soil
Fill small pots (about 2-3 inches deep) with a mix of 50% potting soil and 50% perlite or coarse sand. This ensures excellent drainage—lavender hates soggy roots. Gently press the mix into the pots to remove air pockets, then moisten it lightly with water until it’s damp but not wet. You want the soil to hold moisture without feeling heavy or clumping.
Sow the sprouted seeds ¼ inch deep, spacing them 1 inch apart. Cover lightly with additional soil mix and mist the surface with water until evenly moist. Place the pots in a warm, sunny spot (like a south-facing windowsill) where temperatures stay above 60°F. You’ll see the first true leaves emerge in 4-6 weeks, signaling that the seedlings are established and ready for transplanting.
🌿 Step 5: Transition to Outdoor Conditions
Once seedlings have 3-4 sets of true leaves (not the initial seed leaves), they’re ready for outdoor hardening. Start by placing them in a sheltered spot outside for 1-2 hours on the first day. Gradually increase their time outdoors over 10-14 days
After hardening, transplant the seedlings into their final location, spacing them 12-18 inches apart in well-draining soil. Lavender thrives in full sun, so choose a spot with at least 6-8 hours of direct sunlight daily. Water deeply but infrequently—once established, lavender is drought-tolerant and prefers dry conditions. You’ll see blooms in 1-2 years, but the wait is worth it for those fragrant purple spikes.
Tips & tricks for perfect lavender seed germination
Real talk: Cold-stratifying lavender seeds is a patience game, but these tricks will help you avoid the most common pitfalls and maximize your success rate.
Water Temperature Matters: That "lukewarm" soak in Step 1 is non-negotiable—hot water can shock the seeds while tepid water won't soften their tough coats. Test by dipping your wrist: if it feels like a warm bath (around 90°F), you're golden. I've ruined batches using boiling water that cooled too quickly, so always double-check before soaking those precious seeds for your 12-24 hours. The slight swelling you'll notice after 12 hours confirms they're ready for stratification.
Moisture Monitoring: The damp-sponge consistency in Step 2 is your secret weapon. Too wet and you risk mold; too dry and germination stalls. Here's my foolproof test: Squeeze a handful of the sand-perlite mix—water should drip out slowly, not pool. I check this weekly during the 4-6 week cold period, adjusting with just a spritz from my spray bottle. Pro move: Place a small piece of paper towel in the bag to absorb any excess moisture that might accumulate during the 30-minute airing if needed.
Light Exposure Strategy: While seeds need darkness during stratification, those tiny sprouts in Step 4 crave light immediately after germination. Place your pots under a grow light or in the brightest window you have (south-facing is ideal). I've seen seeds emerge in just 1-2 weeks post-stratification when given consistent light, but if you notice leggy seedlings stretching toward the light, rotate the pots daily for even growth. The goal is strong, compact stems that can handle transplanting later.
Stratification Timeline: The 4-6 week window in Step 3 is flexible, but consistency is key. If your fridge's crisping drawer runs warmer than 40°F, extend the time by 1-2 weeks—lavender seeds need that steady cold to break dormancy. I keep a small thermometer in my fridge to monitor temps, and I've found that setting my fridge to its coldest setting (around 35°F) gives me the most reliable results. The 24-hour acclimation period afterward is crucial too—it's what tricks the seeds into thinking spring has arrived.
Pro Tips for Lavender Seed Sprouts
- Real talk: Cold-stratifying lavender seeds is a patience game, but these tricks will help you avoid the most common p...
- Water Temperature Matters: That "lukewarm" soak in Step 1 is non-negotiable—hot water can shock the seeds while tepid...
- Moisture Monitoring: The damp-sponge consistency in Step 2 is your secret weapon. Too wet and you risk mold; too dry ...
Frequently asked questions
Got questions about growing lavender from seed? You’re not alone!
Here are answers to the most common concerns—from timing to troubleshooting—so you can confidently start your cold-stratified lavender sprouts.
How long does cold stratification take for lavender seeds?
Cold stratification for lavender seeds typically requires 4–8 weeks in the fridge (33–41°F). Place seeds in a damp paper towel or moist sand inside a sealed bag. Patience is key—this mimics winter’s chill, breaking dormancy for better germination. Pro tip: Check seeds weekly for mold or drying; adjust moisture as needed.
When will lavender seed sprouts actually appear after stratification?
After stratification, sprouts usually emerge in 2–6 weeks under warm, bright conditions (70–75°F). Keep soil consistently moist but not soggy, and place trays in indirect light until seedlings sprout. Note: Some varieties may take longer—don’t give up after 3 weeks!
What’s the best soil mix for germinating lavender seeds?
Use a well-draining, gritty mix like 50% sterile potting soil + 50% perlite or coarse sand. Lavender hates soggy roots! Avoid heavy garden soil or compost, which can cause rot. A shallow tray (2–3 inches deep) works best for tiny seeds. Bonus: Sterilize soil first to prevent fungal issues.
Why aren’t my lavender seeds sprouting? Troubleshooting tips.
Common culprits:
- Insufficient stratification: Extend cold treatment to 8–12 weeks if seeds are old.
- Poor moisture: Keep soil damp (not wet) during stratification and germination.
- Temperature issues: Seeds need warmth (70°F+) after stratification.
- Low light: Move trays to a sunny windowsill or under grow lights once sprouted.
If nothing happens after 8 weeks, test a few seeds in warm water—if they sink, they’re viable.
Can I grow lavender from seeds if I don’t have a fridge for stratification?
Yes! Try these alternatives:
- Outdoor winter sowing: Plant seeds in sealed containers outside in fall (they’ll stratify naturally).
- Freezer method: Store seeds in a sealed bag in the freezer for 2–4 weeks (closer to 0°F).
- Peat moss trick: Mix seeds with damp peat moss, place in a bag, and bury it in snow or a shady outdoor spot.
Just ensure seeds stay consistently moist and cold (32–40°F).
Wrapping up and next steps
Growing lavender seed sprouts from cold-stratified seeds is a rewarding journey that unlocks vibrant blooms and fragrant landscapes—and you’ve got the blueprint! With the right materials, patience, and a dash of care, you’re well on your way to nurturing thriving lavender plants.
Remember, consistency is key, whether it’s maintaining moisture, monitoring temperature, or protecting those delicate sprouts from pests.
Ready to take the next step? Plant your sprouted seeds outdoors once all frost risk has passed, or pot them up for a head start in your garden. Watch as your hard work transforms into stunning lavender blooms—your future garden’s star attraction! 🌱✨