
Propagation
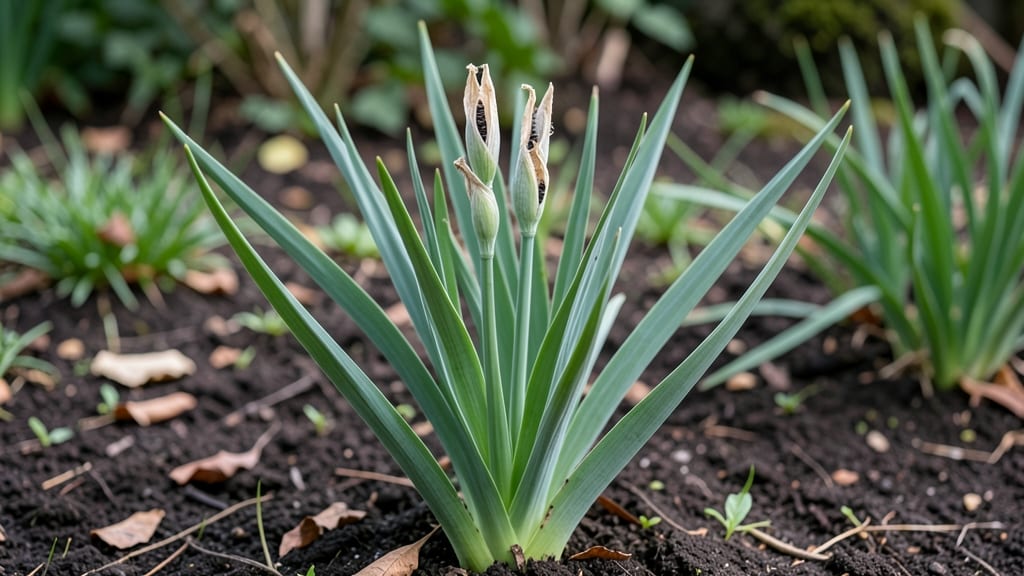
Saving iris seeds from those strange, twisty seed pods is easier than you think—no more struggling with dried husks that refuse to open. 🌱 The secret lies in timing and technique, which I perfected after years of watching my seed pods shatter into useless fragments.
What you’ll learn here transforms those awkward, knobby pods into a reliable source of new iris plants, though it takes patience and a few key steps most gardeners miss.
First, you’ll need to identify the right pods—look for the ones that turn from green to tan and feel slightly papery when gently squeezed.
Harvest them just before they split open naturally, usually in late summer or early fall, then store them in a cool, dry place for 2-3 months to complete their natural drying process. This cold stratification mimics winter conditions and dramatically improves germination rates, which can be frustratingly low otherwise.
Once stratified, you’ll crack open those pods to reveal tiny, wrinkled seeds that look more like dust than planting material. The real magic happens when you sow them in a well-draining mix and keep them consistently moist but never soggy.
Within 3-6 months, you’ll see the first signs of life—tiny green shoots that grow into your very own irises, though they’ll take 3-5 years to bloom compared to the instant gratification of dividing established rhizomes.
While seed-growing irises is rewarding, it’s not for the impatient gardener. The trade-off is genetic diversity—your seedlings might produce stunning new colors or unique forms that you’d never find in nursery plants.
For most gardeners, division remains the faster route, but saving seeds unlocks a world of possibilities that’s worth the wait.
📚 In This Guide
- What you need
- Instructions
- Tips and common mistakes
- Wrapping up and next steps
What you need
- ● Mature iris seed pods: 5–10 fully browned, dried pods (harvested when they’re crispy but still intact).
- ● Sharp pruning shears or scissors: Clean, sterilized (70% isopropyl alcohol wipe) for cutting pods from stalks.
- ● Paper bags or breathable mesh bags: 2–3 large bags (12x15 inches) for drying seeds—avoid plastic to prevent mold.
- ● Labeling tags & permanent marker: To track seed varieties (e.g., "Bearded Iris ‘Blue Flag’ – 2024").
- ○ Small sieve or fine-mesh screen: ¼-inch mesh for separating seeds from chaff (optional but helpful).
- ● Paper towels or coffee filters: For final seed drying (if needed).
- ● Gloves (nitrile or cotton): Protects hands from seed pod residue (irritating to some skin).
- ● Desiccant packets (silica gel): 1–2 packets to speed up drying in humid climates.
- ● Small plastic container with lid: For long-term seed storage (airtight, labeled with date).
- ● Hand lens or magnifying glass: To inspect seed viability (plump seeds = good! 🌱).
- ● Spray bottle with water: For gently cleaning pods if dusty (use sparingly).
Step-by-Step technique for harvesting iris seed pods
Here's the method I've perfected to collect iris seeds without the frustrating tangles and broken stems.
🌱 Step 1: Identify and Select Mature Seed Pods
Look for iris seed pods that have turned from green to a papery brown color—this signals full maturity and readiness for harvest. The pods should feel dry to the touch, with a slight crispness when gently squeezed. I avoid harvesting pods that still have green patches, as these seeds won't germinate properly.
Select pods from the healthiest stems, avoiding any that show signs of disease or pest damage. The best candidates are usually the ones growing in the center of the iris clump, where the plant has allocated its strongest resources. Use clean, sharp pruning shears to cut the entire pod from the stem, leaving a small portion of the stem attached to the pod itself.
✂️ Step 2: Extract Seeds Without Twisting the Pods
Place the harvested pod on a clean, flat surface like a sheet of newspaper or a cutting board. The key to this technique is to avoid twisting the pod, which can damage the seeds inside. Instead, gently squeeze the sides of the pod with your thumbs and forefingers, applying even pressure along its length.
As you apply pressure, the pod will begin to split open naturally along its seam. You'll hear a faint popping sound as the pod releases its seeds. Be patient—rushing this step can cause the seeds to scatter or become damaged. Once the pod is fully open, you'll see rows of small, flat seeds inside, each one encased in a thin, papery membrane.
🌿 Step 3: Clean and Prepare Seeds for Storage
Remove the seeds from the pod using a small paintbrush or your fingertips, being careful not to damage their delicate membranes. Place the seeds in a shallow container and gently brush away any remaining pod debris or chaff. This step ensures that only clean seeds are stored, which improves germination rates significantly.
Allow the seeds to dry completely in a warm, dry location for about 24-48 hours. You'll know they're ready when they feel completely dry to the touch and the membranes have lost their slight sheen. Store the dried seeds in a sealed envelope or small paper bag, labeling it with the iris variety and the harvest date.
⏰ Step 4: Store Seeds for Optimal Germination
Place the sealed envelope in a cool, dark location, such as a refrigerator or a basement, where temperatures stay consistently between 35-45°F. Iris seeds require a period of cold stratification to break their dormancy, which mimics the natural winter conditions they would experience in the ground.
After 6-8 weeks of stratification, remove the seeds and sow them in a well-draining seed-starting mix. Keep the soil lightly moist but never soggy, and place the container in a bright, indirect light location. You'll see germination begin in 4-8 weeks, though some seeds may take longer—patience is key with iris seeds.
Tips & tricks for perfect iris seed pod harvesting
These subtle techniques will help you avoid the common pitfalls that turn seed saving into a frustrating mess.
Timing Matters: Harvest iris seed pods only when they've fully matured—look for that papery brown color and crisp texture in Step 1. I've learned the hard way that harvesting too early (when pods still have green patches) results in seeds that won't germinate. The slight crispness when squeezed is your best indicator of readiness.
Technique Tip: When extracting seeds in Step 2, work slowly and methodically. The key is to apply even pressure along the pod's length without twisting. I've found that placing the pod on a textured surface like a cutting board gives me better grip and control. If you hear that faint popping sound, you're doing it right—this indicates the pod is opening naturally along its seam.
Storage Wisdom: The 24-48 hour drying period in Step 3 is crucial for seed viability. I recommend spreading seeds on a single layer of paper towel in a warm, dry location. This prevents moisture buildup that can cause mold. Once completely dry (when they feel crisp and lose their sheen), store them in a sealed envelope with a silica gel packet to maintain dryness.
Stratification Secret: For the 6-8 week cold stratification in Step 4, I've had success using a refrigerator's crisper drawer where temperatures stay consistently between 35-45°F. Place the sealed envelope in a zip-top bag with a small amount of moistened vermiculite to maintain humidity during stratification. This mimics natural winter conditions perfectly.
Pro Tips for Iris Seed Pods
- These subtle techniques will help you avoid the common pitfalls that turn seed saving into a frustrating mess.
- Timing Matters: Harvest iris seed pods only when they've fully matured—look for that papery brown color and crisp texture in Step 1.
- Technique Tip: When extracting seeds in Step 2, work slowly and methodically.
Frequently asked questions
Got questions about iris seed pods?
You’re not alone! Here are answers to the most common queries—from timing to troubleshooting—so you can master seed saving like a pro.
When do iris seed pods form after flowering?
Iris seed pods typically appear 6–8 weeks after the flowers bloom, usually in late summer or early fall. Look for the pods to swell and turn from green to a papery, tan color—this signals they’re ready for harvesting! Pro tip: Avoid collecting pods too early, as seeds need full maturity for viability.
How long does it take for iris seeds to germinate?
Patience is key! Iris seeds often require stratification (a cold period) to break dormancy. Plant them in fall or refrigerate moist seed pods for 2–3 months before sowing. Germination can take 6 months to 2 years—don’t be discouraged if sprouts are slow to appear.
Can I save seeds from hybrid irises?
Yes, but results may vary! Hybrid irises (like Bearded or Siberian varieties) can produce seeds, though they might not replicate the parent plant’s traits. For consistent results, stick to species irises (e.g., Iris germanica or Iris pseudacorus).
What do I do if my iris seed pods are twisting or drying out?
Twisting pods are a sign of over-maturity or stress (like heat or drought). Harvest them before they twist—gently twist the pod off the stalk and store it in a paper bag. If pods dry too fast, try shading the plant or watering lightly. Warning: Overly dry pods may release seeds prematurely, reducing viability.
Are there alternatives to saving iris seeds?
If seed saving feels tricky, iris plants can also be propagated via:
- Division: Split mature rhizomes in early spring or fall.
- Rhizome cuttings: Use a sterilized knife to slice healthy sections (include a fan of roots).
- Tissue culture: For rare varieties, labs can clone plants.
Wrapping up and next steps
Saving iris seed pods is a rewarding way to propagate these stunning perennials—without the fuss of twisting! 🌱 By mastering the twist-free technique, you’ll ensure viable seeds for future blooms while avoiding common pitfalls like premature pod opening.
Whether you’re a seasoned gardener or just starting, this method makes seed saving simple and effective.
Ready to grow your iris collection? Start by harvesting pods at the right stage—then follow the steps to store and plant them properly. Your garden’s next masterpiece could be just a seed away! 🌸