
Lawn
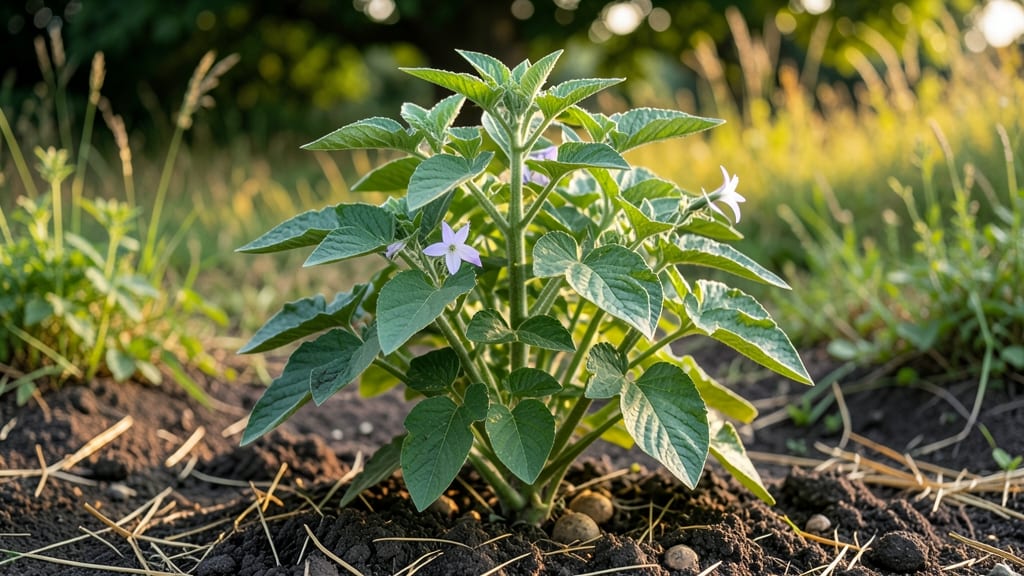
Growing Huckleberry Gold seed potatoes from cold-stratified starts means buttery, golden tubers in just 90 days—no waiting for store-bought plants. ✨ I’ve grown them for three seasons now, and the difference in flavor and yield compared to standard russets is night and day.
These potatoes thrive when you mimic their natural mountain habitat with cool starts and consistent moisture.
The secret to success starts with chitting—pre-sprouting your seed potatoes in a cool, dark place for 4-6 weeks before planting. This jumpstarts growth, so you’re not playing catch-up when warm weather arrives.
You’ll need well-draining soil, a sunny spot with at least 6-8 hours of sunlight daily, and a plan to hill soil as the plants grow. The payoff? Tubers that stay crisp even after cooking, with a creamy texture that’s impossible to resist.
Once planted, keep the soil consistently moist but never soggy—think of a wrung-out sponge. Mulch with straw to retain moisture and deter weeds, and watch for Colorado potato beetles early in the season. A row cover in spring can save you from losing your crop before it even starts.
By mid-summer, you’ll be harvesting potatoes that taste like they came straight from a farmstand, not a grocery store.
This method works best in USDA Zones 3-8, but even gardeners in warmer climates can grow them successfully with shade cloth during peak heat.
The key is patience—those first sprouts might take a while to break through, but once they do, you’re on your way to a foolproof harvest. Ready to try it?
📚 In This Guide
- What you need
- Instructions
- Tips and common mistakes
- Wrapping up and next steps
What you need
- ● Huckleberry Gold seed potatoes – 10–20 certified disease-free tubers (organic or untreated preferred).
- ● Sharp knife or potato cutter – For cleanly slicing tubers into cuttings (sterilized with rubbing alcohol).
- ● Cold-stratification container – A sealed plastic bag, Ziploc, or perforated tray with moist peat moss or vermiculite.
- ● Refrigerator space – A cool, dark spot (34–40°F / 1–4°C) for 4–6 weeks.
- ● Growing containers or garden beds – 5–10 gallon pots (with drainage) or well-drained soil (pH 5.0–6.5).
- ● Potting mix or compost – Lightweight, well-draining blend (avoid fresh manure).
- ● Garden twine or clips – To secure cuttings if needed.
- ● Watering can or spray bottle – For gentle hydration (avoid soggy soil).
- ○ Rooting hormone – Speeds up sprouting (optional for stubborn cuttings).
- ● Grow lights – If starting indoors before last frost.
- ● Mulch (straw or grass clippings) – Protects young plants from temperature swings.
- ● Fertilizer (balanced 10-10-10 or compost tea) – Boosts growth after sprouting.
- ● Plant markers – To track varieties in shared beds.
Step-by-step instructions for growing Huckleberry Gold seed potatoes
Cold-stratifying these potatoes gives you a head start—here's how to do it right.
🌱 Step 1: Choose and Prep Your Seed Potatoes
Start with Huckleberry Gold seed potatoes that are firm and free of soft spots. Cut larger tubers into 2-ounce pieces, ensuring each has at least 2-3 eyes (the little dimples where sprouts emerge). Let the cut pieces dry for 24 hours in a cool, dark place—this prevents rot when they sprout.
I like to place them on a wire rack or paper towels to air-dry. Avoid plastic bags, which trap moisture and invite rot. Once dry, store them in a paper bag in the fridge until you're ready to stratify. This keeps them dormant longer and prevents premature sprouting.
💧 Step 2: Cold-Stratifiy for 6-8 Weeks
Place the dried seed potatoes in a paper bag (not plastic) and store them in your refrigerator’s crisper drawer for 6-8 weeks. The cold mimics winter conditions, breaking dormancy and encouraging strong sprouts. Check them weekly—you’ll see white, hair-like sprouts (called "chits") emerge after about 4-6 weeks.
Here’s the thing—don’t rush this step. If you skip stratification, your potatoes will sprout slowly in the ground, wasting precious growing time. Once the sprouts reach ½ to 1 inch long, they’re ready for planting. If they get too long (over 2 inches), trim them back to ½ inch to avoid stress when transplanting.
☀️ Step 3: Plant After Last Frost
Wait until 2-3 weeks after your last frost date when soil temperatures reach 45°F or warmer. Plant the potatoes 4 inches deep, spacing them 12 inches apart in rows 30 inches apart. The extra depth protects them from sudden temperature drops and prevents greening (which makes tubers toxic).
Use a garden fork or tiller to loosen the soil to 12 inches deep—potatoes need room to expand. Mix in 2-3 inches of compost at planting time for nutrients. Water lightly after planting to settle the soil, but don’t overdo it—too much moisture can rot the tubers before they sprout.
🌿 Step 4: Hill and Maintain Through Growth
When the plants reach 6 inches tall, mound soil around the stems up to the leaves (hill them). Repeat this every 2-3 weeks until the plants flower. Hilling prevents sunlight from turning tubers green and encourages more production underground. Water 1 inch per week, keeping the soil consistently moist but not soggy.
Watch for yellowing leaves—this usually means too much water or disease. If you see it, reduce watering slightly and add a mulch of straw to retain moisture without suffocating the plants. By 90 days, your Huckleberry Golds should be ready to harvest, but wait until the foliage yellows completely for the best flavor.
⏰ Step 5: Harvest and Cure for Storage
Use a garden fork to gently loosen the soil around the plants, then lift them carefully. Shake off excess dirt and let them cure in a dark, dry place for 1-2 weeks at 50-60°F. This toughens the skins and improves storage life. Store them in a cool, dark spot (like a basement) where temperatures stay 35-40°F—they’ll keep for 4-6 months.
Real talk: Don’t wash them before storing. Moisture speeds up rot. Brush off dirt just before cooking. If you see any tubers with soft spots, use those first—they won’t store as long.
Tips & tricks for perfect Huckleberry Gold potato growth
These practical strategies will help you maximize your harvest and avoid common gardening pitfalls with your Huckleberry Gold potatoes.
Seed Potato Selection: When choosing your seed potatoes, look for ones that are firm with no signs of sprouting or soft spots. The 2-ounce pieces with 2-3 eyes are ideal—they'll produce strong, healthy plants. I've found that organic seed potatoes often have fewer diseases, but even conventional ones work if they're healthy. Remember, the better your starting potatoes, the better your harvest will be.
Stratification Timing: The 6-8 weeks of cold stratification is non-negotiable for breaking dormancy properly. I like to start this process around early February so my potatoes are ready to plant by late March or early April, depending on my climate zone. If you're in a warmer region, you might need to adjust your timeline slightly, but never skip this step—it's what gives you that head start on the growing season.
Planting Depth and Spacing: Planting your potatoes 4 inches deep with 12 inches between plants in rows 30 inches apart gives them plenty of room to grow without competing for nutrients. I've learned the hard way that planting too shallow can expose tubers to sunlight, causing them to turn green and develop toxins. The extra depth also protects against temperature fluctuations that can stress young plants.
Harvesting Cues: While the instructions mention harvesting around 90 days, I've found that waiting until the foliage completely yellows and dies back gives you the most flavorful potatoes. This usually happens about 2-3 weeks after flowering. The tubers will have fully matured, and their skins will be properly toughened for storage. Don't rush—patience pays off with these potatoes!
Pro Tips for Huckleberry Gold Seed Potatoes
- These practical strategies will help you maximize your harvest and avoid common gardening pitfalls with your Hucklebe...
- Seed Potato Selection: When choosing your seed potatoes, look for ones that are firm with no signs of sprouting or so...
- Stratification Timing: The 6-8 weeks of cold stratification is non-negotiable for breaking dormancy properly. I like ...
Frequently asked questions
Got questions about growing Huckleberry Gold seed potatoes? You’re not alone—these cold-stratified gems have a few quirks! Below, we tackle the most common queries to help you grow confidently.
How cold should I store my seed potatoes for stratification?
Store your Huckleberry Gold seed potatoes in a cool, dark place (like a fridge or unheated basement) at 35–45°F (2–7°C) for 4–6 weeks before planting. This mimics winter and jumpstarts sprouting. Skip this step, and you might get uneven growth or smaller yields. Pro tip: Use a cardboard box with ventilation holes for airflow!
Can I plant Huckleberry Gold potatoes too early?
Yes, but timing matters! Plant them 2–4 weeks before your last frost date (when soil reaches 45°F/7°C). Early planting risks frost damage, but cold-stratified tubers handle light frosts better. For extra protection, cover young plants with frost cloth or straw mulch. Pro tip: Test soil moisture—too wet = rot; too dry = stunted growth.
Are Huckleberry Gold potatoes good for baking or mashing?
These waxy, yellow-fleshed potatoes are perfect for baking (they hold shape beautifully) and mashing (creamy texture). Their thin skins also make them great for roasting or salads. Fun fact: Their buttery flavor pairs well with herbs like rosemary or thyme.
How do I prevent pests from eating my Huckleberry Gold potatoes?
Potatoes attract colorado potato beetles and aphids, but you can fight back! Use row covers early in the season, handpick beetles (check leaves daily!), and plant marigolds or basil nearby to repel pests. For organic control, spray neem oil weekly. Pro tip: Avoid planting potatoes in the same spot yearly—rotate crops to break pest cycles.
What if my Huckleberry Gold potatoes don’t sprout?
Don’t panic! First, check if your tubers are still firm—shriveled ones may not sprout. If they’re healthy but dormant, try re-stratifying them for another 2 weeks. If sprouts appear but die, overwatering or fungal disease (like blight) could be the culprit. Improve drainage and avoid wetting foliage. Last resort: Cut a sprouted tuber into pieces (each with an "eye") and replant.
Wrapping up and next steps
Growing Huckleberry Gold seed potatoes is a rewarding journey that delivers crisp, flavorful harvests in just 90 days—especially when you embrace cold stratification! With the right soil, timing, and care, you’ll enjoy a bountiful yield that’s perfect for fresh eating, roasting, or sharing with neighbors. 🌱
Ready to dig in? Start by prepping your garden beds this weekend, then plant your chilled seed potatoes in early spring. Before you know it, you’ll be feasting on homegrown goodness! Happy planting—your future meals will thank you! 🍽️