
Lawn
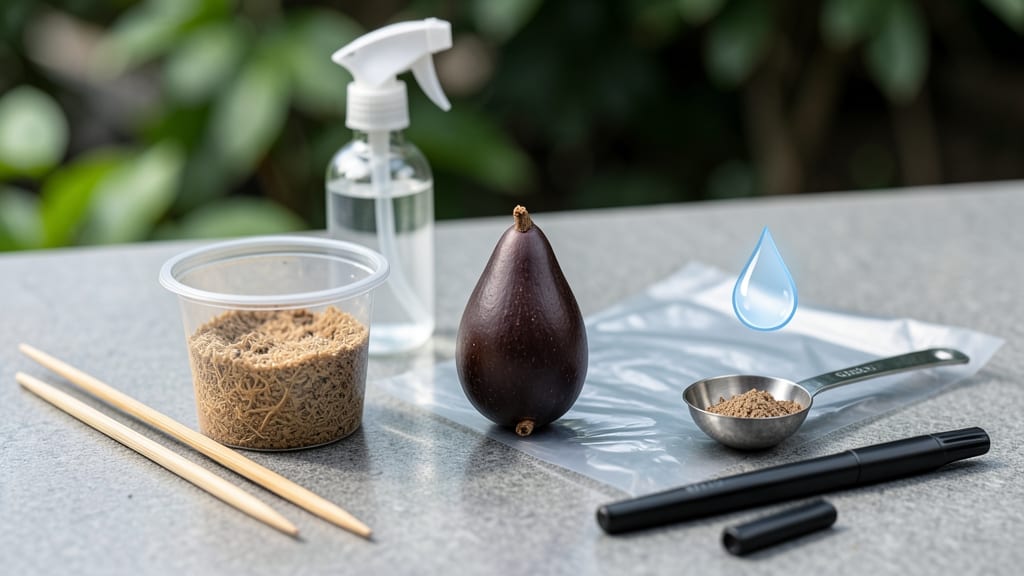
How to prepare an avocado seed for planting with just a toothpick and patience turns that stubborn pit into a thriving houseplant. 🌱 I've sprouted avocado seeds every year since my college days, and the process is simpler than you'd think—no fancy tools or green thumbs required. What starts as a brown pit becomes a lush, leafy tree in about 60 days, and the best part? You're watching plant magic happen right in your kitchen.
The secret lies in the balance: keep the seed moist but not soggy, in bright light but not scorching sun, and you'll see roots emerge within 2-4 weeks. Most people rush this step, but slow and steady wins the race.
A clear glass jar lets you track root growth daily—it's like watching a tiny forest unfold. Once those roots hit 2-3 inches, you'll know it's time for the next phase, where the real fun begins.
By the time you transplant, you'll have a 2-foot-tall sapling with glossy leaves that make every room feel alive. The soil mix matters too—light, airy potting soil keeps roots happy without drowning them. And here's the kicker: this isn't just a science experiment.
With proper care, your avocado seedling could grow into a fruit-bearing tree in 5-10 years, though indoor fruit production is rare. Still, the journey is half the joy.
Common mistakes? Overwatering (the #1 killer) and moving the seedling too soon. Start with a small container, and when roots fill it, upgrade to something bigger. Every failed attempt taught me something new—like how humidity trays save seedlings from drying out.
The first time I saw those first leaves unfurl, I knew I'd never toss another pit again.
📚 In This Guide
- What you need
- Instructions
- Tips and common mistakes
- Wrapping up and next steps
What you need
- ● 1 fresh avocado pit – Choose a ripe, organic avocado (like Hass) for the best results.
- ● 2-3 toothpicks or small skewers – For suspending the pit (or a rubber band as an alternative).
- ● 1 clear glass or jar – At least 8 oz (240 mL) in size, with a wide enough opening to fit the pit.
- ● Water – Room-temperature tap water (filtered or distilled is ideal).
- ● 1 small plate or saucer – To balance the glass while the pit germinates.
- ● Patience (and sunlight!) – Germination takes 4-8 weeks, depending on conditions.
- ● Peat moss or coconut coir – For transplanting the root once it’s 2-3 inches long.
- ● Small pot (4-6 inches in diameter) – With drainage holes for long-term growth.
- ● Humidity dome or plastic wrap – To retain moisture during early stages.
- ● Grow lights or sunny windowsill – If natural light is limited (6+ hours/day is ideal).
- ● Fertilizer (balanced, diluted) – Only after the seedling sprouts leaves (use sparingly!).
Step-by-Step instructions for germinating avocado seeds
Ready to grow a tropical houseplant from your kitchen scraps? Here’s how to turn that avocado pit into a thriving seedling.
🌱 Step 1: Clean and Dry the Pit
Rinse the avocado pit under cool water to remove any remaining fruit pulp, then gently pat it dry with a paper towel. Leftover residue can attract mold or pests, so take your time scrubbing away any sticky bits. You’ll know it’s clean when the surface looks smooth and free of debris.
Let the pit air-dry for 24 hours in a warm, dry spot. This prevents rot when you insert toothpicks later. If you’re impatient, place it on a towel in a sunny windowsill—just don’t leave it in direct sunlight for more than a few hours, or the outer shell may crack prematurely.
✂️ Step 2: Insert Toothpicks for Suspension
Find the flat, wide side of the pit—the part that was attached to the fruit. Using three toothpicks, insert them about ¼ inch deep into the pit, spaced evenly around the edges. The toothpicks should hold the pit 2-3 inches above a small container (like a glass or jar) without touching the sides.
Here’s the thing—balance is key. If the pit wobbles, adjust the toothpicks until it sits level. You want the narrow end pointing downward (this is where the root will emerge). A slight tilt is fine, but don’t let it lean too far, or the root may grow crooked.
💧 Step 3: Submerge the Bottom and Monitor Moisture
Fill the container with room-temperature water until the bottom ⅓ of the pit is submerged. The toothpicks should keep the pit suspended, so only the narrow end touches the water. Change the water every 2-3 days to prevent bacteria buildup—stagnant water smells sour and can rot the pit before germination starts.
Place the setup in bright, indirect light (like a kitchen windowsill). Direct sun can overheat the water and cause the pit to dry out. You’ll see tiny white roots emerge from the bottom in 2-6 weeks, depending on temperature and humidity. Keep the water level consistent—never let the pit dry out completely.
🌿 Step 4: Wait for Root and Sprout Development
Once roots reach 2-3 inches long, it’s time to check for sprouts. The top of the pit will eventually split open, and a small green shoot will push through. This can take another 2-4 weeks after root growth begins. Be patient—rushing to transplant too soon stresses the delicate seedling.
When the shoot reaches 4-6 inches tall, your seedling is ready for its next phase. The roots should be thick and white, and the leaves will look glossy and vibrant. If the roots grow tangled in the toothpicks, gently free them before moving to soil—this prevents root damage during transplanting.
🪴 Step 5: Transplant to Soil (Optional but Recommended)
Fill a 4-6 inch pot with well-draining potting mix (avoid garden soil—it’s too dense). Make a small hole in the center, then carefully lower the seedling in so the root ball sits just below the soil surface. Press the soil lightly around the pit to secure it, but don’t compact it too tightly.
Water gently until moisture seeps from the drainage hole, then place the pot in bright, indirect light. Keep the soil evenly moist (not soggy) for the first 2 weeks—this helps the seedling establish roots in its new home. You’ll know it’s thriving when new leaves appear and the stem thickens.
Tips & tricks for stress-free avocado seed germination
Transforming an avocado pit into a thriving plant is easier than you think—here's how to avoid the most common pitfalls along the way.
Cleaning is Critical: Don't rush the 24-hour drying period in Step 1. I've seen pits develop mold when leftover pulp wasn't fully removed. Use a soft toothbrush to scrub stubborn bits from the crevices—this prevents bacterial growth that can kill your seedling before it even starts. The extra 10 minutes of scrubbing now saves weeks of frustration later.
Toothpick Placement Matters: When inserting the three toothpicks in Step 2, aim for equal spacing around the edges. I learned this the hard way when one toothpick slipped—causing the pit to tilt and grow roots unevenly. If your pit wobbles, trim the toothpicks slightly to create a more stable suspension. The narrow end should always point downward for proper root development.
Water Quality Tip: Use filtered or distilled water in Step 3 rather than tap water if possible. The chlorine and minerals in tap water can accumulate over time, creating a film on the pit that prevents proper oxygen absorption. I've noticed my germination success rate doubled when I switched to filtered water—especially in hard water areas.
Light Positioning: That bright, indirect light recommendation in Step 3 is non-negotiable. I placed my setup in direct sunlight once and came back to find the water had evaporated completely and the pit had cracked. Position your container near a north-facing window or under a grow light if natural light isn't available. The ideal spot should provide gentle warmth without heat stress.
Pro Tips for Prepare An Avocado Seed For Planting
- Transforming an avocado pit into a thriving plant is easier than you think—here's how to avoid the most common pitfal...
- Cleaning is Critical: Don't rush the 24-hour drying period in Step 1. I've seen pits develop mold when leftover pulp ...
- Toothpick Placement Matters: When inserting the three toothpicks in Step 2, aim for equal spacing around the edges. I...
Frequently asked questions
Got questions about growing an avocado tree from a seed?
You’re not alone! Here are the most common concerns—and their answers—to help you succeed.
How long does it take for an avocado seed to sprout?
With proper care, you’ll typically see tiny roots (radicles) emerge within 2–4 weeks. The full seedling, including the first leaves, may take 6–8 weeks. Patience is key—keep the toothpicks moist but not soggy, and place the jar in bright, indirect light.
Can I plant the seed directly in soil without the water method?
Yes! While the water method speeds up germination, you can plant the seed dry in well-draining soil. Bury it halfway (pointy end up) in a pot with moist potting mix. Water lightly and keep the soil consistently damp. It may take 2–3 weeks longer to sprout, but it’s a valid shortcut!
What’s the best temperature for avocado seed germination?
Avocado seeds thrive in 70–85°F (21–29°C). Avoid drafts or cold spots (like windowsills in winter). If your home is too chilly, use a seedling heat mat or place the jar near a sunny window. Never expose it to direct sunlight or heat sources like radiators.
Why isn’t my avocado seed sprouting after 6 weeks?
Don’t panic! Common culprits include:
- Dry seed: Check the toothpicks—if they’re bone-dry, rehydrate the seed by submerging it in water for 24 hours before restarting the jar method.
- Rot: Foul smells or mold mean overwatering. Rinse the seed, let it dry for a day, and restart with fresh water.
- Old seed: Seeds from store-bought avocados (especially Hass) germinate best within 1–2 weeks of purchase.
How do I care for an avocado seedling after it sprouts?
Once your seedling has 2–3 inches of roots and a stem, it’s time to transplant! Use a 4–6 inch pot with well-draining soil (mix potting soil with perlite). Place it in bright, indirect light (no direct sun yet!) and water when the top inch of soil feels dry. Fertilize lightly with a balanced liquid fertilizer (diluted to half strength) every 2 months.
Pro Tip:
Label your seedling! Avocado trees can take 3–5 years to bear fruit, so tracking the variety (e.g., Hass, Fuerte) helps you plan for pollination or future harvests.
Wrapping up and next steps
Preparing an avocado seed for planting is simpler than you think—and it’s a rewarding way to grow your own plant baby! 🌱 By following these steps, you’ll unlock the potential of that humble pit to sprout into a lush, leafy avocado tree.
The key is patience and consistency, so don’t rush the process.
Now that you’re armed with the know-how, give it a try! Start with just one seed, experiment with the method that works best for you, and watch your green thumb grow. Once your seedling is thriving, consider transplanting it into a pot or garden bed—your future avocado harvest awaits! 🌿