
Planting
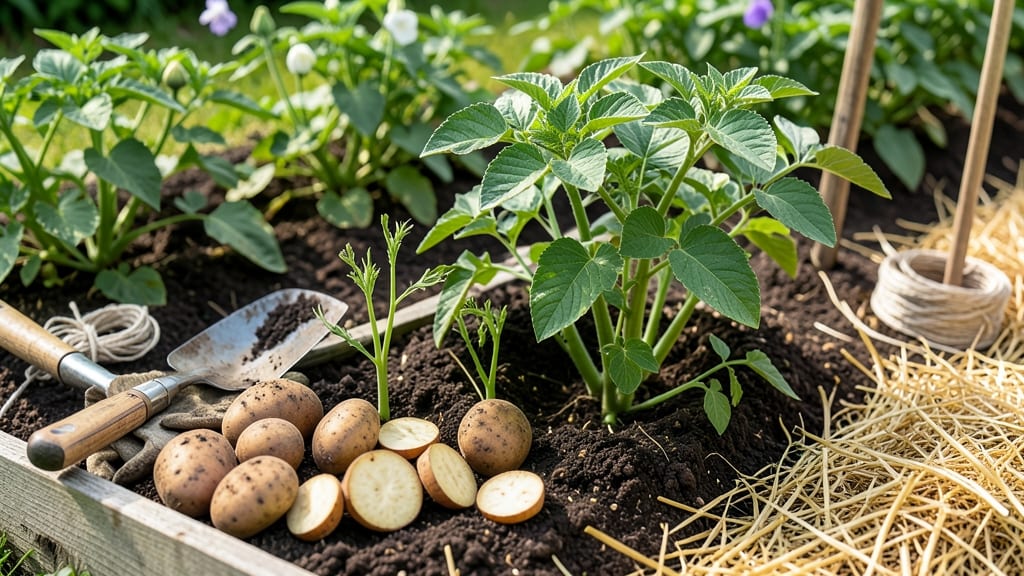
Planting seed potatoes in the ground transforms humble chunks into a harvest that feeds a family for months. 🌱 The secret starts with certified seed potatoes—not grocery store spuds—and ends with earthy mounds that burst with golden potatoes by summer.
I’ve turned my backyard into a potato powerhouse using this simple method, and you can too. You’ll need a sunny spot with loose, well-draining soil, cut seed potatoes with at least two eyes, and a fork for planting.
Skip the chitting step if you’re short on time, but pre-sprouting gives you a head start in cooler climates. The key is depth—plant them 4 inches deep, with the cut side down, and space rows 30 inches apart for easy harvesting.
By midseason, you’ll be hilling soil around the stems to encourage more tubers, and by harvest time, you’ll pull up potatoes the size of your fist. The first few digs are always exciting—there’s nothing like pulling up your own food. Even beginners nail this with the right prep.
Works in zones 2-8, though early varieties suit cooler regions. Avoid planting too deep in sandy soil or too shallow in clay—adjust based on your dirt’s drainage. Now grab those seed potatoes and let’s get growing!
📚 In This Guide
- What you need
- Instructions
- Tips and common mistakes
- Wrapping up and next steps
What you need
- ● Seed potatoes: 1–2 lbs per 10 sq ft of garden bed (choose certified disease-free, organic if preferred).
- ● Garden soil: Well-draining, loose, and rich in organic matter (amend with compost if needed).
- ● Garden fork or tiller: For loosening soil to a depth of 8–12 inches.
- ● Garden hose or watering can: With a gentle spray nozzle for even watering.
- ● Ruler or measuring tape: To ensure proper spacing (12–15 inches apart, rows 2–3 feet apart).
- ○ Garden twine or stakes: For marking rows (optional but helpful!).
- ● Mulch (straw, grass clippings, or leaves): To retain moisture and suppress weeds.
- ● Potato fertilizer: Low in nitrogen (e.g., 5-10-10) to encourage tuber growth.
- ● Epsom salt: A handful per plant for magnesium boost (especially in sandy soil).
- ● Row covers or frost cloth: To protect early sprouts from cold snaps.
- ● Garden kneeler or stool: For comfort during planting.
- ● Plant labels: To track varieties and harvest dates.
Step-by-Step instructions for planting seed potatoes
Here’s my go-to method for planting seed potatoes—simple, reliable, and perfect for beginners.
🌱 Step 1: Prep Your Seed Potatoes for Planting
Start by selecting certified seed potatoes (not grocery store potatoes—they’re treated to prevent sprouting). Place them in a bright, cool spot (50-60°F) for 4-6 weeks before planting. This encourages strong sprouts, called "chits," which grow about ½ inch long. You’ll know they’re ready when you see tiny green shoots emerging.
Cut larger seed potatoes into 2-ounce chunks, ensuring each piece has at least 2-3 eyes (those little dimples where sprouts grow). Let the cut pieces dry for 1-2 days in a warm, dry place. This prevents rot when you plant. I like to dust the cut sides with crushed charcoal—it helps prevent disease and speeds healing.
🪴 Step 2: Choose the Right Spot and Soil
Seed potatoes thrive in full sun (6-8 hours daily) and well-draining soil. Avoid planting in the same spot as last year’s potatoes—this prevents disease buildup. Work in 2-3 inches of compost or aged manure into the top 6 inches of soil to boost nutrients. The soil should be loose and crumbly, not compacted.
Test your soil’s moisture by squeezing a handful—it should hold together but not be soggy. If your soil drains poorly, mix in sand or perlite to improve airflow. I like to add a slow-release fertilizer (like 10-10-10) at planting time for a steady nutrient boost. Just follow the package rate—overdoing it can burn the potatoes.
☀️ Step 3: Plant the Seed Potatoes at the Right Depth
Dig trenches 4-6 inches deep, spacing them 3 feet apart to allow room for the plants to spread. Place each seed potato chunk eyes-up (so the sprouts face upward) and cover with 4 inches of soil. Space individual chunks 12 inches apart in the trench. This gives the plants plenty of room to grow without crowding.
Water the soil gently after planting to settle it around the potatoes. Avoid soaking the soil—you want it moist but not waterlogged. A light misting with a hose or watering can works best. Mulch the area with 2-3 inches of straw or grass clippings to retain moisture and keep weeds down. This also helps regulate soil temperature, which is key for even growth.
💧 Step 4: Maintain Moisture and Hill the Soil
Keep the soil consistently moist but not soggy—seed potatoes need 1-1.5 inches of water per week, either from rain or irrigation. Let the top 1-2 inches of soil dry out slightly between waterings to prevent rot. I water in the early morning to reduce evaporation and fungal risks.
When the potato plants reach 6 inches tall, mound soil around the stems to create hills. This encourages more tubers to form and protects them from sunlight, which turns potatoes green (and bitter). Repeat this process every 2-3 weeks until the plants flower. By harvest time, your hills should be 8-12 inches high. Just be gentle—you don’t want to damage the stems.
⏰ Step 5: Harvest at the Right Time
New potatoes can be harvested 2-3 weeks after flowering by gently digging around the plants. Look for small, firm potatoes about golf-ball size. For a full harvest, wait until the plants yellow and die back, usually 4-5 months after planting. Use a fork to loosen the soil and pull the plants up carefully. Let them dry in the sun for 1-2 hours before storing.
Cure the potatoes by storing them in a cool, dark, well-ventilated place (50-60°F) for 1-2 weeks. This thickens their skins and improves storage life. Once cured, move them to a dry, dark spot (40-50°F) for long-term storage. Avoid refrigerating—cold temperatures turn potatoes sweet and mealy.
Tips & tricks for perfect seed potato planting
Here's what nobody tells you—these tricks will help you avoid common mistakes and grow a bountiful potato harvest.
Chit Development: The 4-6 weeks of chitting (growing sprouts) at 50-60°F is non-negotiable for strong plants. I place mine on a seed tray near an east-facing window where they get gentle morning light. If your sprouts grow too long before planting, trim them back to about ½ inch to prevent breakage when you handle the potatoes. This also helps the energy focus on root development rather than leaf growth.
Soil Prep Secret: For Step 2, I go the extra mile by testing my soil's pH before planting. Seed potatoes prefer a slightly acidic soil between 5.0-6.5. If your soil is too alkaline, mix in peat moss or sulfur to adjust it. The 2-3 inches of compost I add isn't just for nutrients—it also improves soil structure, which is crucial for those 4-6 inch deep trenches we'll be planting in. Think of it as creating a perfect fluffy bed for your potatoes.
Planting Depth: When you're planting those 2-ounce chunks in Step 3, remember that deeper isn't always better. While the instructions call for 4 inches of soil coverage, I've found that in cooler climates, adding an extra inch or two of mulch on top can help regulate soil temperature. This is especially important if your area gets late frosts. The key is maintaining that 4-inch soil coverage while protecting the plants from temperature swings.
Watering Wisdom: That 1-1.5 inches of water per week guideline in Step 4 is perfect, but timing matters just as much. I use a simple trick: water deeply in the morning so the soil has time to dry out slightly before evening. This prevents fungal diseases that thrive in damp conditions. And here's a pro move—use a soaker hose instead of overhead watering. It delivers water right to the roots without wetting the leaves, which helps prevent common potato diseases like blight.
Pro Tips for Plant Seed Potatoes In The Ground
- Here's what nobody tells you—these tricks will help you avoid common mistakes and grow a bountiful potato harvest.
- Chit Development: The 4-6 weeks of chitting (growing sprouts) at 50-60°F is non-negotiable for strong plants. I place...
- Soil Prep Secret: For Step 2, I go the extra mile by testing my soil's pH before planting. Seed potatoes prefer a sli...
Frequently asked questions
Got questions about planting seed potatoes? You’re not alone! Here are some of the most common queries—plus straightforward answers to get you growing like a pro.
Can I plant seed potatoes in containers instead of the ground?
Containers work great if you have limited space. Use a deep pot (at least 12 inches) with drainage holes, fill it with well-draining soil, and plant your potatoes the same way you would in the ground. Just be sure to rotate the container occasionally for even sunlight exposure. Pro tip: Add compost to boost nutrients in small spaces!
How long does it take for seed potatoes to sprout and grow?
Seed potatoes typically sprout in 2–4 weeks after planting, depending on soil temperature and moisture. Once sprouted, expect 90–120 days to harvest mature potatoes (varies by variety). Keep an eye out for flowering—this signals tubers are forming underground!
What do I do if my seed potatoes rot or mold in the soil?
Rotting or mold (often blackleg or soft rot) usually means poor drainage, overwatering, or diseased seed potatoes. To prevent it: chit your potatoes before planting, use raised beds if drainage is poor, and avoid waterlogged soil. If you spot mold, remove affected tubers immediately and disinfect tools. Pro tip: Store seed potatoes in a cool, dark place until planting!
Do I need to fertilize seed potatoes, and what’s best?
Seed potatoes benefit from a balanced fertilizer (like 10-10-10) at planting, then a nitrogen boost (like blood meal) when foliage appears. Avoid over-fertilizing—too much nitrogen = leafy growth, fewer tubers. Organic options like compost or worm castings work wonders too! Pro tip: Side-dress with compost mid-season for a steady nutrient supply.
Can I plant seed potatoes in spring or fall? What’s the best time?
The ideal time is 2–4 weeks before your last frost (spring) for most climates. Fall planting is risky unless you live in a mild zone—potatoes need 60–80 days of warm soil to mature. Wait until soil temps hit 45°F (7°C) to avoid rot. Pro tip: Use a soil thermometer to check!
Wrapping up and next steps
Planting seed potatoes is a rewarding journey that leads to a bountiful harvest of crisp, homegrown spuds!
By choosing the right variety, pre-sprouting your tubers, and giving them the ideal soil and sunlight, you’re well on your way to a thriving garden. Don’t forget to monitor for pests and diseases—early action keeps your crop healthy and happy.
Now that you’re armed with the know-how, roll up your sleeves and get planting! 🌱 Start small if you’re new, and soon you’ll be enjoying fresh potatoes straight from your garden. Happy growing!