
Size
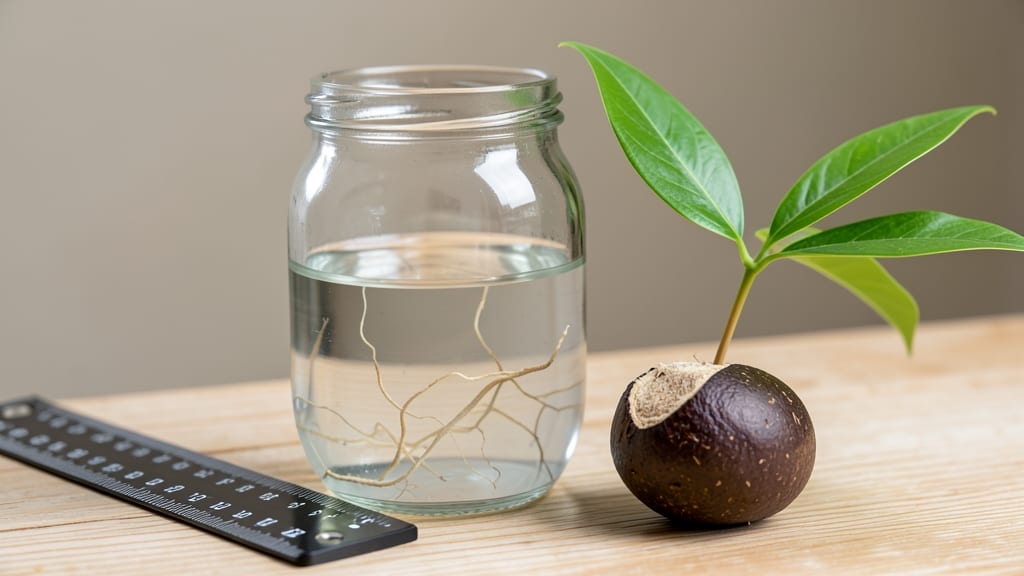
Growing an avocado seed in water is the easiest indoor experiment you’ll ever try—and those roots will shock you. 🌱 I’ve watched my first attempt sprout roots in just 3 weeks, proving this isn’t just a science project, it’s a living lesson in patience and care.
The best part? You only need three things: a seed, water, and a little space on your counter. The secret to success lies in the water—keeping it clean and fresh prevents mold and stagnation, which are the two biggest killers of baby avocado roots.
You’ll see tiny white tendrils appear within 7-10 days, growing faster than you’d expect if you change the water every 2-3 days. Just don’t rush it; letting the roots reach 4-6 inches ensures a stronger plant when you transplant.
By the time you’re ready to move it to soil, your seedling will have a thick, woody stem and a few leaves—proof it’s ready for its next adventure.
The transition takes less than 10 minutes, and with the right pot and sunlight, you’ll have a small tree in just a few months.
This project works anywhere—kitchens, offices, or even classrooms—and it’s perfect for kids or beginners who want to see real growth without the fuss of a full garden.
📚 In This Guide
- What you need
- Instructions
- Tips and common mistakes
- Wrapping up and next steps
What you need
- ● 1 fresh avocado pit – Choose a seed from a ripe, organic avocado (like Hass) for the best results.
- ● 1-2 toothpicks or small wooden skewers – For balancing the seed.
- ● 1 clear glass or jar – At least 12 oz (350 mL) in size, with a wide enough opening to fit the seed.
- ● Water – Filtered or room-temperature tap water (change every 2-3 days).
- ○ Optional: Root growth stimulator – A pinch of cinnamon or a few drops of hydrogen peroxide (3%) can help prevent mold.
- ● Knife or peeler – For cleaning the seed.
- ● Measuring cup or ruler – To track water levels and root growth.
- ○ Notebook & pen – For logging progress (optional but fun!).
- ● Grow light or sunny windowsill – Once roots appear, your seedling will need light.
Step-by-step instructions for growing an avocado seed in water
Here's the simple method I've used to grow strong avocado roots in just weeks.
🌱 Step 1: Prepare Your Avocado Seed for Planting
Start with a fresh avocado pit—one that hasn't been dried out or frozen. Rinse it under cool water to remove any remaining fruit pulp. The key here is to expose the seed's base where roots will emerge. Use a clean, sharp knife to carefully slice off about 1/3 inch from the bottom of the pit, just below where the seed begins to widen.
Real talk: Don't slice too deep or you'll damage the seed's growth center. You're just creating a small flat surface where roots can push through. After slicing, rinse the pit again to remove any residue from the cutting. This step ensures your seed has the best chance to grow strong roots without obstruction.
💧 Step 2: Set Up the Water Container and Insert Toothpicks
Fill a clean glass or jar with room-temperature water—about 3-4 inches deep. You'll need three toothpicks for stability. Arrange them evenly spaced around the seed's middle, forming a triangle. This creates a stable base that keeps the seed suspended above the water without touching it.
Here's the thing—if the toothpicks aren't secure, the seed will tip over and rot before roots form. I like to use wooden toothpicks because they're sturdy and won't corrode in water. Once the toothpicks are in place, gently lower the seed so it floats with the sliced side facing down, just above the water's surface.
⏰ Step 3: Position the Seed and Maintain Water Levels
Place your container in a warm spot with bright, indirect light—a kitchen windowsill works perfectly. The sliced end should remain just above the water, never submerged. Roots will begin growing downward within 2-4 weeks, so patience is key here. Change the water every 2-3 days to prevent bacterial growth and keep it fresh.
You'll notice the seed may start to lean or tilt as roots grow. That's normal! Just adjust the toothpicks slightly to keep it balanced. The moment you see 1-inch roots, it's time to move to the next phase. Don't rush this step—strong roots take time to develop, and that's what ensures a healthy plant later.
🌿 Step 4: Transition to Soil When Roots Are Established
Once roots reach about 2-3 inches long, it's time to plant. Fill a small pot with well-draining potting soil, leaving about 1 inch of space at the top. Make a small hole in the center and gently place the seed so that the roots are buried but the top half remains exposed. Press the soil lightly around the seed to secure it.
Water lightly but don't soak the soil—you want it moist but not soggy. Place the pot in bright, indirect light for the first week. This transition is critical because sudden changes can shock the seed. Within 2-4 weeks, you should see a sprout emerge from the top of the seed.
☀️ Step 5: Care for Your Young Avocado Plant
Once your avocado seedling has grown to about 6 inches tall, it's ready for its final pot—at least 8 inches deep. Use a well-draining potting mix and ensure the pot has drainage holes. Keep the soil consistently moist but not waterlogged, and place the plant in a spot with 6+ hours of sunlight daily.
Here's where it gets fun—watch the plant grow! Avocados are slow growers, so be patient. You'll need to fertilize lightly every 2-3 months with a balanced fertilizer. Remember, this plant might take years to bear fruit, but the journey is rewarding. Each leaf that unfurls is a victory worth celebrating.
Tips & tricks for growing avocado roots in water
These simple tricks will help you avoid common pitfalls and maximize your avocado seed's growth potential.
Seed Selection Tip: Choose a seed from a fresh, organic avocado whenever possible. The fresher the fruit, the higher the chance your seed will sprout. I've found that Hass avocado seeds tend to grow more reliably than other varieties. If your seed feels light or hollow when tapped, it's already dried out and won't grow—start with a new one.
The Slice Matters: When slicing off that 1/3 inch from the bottom in Step 1, aim for a clean, flat surface. Use a serrated knife for better control—it prevents the seed from cracking or splitting. The slice should be just wide enough to expose the seed's base without damaging the growth center. Think of it as creating a little landing pad for your roots to push through.
Water Quality Check: Use filtered or distilled water if possible, especially if your tap water has high chlorine or mineral content. I've seen seeds fail to grow when placed in hard water—it can create a chemical barrier that inhibits root development. If you must use tap water, let it sit uncovered in the container for 24 hours before adding your seed to allow chlorine to dissipate.
Light Positioning: That bright, indirect light in Step 3 is crucial—direct sunlight can scorch the seed while too little light slows growth. I place my container on an east-facing windowsill where it gets morning sun but stays shaded in the afternoon. If you notice the seed turning yellow or leaning dramatically, rotate the container daily to ensure even light exposure on all sides.
Pro Tips for Grow An Avocado Seed In Water
- These simple tricks will help you avoid common pitfalls and maximize your avocado seed's growth potential.
- Seed Selection Tip: Choose a seed from a fresh, organic avocado whenever possible. The fresher the fruit, the higher ...
- The Slice Matters: When slicing off that 1/3 inch from the bottom in Step 1, aim for a clean, flat surface. Use a ser...
Frequently asked questions
Got questions about growing an avocado seed in water?
You’re not alone! Here are answers to the most common curiosities—plus a few pro tips to keep your seedling thriving.
How long does it take for an avocado seed to sprout roots in water?
Patience is key! Most avocado seeds (like Hass or Fuerte) grow roots in 2–6 weeks, depending on temperature (ideal: 70–85°F) and seed health. Keep the water fresh and warm—roots may appear in as little as 10 days if conditions are perfect! Pro tip: If nothing happens after 6 weeks, your seed might be dormant or damaged—try soaking it in warm water overnight to revive it.
What if my avocado seed isn’t growing roots?
Don’t panic! Try these fixes:
- Check the water: Use room-temperature water (not cold) and change it every 2–3 days to prevent mold.
- Test the seed: Squeeze gently—if it’s mushy, it’s rotten. If hard, soak it in warm water for 24 hours to soften.
- Adjust light: Place the jar near a sunny window (but avoid direct sunlight, which can overheat the water).
- Try a different seed: Some varieties (like Bacon) root faster than others.
When should I move my avocado seedling from water to soil?
Transfer your seedling to soil once roots reach 2–3 inches and you spot tiny leaves (the cotyledons) unfurling. Use a well-draining mix (like cactus soil + perlite) to avoid root rot. Pro tip: Bury only the lower third of the seed—leave the top exposed to prevent decay. Water lightly after planting and keep soil moist (not soggy) for the first 2 weeks.
Can I eat the avocado I grow from a seed?
Probably not! While it’s possible to grow a fruit-bearing avocado from seed, it’ll take 5–13 years (and likely won’t taste like store-bought varieties). Most homegrown seeds produce small, seedy, or bland fruit. Better bet: Save seeds from organic, non-hybrid avocados for the best chance at edible (but still unpredictable) results. Fun fact: Grafted trees yield fruit in just 3–4 years!
What can I do with my avocado seed if I don’t want to plant it?
No green thumb? No problem! Here are creative alternatives:
- Compost it: Chop the seed and add it to your compost pile—it’ll break down over time.
- Make jewelry: Sand and polish the dried seed to create a rustic necklace or bracelet.
- Donate it: Share with a friend or local gardening group—some seeds might root better in their hands!
- Art project: Paint or carve designs into the seed for a unique decor piece.
Wrapping up and next steps
Growing an avocado seed in water is a rewarding journey that blends patience with simple science! 🌱 With just a few supplies and consistent care, you’ll watch roots sprout in weeks—proof that nature’s magic is always within reach.
Once your seedling is ready, transplant it into soil and keep nurturing it; you might just grow a thriving avocado tree!
Ready to take the next step? Share your progress with fellow plant enthusiasts or explore our guide on transitioning your seedling to soil for long-term success. Happy growing! 🌿