
Lawn
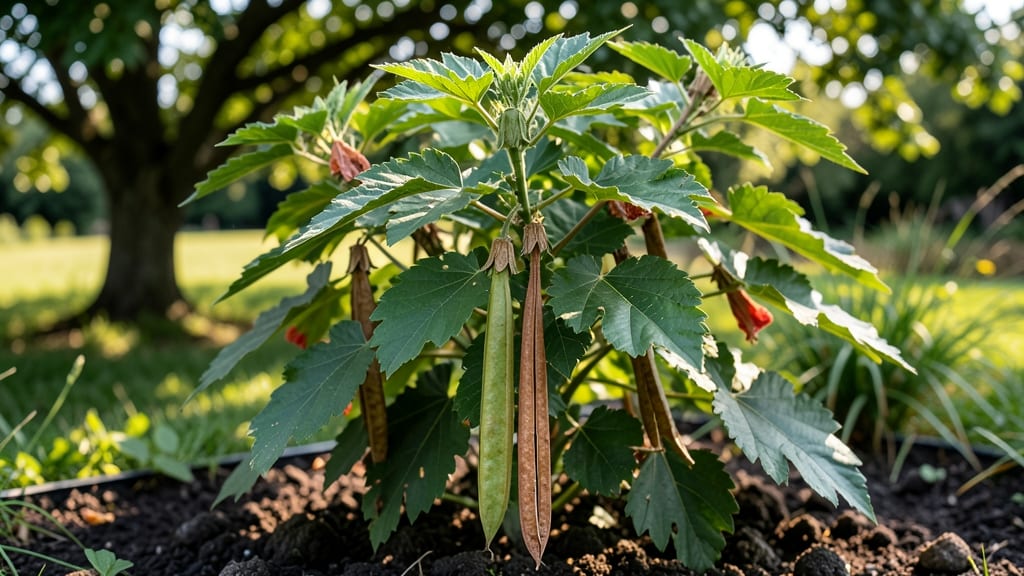
Your hardy hibiscus seed pods hold the key to next year’s bold, tropical blooms—even in colder zones. 🌱 I’ve grown these reliably for years, and the secret starts with harvesting pods at the right moment, drying them properly, and storing them until spring.
The payoff? Plants that bounce back stronger after winter, with fewer floppy stems and more vibrant flowers.
First, wait until pods turn brown and papery before harvesting—usually late fall. Snap them off cleanly, then spread them in a dry, shady spot for 2-3 weeks to fully dry.
Store the seeds in a sealed container with silica gel packets to prevent mold. Hardy hibiscus seeds can stay viable for 2-3 years, so don’t rush planting them.
When spring arrives, soak seeds overnight to soften the tough outer shell, then plant them ¼ inch deep in well-draining soil. They need full sun (6+ hours daily) and consistent moisture, but avoid soggy soil—root rot is the #1 killer.
Frost sensitivity is real, so wait until after your last frost date to transplant seedlings outdoors.
In zones 7-9, hardy hibiscus often overwinters as a perennial, but in colder areas, treat it like an annual or dig up tubers for indoor storage.
The first blooms appear around mid-summer, and with proper care, your plants will reward you with 3-4 feet of lush growth by fall. Patience pays off—these aren’t quick growers, but they’re worth the wait.
📚 In This Guide
- What you need
- Instructions
- Tips and common mistakes
- Wrapping up and next steps
What you need
- ● Hardy hibiscus seed pods – 5-10 pods (ensure they’re fully mature and dry, ideally from a trusted source or your own plants).
- ● Seed-starting mix – 2-3 quarts of lightweight, well-draining potting soil (avoid garden soil—it’s too dense!).
- ● Seed trays or small pots – 6-10 shallow containers (3-4 inches deep) with drainage holes.
- ● Plastic wrap or humidity dome – To create a mini greenhouse effect and retain moisture.
- ● Spray bottle – For gentle watering (avoid over-saturating the soil).
- ● Grow lights or sunny windowsill – A warm, bright spot (60-75°F) for germination (south-facing window or LED grow lights work best).
- ○ Fertilizer (optional but helpful) – A balanced, water-soluble fertilizer (5-10-5 ratio) for young seedlings.
- ● Pruning shears or scissors – To carefully open seed pods and extract seeds.
- ● Tweezers or toothpick – For handling tiny seeds without crushing them.
- ○ Thermometer (optional) – To monitor soil temperature (ideal range: 70-80°F for germination).
- ● Transplanting tray or garden bed – For moving seedlings outdoors once they’ve sprouted (after the last frost).
- ● Gloves (recommended) – To protect hands from prickly seed pods and soil.
Step-by-step instructions for harvesting and cold-hardening hardy hibiscus seed pods
Here’s how to collect, process, and store those woody seed pods for next season’s vibrant blooms.
🌿 Step 1: Identify and Harvest Mature Seed Pods
Wait until the pods turn from green to a deep brown or tan—this means they’re fully mature and ready for collection. Hardy hibiscus pods are typically 3-5 inches long and feel slightly papery when dry. I like to harvest them on a dry day when the pods are crisp, as damp pods can mold if stored improperly.
Use clean, sharp pruners to snip the pods from the stem, leaving a small portion attached to avoid damaging the plant. Place them in a paper bag or open container to allow airflow while they finish drying. If pods still feel moist, spread them on a screen in a warm, dry spot for 3-5 days until completely dry to the touch.
🪴 Step 2: Extract Seeds and Prepare for Storage
Once the pods are bone-dry, gently crack them open with your fingers or a small hammer. Inside, you’ll find flat, dark seeds surrounded by fluffy fibers. Remove the seeds carefully—do not rub them, as this can damage their protective coating. A small sieve helps separate seeds from debris if the pods are particularly fibrous.
Let the seeds air-dry for an additional 24 hours in a warm, dry place. This extra step ensures any lingering moisture won’t cause rot during storage. Store the seeds in a paper envelope or airtight container with a packet of silica gel to absorb moisture. Label the container with the variety and harvest date—hibiscus seeds lose viability over time, so freshness matters.
⏰ Step 3: Cold-Harden Seeds for Spring Planting
Hardy hibiscus seeds need a cold stratification period to break dormancy. Place the seeds in a sealed plastic bag with a moistened paper towel—just damp, not soggy. Seal the bag and refrigerate for 6-8 weeks at 35-40°F. Check the towel weekly; if it dries out, spritz it lightly with water and reseal.
This cold treatment mimics winter conditions and signals the seeds to germinate when spring arrives. After stratification, remove the seeds from the fridge and let them sit at room temperature for 24 hours before sowing. You’ll see tiny sprouts within 2-4 weeks if everything went right—patience is key here, as hibiscus seeds can be slow to wake up.
🌱 Step 4: Sow Cold-Hardened Seeds Indoors
Fill 2-3 inch deep seed trays with a light, well-draining potting mix—hibiscus seeds dislike soggy soil. Plant seeds ¼ inch deep, spacing them 1 inch apart to avoid overcrowding. Gently press the soil around them but don’t compact it too tightly. Water lightly from the bottom to avoid displacing seeds.
Cover the trays with a clear plastic dome or plastic wrap to retain moisture and warmth. Place them in a bright, indirect light spot (like a south-facing window) or under grow lights for 12-14 hours daily. Keep the soil consistently moist but not waterlogged—top inch should feel damp to the touch. Germination can take 2-4 weeks, so stay patient and resist the urge to peek too often.
Tips & tricks for perfect hardy hibiscus seed pods
Here’s what nobody tells you about getting every last drop of potential from those stubborn seed pods.
Pod Maturity Matters: The color change from green to deep brown is your only real indicator—don’t rush it! I’ve learned the hard way that slightly green pods won’t dry properly and may develop mold. If you’re unsure, wait another day. The crisp texture when dry is your best confirmation. For extra safety, harvest pods from different branches to ensure you’ve got a good mix of mature ones.
Storage Wisdom: Paper envelopes are your best friend for long-term storage, but here’s the trick: place a small piece of chalk or a silica gel packet inside before sealing. This extra moisture absorber prevents condensation buildup that could rot seeds over time. Labeling with the harvest date is crucial—hibiscus seeds lose viability after about 2 years, so you’ll want to use the oldest seeds first.
Cold Stratification Secret: That 6-8 week cold period is non-negotiable, but here’s how to make it foolproof. Use a small refrigerator with consistent temperatures (35-40°F) rather than a larger one that might fluctuate. I like to place the sealed bag in a produce drawer where it stays cool and dark. The weekly check for moisture is critical—if the towel dries out completely, the seeds won’t germinate properly.
Sowing Technique: When planting those ¼-inch-deep seeds, use a toothpick to make small holes in the soil—this prevents seeds from sinking too deep or getting buried under soil pressure. After sowing, give the trays a gentle tap on the counter to settle the soil around seeds. The 12-14 hours of light should be bright but indirect; hibiscus seedlings are sensitive to harsh sunlight that can scorch their delicate leaves.
Pro Tips for Hardy Hibiscus Seed Pods
- Here’s what nobody tells you about getting every last drop of potential from those stubborn seed pods.
- Pod Maturity Matters: The color change from green to deep brown is your only real indicator—don’t rush it! I’ve learn...
- Storage Wisdom: Paper envelopes are your best friend for long-term storage, but here’s the trick: place a small piece...
Frequently asked questions
Got questions about hardy hibiscus seed pods?
Here are answers to the most common ones—whether you're planting, troubleshooting, or just curious about these cold-tolerant beauties.
How cold can hardy hibiscus seed pods survive?
Hardy hibiscus (like Hibiscus moscheutos) can tolerate light frosts down to 15–20°F (-9 to -7°C) once established. However, seed pods themselves are more delicate—they may need protection (like a frost blanket) if temps drop below 32°F (0°C). Start seeds indoors 8–10 weeks before your last frost for best results!
When is the best time to collect seed pods from hardy hibiscus?
Harvest pods when they’re dry and brown but before they split open (usually late fall to early winter). Wait until after the first frost to ensure seeds are fully mature. Store them in a cool, dry place (like a paper envelope) until spring planting. Pro tip: Label pods by variety if growing multiple types!
Can I plant hardy hibiscus seed pods directly in the ground?
Yes! Hardy hibiscus seeds thrive in full sun and well-draining soil. Scatter pods (or extracted seeds) on prepared soil in spring after the last frost, pressing them lightly into the earth. They germinate best at 70–75°F (21–24°C), so consider a mini greenhouse or row cover if your climate is cool.
What if my hardy hibiscus seed pods aren’t germinating?
Try these fixes:
- Stratification: Cold-moisten seeds in a plastic bag in the fridge for 4–6 weeks to mimic winter.
- Soak seeds: Soak pods in warm water for 24 hours before planting to soften the hard outer shell.
- Check depth: Plant seeds ¼ inch deep—too deep = slower germination.
- Light exposure: Hardy hibiscus seeds need light to germinate—don’t bury them!
Are there alternatives to growing from seed pods?
For faster results, try:
- Transplants: Buy cold-hardy hibiscus starts from nurseries in early spring.
- Division: Split mature hibiscus clumps in early spring or fall.
- Cuttings: Root semi-hardwood cuttings in water or perlite over summer.
Wrapping up and next steps
Hardy hibiscus seed pods are your gateway to vibrant, cold-resistant blooms that thrive year after year! 🌱 Whether you’re a seasoned gardener or just starting, these resilient plants offer low-maintenance beauty and stunning visual appeal.
Now that you’re equipped with the right knowledge—from seed sourcing to winter care—it’s time to roll up your sleeves and plant those pods!
Start small with just a few pods, experiment with your garden’s microclimate, and watch your hibiscus flourish. Your spring garden will thank you!
- Next step: Grab those seed pods and plan your planting schedule—soon, you’ll be enjoying hardy hibiscus in full bloom!