
Lawn
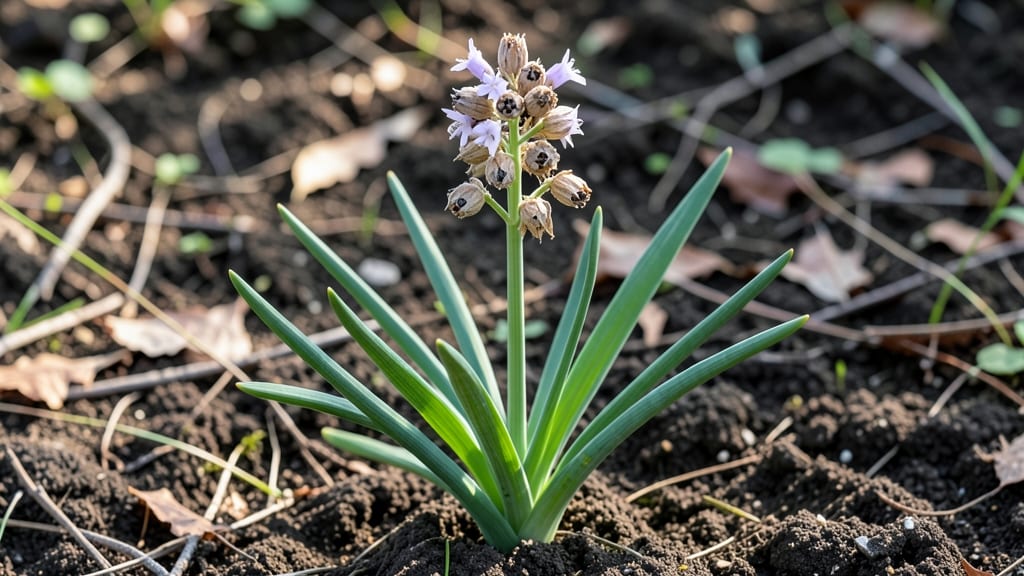
Harvesting green onion seed pods is the secret to growing your own onions year after year—no store-bought seeds needed. 🌱 I’ve saved seeds from my garden for three seasons now, and the first batch of homegrown onions always tastes sweeter than anything I’ve bought.
The process is simpler than you’d think, especially if you start with mature plants that have developed those distinctive seed pods.
You’ll need just a few things: ripe seed pods (they’ll turn brown and papery when ready), a dry container for storage, and a sunny spot for next year’s seedlings.
The key is patience—these pods take about 6-8 weeks to mature after flowering, but once they’re ready, you’ll have seeds that germinate reliably. Even if you’ve never grown onions from seed before, this method works for beginners.
By saving your own seed pods, you’ll get onions that thrive in your climate and soil, with fewer pests and diseases. The first sprouts appear in about 7-14 days, and you’ll be harvesting fresh green onions in just a few weeks.
It’s a cycle that keeps giving—no more buying seedlings or worrying about transplant shock.
Whether you’re growing in containers or garden beds, the same principles apply. Just make sure to keep the soil moist but not soggy, and give them plenty of sunlight. Here’s how to do it step by step—no green thumb required.
📚 In This Guide
- What you need
- Instructions
- Tips and common mistakes
- Wrapping up and next steps
What you need
- ● Mature green onions (scallions): Choose healthy, disease-free plants with fully developed seed pods (usually after flowering and drying). Aim for 10-15 mature plants for a good seed yield.
- ● Seed pods: Collect brown, dry pods (about 1-2 inches long) once they’ve split open naturally or are fully mature.
- ● Paper bags or envelopes: For drying and storing seed pods (use breathable, labeled options).
- ● Scissors or pruning shears: To harvest pods cleanly without damaging the plant.
- ○ Small mesh bag or screen: For threshing seeds (optional but helpful for separation).
- ● Seed-saving journal: To track variety, harvest date, and germination notes.
- ● Desiccant packets (e.g., silica gel): For extra-dry storage if humidity is high.
- ● Plant labels: To organize seeds by variety (if saving multiple types).
- ● Humidity monitor: Ideal for maintaining 30-40% humidity during storage.
- ● Patience: Seed pods take 4-6 weeks to fully mature after flowering.
- ● Dry, well-ventilated space: For proper drying (avoid moisture!).
- ● Knowledge of your climate: Some regions may need artificial drying if rain is frequent.
How to harvest green onion seed pods for next year’s sprouts
Here’s the simple method I use to collect seed pods from green onions—no fancy tools or complicated steps, just a little patience and timing.
🌱 Step 1: Identify Mature Seed Pods
Wait until your green onions bolt—those tall flower stalks with round, papery seed pods are your signal. The pods should turn from green to a light tan color, but don’t wait until they split open. Harvest them when they’re dry but still intact, usually 4-6 weeks after flowering begins.
Gently twist the pods off the stalk by hand—no need to cut. If they resist, they’re not ready yet. Store them in a paper bag (not plastic) in a cool, dry place. This keeps them dry and prevents mold while they finish maturing.
⏰ Step 2: Dry and Store Seed Pods Properly
Spread the harvested pods on a clean, dry surface in a single layer. Let them dry for 1-2 weeks in a warm, well-ventilated area. You’ll know they’re fully dry when the pods rattle when shaken and the seeds inside feel hard and papery.
Once dry, store the pods in an airtight container in your freezer. The cold prevents moisture buildup and keeps them viable for 2-3 years. Label the container with the harvest date—older seeds germinate more slowly.
🌱 Step 3: Test Germination Before Planting Next Year
Before you plant, test a few seeds to confirm viability. Place 5-10 seeds between damp paper towels in a sealed plastic bag. Keep them in a warm spot (70-75°F) and check daily. You should see sprouts in 7-10 days—if fewer than half sprout, your seeds may need refreshing.
If germination is poor, try soaking the seeds in lukewarm water for 24 hours before planting. This softens the seed coat and often improves germination. Plant the sprouted seeds ¼ inch deep in well-draining soil, keeping it consistently moist until they emerge.
☀️ Step 4: Plant Sprouted Seeds for Strong Starts
Sow seeds indoors 8-10 weeks before your last frost date. Use small pots or seed trays filled with light, well-draining potting mix. Keep the soil warm and moist, and place the trays under grow lights or in a sunny window.
Thin seedlings to 2 inches apart once they develop 2-3 true leaves. Harden them off outdoors for 1 week before transplanting. Green onions are frost-tolerant, so you can plant them early—just cover them if temperatures dip below 30°F.
🌿 Step 5: Maintain Healthy Plants for Future Harvests
Green onions thrive in full sun to partial shade and well-draining soil. Keep the soil consistently moist but not soggy—water at the base to avoid wetting the leaves, which can cause rot.
Fertilize lightly with a balanced organic fertilizer every 4-6 weeks. Avoid over-fertilizing, as it leads to leafy growth at the expense of bulb development. Harvest outer leaves as needed, leaving the center intact for regrowth.
Tips & tricks for perfect green onion seed pod harvesting
Here's what nobody tells you about saving those seed pods—little details that make all the difference between viable sprouts and wasted effort.
Timing is Everything: The 4-6 week window after flowering is critical for harvesting. If you wait too long, the pods will split open and scatter seeds everywhere. I've learned the hard way—mark your calendar when those flower stalks appear! Watch for the pods to turn light tan (not brown) and feel slightly papery to the touch. This is your exact cue to harvest.
Storage Wisdom: That paper bag isn't just for convenience—it's the secret to preventing mold. The breathable material allows moisture to escape while keeping out humidity. I store mine in a cool, dry pantry until I'm ready to freeze. Pro tip: If you notice any condensation inside the bag, transfer immediately to a new bag with a silica gel packet to absorb moisture.
Germination Test: The 5-10 seed test is your quality control step. I always test at least 10 seeds to get reliable results—fewer than 50% germination means your seeds need refreshing. For best results, place the damp paper towel setup near a sunny window or under a grow light. The warmth from the light actually speeds up germination by 24-48 hours compared to a dark cabinet.
Freezer Strategy: Freezing your seed pods extends their viability to 2-3 years, but there's a trick to prevent moisture buildup. Place a small silica gel packet or a few uncooked rice grains in the storage container. These natural desiccants absorb any moisture that might develop during storage. I also date my containers—older seeds germinate more slowly, so you'll want to plant them first.
Pro Tips for Green Onion Seed Pods
- Here's what nobody tells you about saving those seed pods—little details that make all the difference between viable ...
- Timing is Everything: The 4-6 week window after flowering is critical for harvesting. If you wait too long, the pods ...
- Storage Wisdom: That paper bag isn't just for convenience—it's the secret to preventing mold. The breathable material...
Frequently asked questions
Got questions about harvesting green onion seed pods? You’re not alone!
Here are answers to the most common queries—so you can confidently save seeds and grow your own next season.
When is the best time to harvest green onion seed pods?
Harvest seed pods when they turn tan or light brown and start splitting open slightly—usually 4–6 weeks after flowering. Wait too long, and the pods may shatter, scattering seeds prematurely. Aim for dry, sunny days to avoid moisture issues.
How do I know if my green onion seed pods are mature enough?
Mature pods feel dry and papery to the touch, with seeds rattling inside when shaken gently. If they’re still green or firm, they’re not ready. Pro tip: Cut the entire seed stalk (including pods) and hang it upside down in a paper bag for 1–2 weeks to dry fully before handling.
Can I save seeds from store-bought green onions?
Unfortunately, no—most commercial green onions are triploid (sterile hybrids) and won’t produce viable seeds. To save seeds, grow open-pollinated varieties like ‘Evergreen Hardy White’ or ‘Tokyo Long White’ from seed pods or reputable seed suppliers.
What should I do if my seed pods mold or rot?
Mold or rot usually happens from excess moisture during harvest or storage. To fix it:
- Harvest pods only on dry days or after morning dew evaporates.
- Spread pods in a single layer on a tray with airflow (no plastic bags!).
- Store in a cool, dry place (like a glass jar) with a silica packet to absorb humidity.
How long can I store green onion seed pods before planting?
Properly dried and stored pods stay viable for 2–3 years in ideal conditions (50°F or below, low humidity). Test germination by planting a few seeds—if they sprout within 2 weeks, the rest are good to go! Tip: Label pods with the harvest year to track freshness.
What can I do with leftover green onion seed pods after harvesting?
Don’t toss them! Use leftover pods for:
- Compost (chop into small pieces first).
- Crafts—kids can paint or glue them onto paper for eco-friendly art!
- Seed starting mix—crush dried pods into potting soil for extra nutrients.
Wrapping up and next steps
Harvesting green onion seed pods is a simple yet rewarding way to ensure a fresh supply of homegrown greens next season! With just a few tools and a little patience, you can turn last year’s harvest into next year’s thriving plants.
Whether you’re a gardening novice or a seasoned pro, this stress-free method makes it easy to save seeds, reduce waste, and grow stronger sprouts—all while enjoying the satisfaction of a self-sustaining garden.
Now that you’re equipped with the know-how, why not give it a try? Grab your gloves, snip those pods, and let nature do the rest. Happy gardening—and here’s to a bountiful harvest in 2025! 🌱✨