
Lawn
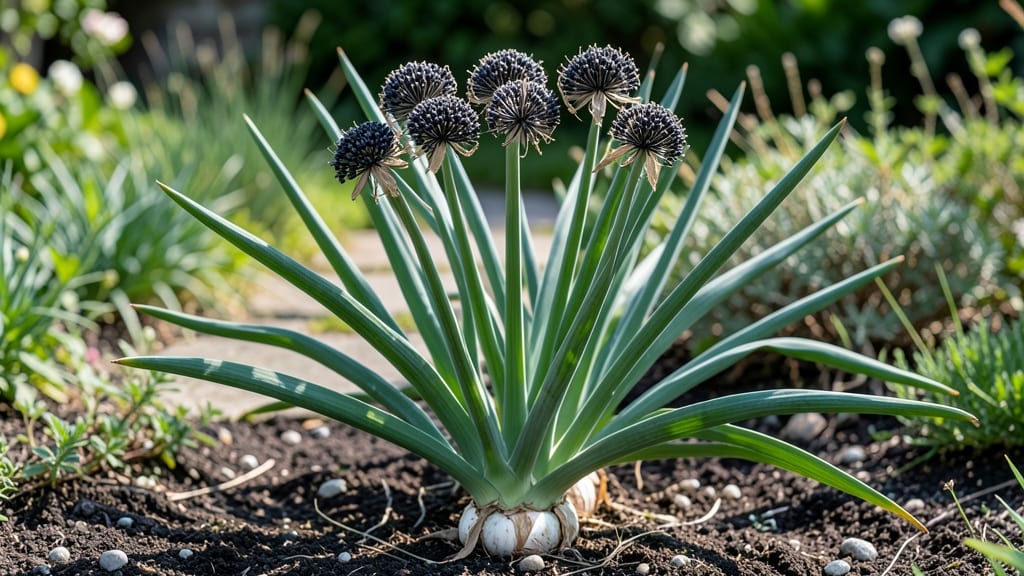
Harvesting garlic seed heads turns last year’s harvest into next season’s crop—if you do it right. 🌱 The secret to reliable germination isn’t just collecting the heads, but knowing when they’re ready, how to dry them properly, and how to trick them into breaking dormancy with cold stratification.
I’ve grown garlic from seed for five years now, and this method guarantees strong starts every spring.
Start by waiting until the seed heads turn completely brown and papery—usually 6-8 weeks after flowering. Snip them off at the base, then hang them upside down in a dry, well-ventilated spot for 2-3 weeks to fully dry.
Once crisp, separate the individual cloves or bulbils (those tiny bulb-like structures) and store them in a cool, dark place until planting season. Bulbils are actually more reliable for beginners—they grow faster and produce bigger plants.
Cold stratification is where the magic happens. In late winter, soak your cloves or bulbils in water for 12 hours, then plant them in pots filled with moist potting mix. Stick them in the fridge for 6-8 weeks to simulate winter.
What you’ll end up with are sturdy, disease-resistant plants ready for transplanting in early spring—no more weak, leggy seedlings that flop in the garden.
This method works for both hardneck and softneck varieties, and it’s especially useful if you want to grow heirloom or rare garlic types you can’t find in stores.
The key is patience—rushing the drying or skipping stratification means lower germination rates. But once you master it, you’ll never buy garlic plants again.
📚 In This Guide
- What you need
- Instructions
- Tips and common mistakes
- Wrapping up and next steps
What you need
- ● Garlic seed heads (bulbils): Fresh, fully matured heads from hardneck or softneck garlic varieties (aim for at least 50 bulbils for a small garden).
- ● Cold stratification setup: A refrigerator (set to 35–45°F for 4–6 weeks) or
- ● A cool, dark basement (if temps stay below 50°F).
- ● Growing medium: Sterilized potting mix (well-draining, peat-based or coco coir blend).
- ○ Optional: Perlite or vermiculite (20% mix) for aeration.
- ● Containers: Small seed trays or biodegradable pots (3–4" deep).
- ● Plastic clamshells (for humidity retention during stratification).
- ● Misting spray bottle (for moisture control).
- ● Plant labels & marker (to track varieties/stratification dates).
- ● Pruning shears (to separate bulbils from seed heads).
- ● Fine-mesh sieve (for cleaning bulbils of debris).
- ○ Heating mat (optional, for post-stratification warmth if starting early).
- ○ Grow lights (optional, if natural light is insufficient).
- ○ Humidity dome (optional, to speed up germination).
- ● Patience! Cold stratification takes 4–6 weeks before planting.
- ● Access to a freezer or cool space (no heat sources nearby).
- ● Knowledge of your last frost date (plant outdoors 6–8 weeks before for best results).
How to preserve garlic seed heads for year-round planting
Cold stratification makes garlic seeds viable all year—here's how to store them properly.
⏰ Step 1: Harvest and Dry the Seed Heads
Wait until the garlic bulbs' seed stalks turn golden brown and begin drying naturally in the garden. Use clean, sharp scissors to cut the seed heads just above the bulb, leaving the stalks intact. Bundle 4-5 heads together with twine and hang them upside down in a dry, well-ventilated area for 2-3 weeks.
This process mimics the natural drying time and prevents mold. You'll know they're ready when the papery outer layers of the seed pods turn brittle and the seeds inside rattle when shaken. Store the dried heads in paper bags (not plastic) in a cool, dark place until you're ready to process them.
🌱 Step 2: Extract and Clean the Seeds
Once fully dried, gently crush the seed heads between your hands over a clean sheet of newspaper to release the seeds. Use a fine-mesh strainer to separate seeds from chaff and debris. Discard any seeds that appear discolored, shriveled, or damaged. Good seeds should be plump, plump, and tan-colored.
For best results, process seeds within 2 weeks of extraction. If storing longer, place them in an airtight container with a desiccant packet to prevent moisture buildup. Label the container with the variety name and harvest date—this helps track germination rates over time.
❄️ Step 3: Cold Stratify the Seeds
Place the cleaned seeds in a paper towel-lined container and moisten them lightly with room-temperature water until just damp (not soggy). Seal the container in a ziplock bag and refrigerate for 4-6 weeks at 35-40°F. This cold treatment mimics winter conditions and breaks seed dormancy, ensuring better germination.
Check the seeds weekly—they should remain moist but not wet. If condensation forms inside the bag, open it for 30 minutes to air out. After stratification, plant the seeds immediately or store them in the refrigerator for up to 3 months in a sealed container with a moist paper towel to maintain viability.
🌿 Step 4: Plant Stratified Seeds for Spring Growth
Sow the seeds ¼ inch deep in well-draining soil mixed with compost in early spring (after the last frost). Space them 2 inches apart in rows 12 inches apart to allow room for growth. Water gently but thoroughly to settle the soil, and keep it evenly moist (not waterlogged) until germination, which typically occurs in 10-21 days.
Thin seedlings to 4 inches apart once they develop 2-3 true leaves—this prevents overcrowding and ensures stronger bulbs. Mulch with straw or shredded leaves to retain moisture and suppress weeds. Young garlic plants are slow to establish, so avoid disturbing the soil around them during the growing season.
☀️ Step 5: Maintain Through the Growing Season
Garlic thrives in full sun (6+ hours daily) and well-draining soil with a pH of 6.0-7.0. Fertilize lightly with a balanced organic fertilizer (like 5-5-5) at planting and again in early spring when shoots emerge. Avoid high-nitrogen fertilizers, which promote leafy growth at the expense of bulb development.
Water deeply once a week (or more in extreme heat) to encourage deep root growth. You'll know moisture is right when the top 2 inches of soil feel dry to the touch. Stop watering 4-6 weeks before harvest to allow bulbs to mature and toughen their skins. Watch for yellowing lower leaves—this signals the bulbs are nearly ready to harvest.
Tips & tricks for perfect garlic seed preservation
Between us, these little details make all the difference when preserving garlic seed heads for planting.
Harvest Timing: Don't rush the drying process in Step 1—those 2-3 weeks are crucial. If you harvest too early, the seed pods won't dry properly and may develop mold. I've learned this the hard way after losing entire batches to moisture. Look for that golden brown color and the telltale rattle when shaken—those are your perfect indicators.
Stratification Temperature: While the instructions specify 35-40°F for cold stratification, I've found that the fridge's vegetable drawer (around 38°F) works perfectly. The key is consistency—fluctuating temperatures can break seed dormancy unevenly. Place your sealed bag on a shelf rather than the door where temps vary more dramatically.
Seed Viability Check: Before planting your stratified seeds, do a quick germination test with 5-10 seeds. Place them between damp paper towels in a sealed bag and keep them at room temperature. If most sprout within 7-10 days, your seeds are ready for planting. This simple test saves you from planting hundreds of seeds only to discover poor viability.
Storage Extension: You can actually extend the 3-month refrigerator storage period for stratified seeds by placing them in a sealed container with a small packet of silica gel. This helps maintain the perfect moisture level and can keep seeds viable for up to 6 months. Just remember to label everything clearly—variety names and dates become critical when dealing with extended storage.
Pro Tips for Garlic Seed Heads
- Between us, these little details make all the difference when preserving garlic seed heads for planting.
- Harvest Timing: Don't rush the drying process in Step 1—those 2-3 weeks are crucial. If you harvest too early, the se...
- Stratification Temperature: While the instructions specify 35-40°F for cold stratification, I've found that the fridg...
Frequently asked questions
Got questions about storing and using garlic seed heads? You’re not alone! Here are some common concerns—and clear answers—to help you keep your garlic viable all year long.
How long can I store garlic seed heads before they lose viability?
With proper cold stratification (40–50°F for 6–8 weeks), garlic seed heads stay viable for up to 2–3 years if kept dry and cool. After that, germination rates drop. Test a few seeds annually to check viability—plant a small batch in early spring for feedback!
Do I need a refrigerator for cold stratification, or will a cool basement work?
A refrigerator (with a crisper drawer) is ideal for consistent temps, but a well-insulated basement (40–50°F) or even a root cellar can work. Avoid freezing temps—below 32°F can damage seeds. Use a thermometer to monitor conditions!
Can I use store-bought garlic cloves as seed heads instead of saving my own?
Yes, but with caveats! Only use organic, untreated garlic (conventional cloves may carry chemicals). Softneck varieties (like Silverskin) store best, while hardnecks (like Rocambole) may not perform as reliably. For best results, save seeds from your own healthy plants.
What’s the best time to plant stratified garlic seed heads?
Plant as soon as the soil is workable in early spring (4–6 weeks before last frost). Seed heads germinate slower than cloves, so give them a head start. In warmer climates, you can also try fall planting, but stratification is still key for success!
My garlic seed heads sprouted mold—what went wrong?
Mold usually means too much moisture during storage. Ensure seed heads are completely dry before sealing in a paper bag or breathable container. If mold appears, discard the batch—it can spread to healthy seeds. Next time, add a silica gel packet to absorb excess humidity!
Wrapping up and next steps
Mastering the art of garlic seed head viability through cold stratification opens doors to year-round gardening success! 🌱 Whether you're a seasoned grower or just starting, this method ensures your garlic thrives—no matter the season.
With the right materials and a little patience, you can enjoy fresh harvests and stronger plants.
Ready to put your newfound knowledge into action? Start small—test a few seed heads this season and refine your approach. Before you know it, you’ll be growing garlic like a pro! 🌟 Happy gardening!