
Lawn
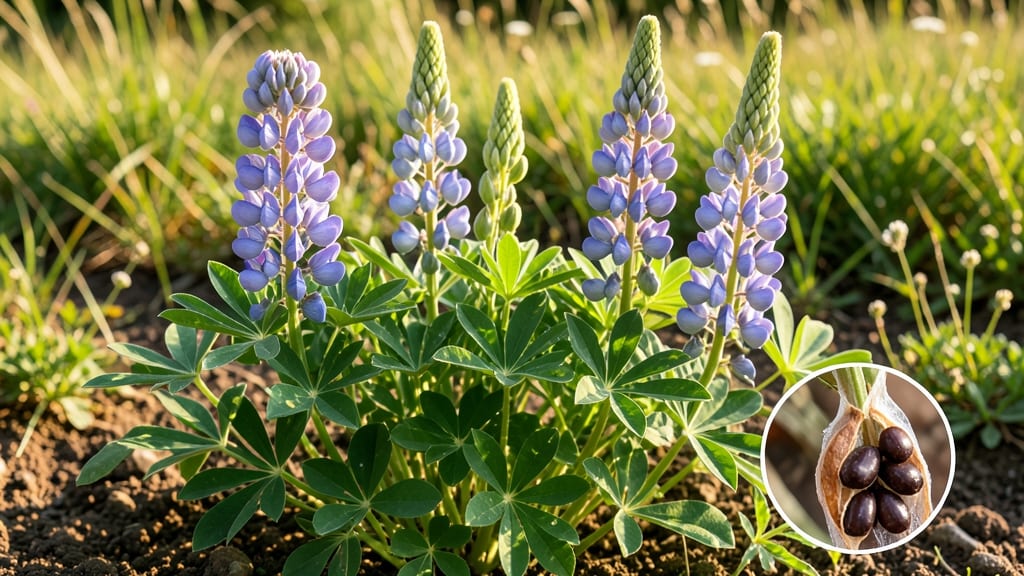
Cold-stratified flower seed pods transform last year’s blooms into next season’s garden stars in just 60 days. 🌱 I’ve saved seeds from marigolds, zinnias, and snapdragons for years, and the trick isn’t complicated—it’s about timing, patience, and a little fridge magic.
Those dried pods on your plants? They’re packed with potential, waiting for the right moment to wake up.
The process starts with healthy pods—look for ones that are fully brown and slightly papery, not moldy or cracked. Harvest them when they’re dry but before they burst open, then store them in paper envelopes until you’re ready to stratify.
For most annuals, a 6-week cold spell mimics winter’s natural dormancy, breaking their stubbornness and coaxing new life.
By day 60, you’ll be pressing those seeds into damp potting mix, watching for the first green shoots that signal success. The payoff? A garden full of heirloom varieties you grew from scratch, with flavors and colors store-bought seeds can’t match.
It’s gardening’s version of time travel—planting today for next summer’s blooms.
Works for almost any flower seed, from easygoing zinnias to fussy snapdragons. Here’s how to make it work without the guesswork—no green thumb required.
📚 In This Guide
- What you need
- Instructions
- Tips and common mistakes
- Wrapping up and next steps
What you need
- ● Flower seed pods: 50–100 pods (varies by project size; opt for unopened pods like milkweed, lupine, or poppies for best results).
- ● Potting soil: 1–2 gallons of well-draining, sterile mix (e.g., 60% peat moss, 30% perlite, 10% vermiculite).
- ● Seed-starting trays: 1–2 trays (72-cell or 128-cell with drainage holes).
- ● Plastic storage bag: 1 large, resealable bag (1–2 gallons) with a zip-top closure.
- ● Labeling tags: 5–10 waterproof tags + marker (to track seed types and stratification dates).
- ● Spray bottle: 1 (for gentle soil moisture—avoid overwatering!).
- ● Refrigerator space: A cold, dark spot (33–40°F / 1–4°C) for 60 days (e.g., crisper drawer or unheated garage).
- ● Grow lights: 1–2 LED bulbs (for post-stratification seedling growth if natural light is limited).
- ● Humidity dome: 1 (to retain moisture during early germination).
- ● Thermometer/hygrometer: 1 (to monitor fridge temps/humidity if precise conditions are critical).
- ● Compost or worm castings: ½ cup (mixed into soil for added nutrients).
- ● Glove: 1 pair (to protect hands from prickly pods like okra or honey locust).
How to cold-stratify flower seed pods for guaranteed germination
Here's my foolproof method for breaking dormancy and getting those stubborn flower seeds to sprout reliably.
🌱 Step 1: Collect and Prepare Mature Seed Pods
Harvest seed pods when they're fully dry and brown but still intact—usually in late fall or early winter. I like to collect them after the first frost when they've naturally released some moisture. Place the pods in a paper bag and let them dry completely in a warm, dry spot for 7-10 days.
Once dry, gently open the pods and remove the seeds. You'll see the seeds inside are often coated with a hard, protective layer. This coating is nature's way of protecting the seed, but it also means we need to break dormancy through cold stratification. Don't skip this step—seeds without stratification may never germinate.
❄️ Step 2: Mix Seeds with Moist Growing Medium
Fill a small container with moistened perlite or sand—these materials drain well but hold enough moisture to keep seeds hydrated. I use a ratio of 1 part seeds to 3 parts perlite for good airflow. Mix everything thoroughly so seeds aren't clumped together.
This mixture should feel like a damp sponge—not dripping wet, but with enough moisture that it holds together when squeezed. If it's too dry, add a few drops of water; if it's too wet, spread it out to dry slightly. The goal is to create an environment that mimics the natural winter conditions these seeds need to break dormancy.
⏰ Step 3: Cold-Stratify for 60 Days
Place the seed mixture in a sealed plastic bag with a few small holes for airflow. Store it in your refrigerator's crisper drawer where temperatures stay consistently between 35-45°F. This mimics the natural winter chill period that many flower seeds require to germinate.
Check the mixture every 2-3 weeks to ensure it hasn't dried out. If it feels dry to the touch, mist it lightly with water and return it to the fridge. After 60 days, your seeds should be ready to plant—this is when they'll have completed their dormancy cycle and be primed for germination.
🌱 Step 4: Plant Stratified Seeds in Potting Mix
Fill small seedling trays with well-draining potting mix and plant your stratified seeds at a depth of about ¼ inch. Press the soil gently around each seed to ensure good contact. I like to use a fine mist spray bottle to water the soil lightly—this prevents seeds from washing away or becoming too waterlogged.
Place the trays in a warm spot with indirect light for the first 7-10 days. You'll see the first signs of germination as tiny green shoots push through the soil. This is the moment you've been waiting for—your cold stratification paid off! Keep the soil consistently moist but not soggy during this time.
☀️ Step 5: Move to Light and Monitor Growth
Once seedlings emerge, move them to a location with bright, indirect light for the first week. After that, gradually introduce them to more direct sunlight. You'll notice the seedlings grow taller and develop stronger stems as they adapt to their new environment.
Watch for the first true leaves to appear—these are the second set of leaves that develop after the initial seed leaves (cotyledons). Once you see these, your seedlings are ready to be transplanted into individual pots or directly into the garden. This usually happens within 3-4 weeks after germination.
Tips & tricks for perfect flower seed pod germination
These little-known tricks will help you maximize your success rate with cold-stratified flower seeds.
Pod Selection: Harvest seed pods when they're fully mature but still intact—this means they should be completely dry and brown. If pods are still green or have started to split open naturally, they may not be ready. I've found that pods collected after the first frost often yield the best results because the natural moisture release helps prepare them for stratification. Avoid using pods that feel damp or have any signs of mold.
Medium Choice: While perlite and sand work well, you can also use a mix of 50% peat moss and 50% coarse sand for better moisture retention. The key is to avoid materials that compact easily, like regular potting soil, which can suffocate seeds. If you're using sand, make sure it's coarse—not the fine kind used for aquariums. The goal is to mimic the natural conditions these seeds would experience in their native environment.
Storage Strategy: Place your sealed bag of stratified seeds on a shelf in the fridge rather than the door, where temperatures fluctuate wildly. The crisper drawer is ideal because it maintains a consistent 35-45°F range. I like to label each bag with the date and seed type to keep track of the 60-day timeline. This helps prevent mix-ups if you're working with multiple seed varieties.
Planting Depth: When planting your stratified seeds, use a toothpick or pencil to create small holes at the ¼-inch depth. This ensures consistent planting depth without accidentally crushing the seeds. After planting, I like to place the trays in a clear plastic bag with a few small holes to create a mini greenhouse effect. This helps maintain humidity during the critical first 7-10 days while preventing waterlogging.
Pro Tips for Flower Seed Pods
- These little-known tricks will help you maximize your success rate with cold-stratified flower seeds.
- Pod Selection: Harvest seed pods when they're fully mature but still intact—this means they should be completely dry ...
- Medium Choice: While perlite and sand work well, you can also use a mix of 50% peat moss and 50% coarse sand for bett...
Frequently asked questions
Got questions about working with flower seed pods and cold stratification? You’re not alone! Here are some of the most common queries—and their straightforward answers—to help you get started with confidence.
What does "cold-stratification" mean, and why do some flower seed pods need it?
Cold-stratification mimics winter conditions to break seed dormancy. Many wildflower and perennial seed pods (like lupine or black-eyed Susan) require this process to soften their hard outer shells. Without it, germination rates drop dramatically—sometimes to near zero! Think of it as a natural "wake-up call" for seeds.
How do I know if my seed pods are ready for cold stratification?
Most seed pods are ready when they’re fully dry and brown (or their mature color). If they’re still green or moist, they’re not ripe. For store-bought pods, check the packaging—it’ll specify if stratification is needed. A quick test: Squeeze gently; if the pod cracks or feels brittle, it’s likely ready!
Can I use my freezer instead of a fridge for cold stratification?
Yes, but with caution! Freezers can fluctuate in temperature (sometimes dropping below 32°F), which may harm delicate seeds. If using one, place pods in a sealed bag with a damp paper towel, then monitor weekly. For best results, a fridge’s crispier drawer (34–40°F) is ideal.
What if my seed pods mold or rot during stratification?
Mold or rot usually means excess moisture or poor airflow. To fix it, remove affected pods immediately and adjust your setup: Use a single layer of pods (not piled), reduce moisture to just damp (not soggy), and add a tiny hole in the bag for ventilation. Discard any moldy seeds—don’t risk spreading it!
How long can I store stratified seed pods before planting?
Once stratified, store pods in a cool, dry place (like a sealed container in the fridge) for up to 6 months. After that, germination rates may decline. Label your containers with the date to track freshness. Pro tip: Plant them as soon as they’re ready to avoid dormancy creep!
Wrapping up and next steps
From cold-stratified flower seed pods to thriving plants in just 60 days, you’ve unlocked a game-changing gardening hack! 🌱 Whether you’re reviving heirloom varieties or experimenting with native wildflowers, this method saves time and boosts success rates.
Now’s the perfect moment to grab those prepped seeds and plant them—your garden (and pollinators!) will thank you.
Ready to level up? Try this technique with a new batch of seeds or share your progress with fellow gardeners. Happy planting! 🌸