
Propagation
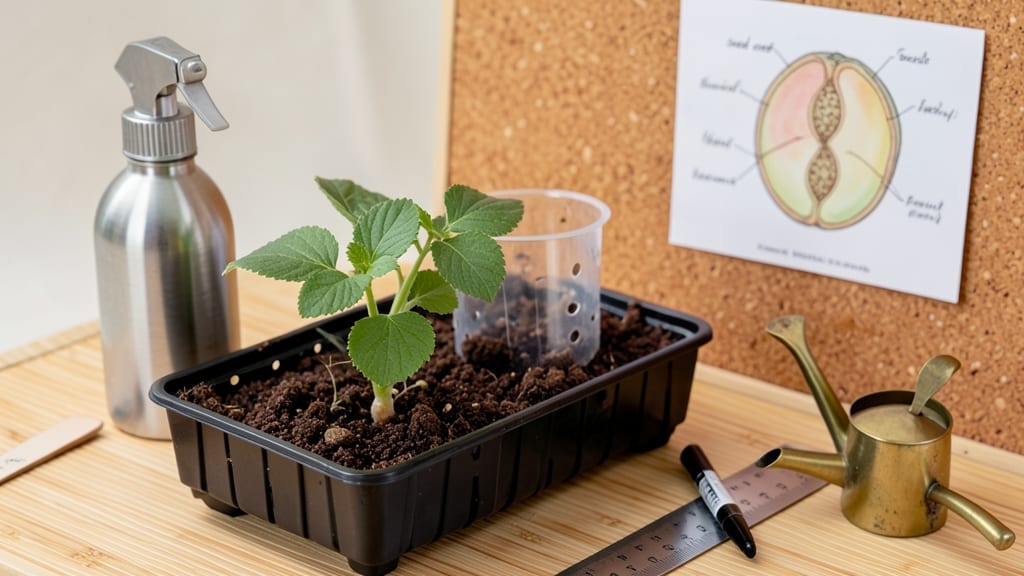
I’ll explain seed germination—that magical moment when a tiny seed holds the promise of a full-grown plant, provided you give it the right conditions. ✨ The science behind it is simpler than you think: water wakes up the seed, warmth activates growth, and light helps it find its way upward.
My first germination experiment failed because I assumed seeds knew what they were doing—turns out, they need precise care to break dormancy and push through the soil.
The process unfolds in three key stages: imbibition (when the seed soaks up water), activation (when enzymes kick in), and emergence (when that first shoot appears). Most seeds need consistent moisture, temperatures between 60-80°F, and darkness to germinate—though some, like lettuce, prefer light.
I learned the hard way that skipping these basics leads to moldy seeds or weak sprouts that never make it to the surface. You’ll know you’re on track when you see firm, white roots emerging first, followed by a tiny loop of green breaking through the soil.
Healthy sprouts stand upright and have smooth, vibrant leaves—not yellowing or stretched. This whole process can take anywhere from 3 days (like radishes) to 3 weeks (like tomatoes), depending on the plant.
The beauty of germination is that you’re essentially growing a tiny plant from scratch—no soil mix, no pruning, just patience and the right environment. Once you master these basics, you’ll be starting seeds like a pro, with reliable sprouts every time. Let’s get those seeds going!
📚 In This Guide
- What you need
- Instructions
- Tips and common mistakes
- Wrapping up and next steps
What you need
- ● Seeds: Choose fresh, high-quality seeds (e.g., beans, peas, or sunflower seeds). Quantity: 5–10 seeds per experiment.
- ● Growing medium: Paper towels (2–3 sheets) or
- ● Peat pellets (3–5, pre-moistened) or
- ● Potting soil (sterilized, 1–2 cups).
- ● Container: Plastic bag (ziplock, quart-sized) or
- ● Seed tray (with drainage holes) or
- ● Small pot (3–4 inches in diameter).
- ● Water: Room-temperature, filtered or distilled (avoid tap water if heavily chlorinated). Quantity: 1–2 tbsp per seed type.
- ○ Spray bottle (optional, for gentle watering).
- ● Notebook/pencil (to track germination progress).
- ○ Heat mat (optional, for warm-weather seeds like peppers).
- ○ Grow light (optional, if natural light is insufficient).
- ○ Humidity dome (optional, for delicate seeds like orchids).
- ● Ruler (to measure sprout growth).
- ● Access to indirect sunlight or a grow light (6–8 hours/day).
- ● Consistent temperature control (most seeds thrive at 65–75°F).
- ● Patience! Germination times vary (e.g., beans: 7–14 days; sunflowers: 7–21 days).
How to achieve reliable seed germination every time
Here's the science-backed method I trust to turn seeds into strong sprouts—no guesswork involved.
🌱 Step 1: Choose Seeds and Understand Their Needs
Not all seeds germinate the same way. Check the packet for specific instructions—some need light to sprout, others darkness. I always start with fresh seeds (within 1-2 years) because older seeds lose viability. For example, tomatoes and peppers prefer warmth (75-85°F), while lettuce and spinach germinate best at cooler temperatures (60-70°F).
Soak seeds overnight in lukewarm water for varieties with hard outer coatings (like chives or basil). This softens the shell and speeds up germination. Drain and plant immediately—don’t let them dry out. If the packet doesn’t specify, skip soaking unless you’re dealing with stubborn seeds.
💧 Step 2: Prepare Moisture and Temperature Conditions
Fill a seed tray or small pot with moistened potting mix (not garden soil—it’s too dense). Press down gently to remove air pockets, then water until the top inch feels damp but not soggy. The goal is consistent moisture without waterlogging. I use a spray bottle for delicate seeds like impatiens to avoid displacing them.
Place the tray in a warm spot—75-85°F is ideal for most vegetables. A seedling heat mat works wonders if your home runs cooler. Cover the tray with plastic wrap or a humidity dome to trap warmth and moisture. Check daily for condensation; if the plastic fogs up, you’ve got the right balance.
☀️ Step 3: Monitor and Maintain Germination Conditions
Germination times vary by seed type—3-10 days for fast growers like radishes, up to 3 weeks for slower ones like parsley. Keep the soil consistently moist by misting lightly when the surface feels dry to the touch. Overwatering now can drown seeds before they sprout, so resist the urge to soak.
Once seeds sprout, remove the cover immediately to prevent fungal growth. You’ll see tiny green hooks (the hypocotyl) pushing through the soil first. This is your cue to move seedlings to bright, indirect light within 24 hours—direct sun now will scorch delicate new leaves.
✂️ Step 4: Thin and Strengthen Seedlings
When seedlings develop first true leaves (not the initial seed leaves), thin them to 1-2 inches apart to avoid competition. Use scissors to snip weak sprouts at soil level—pulling risks disturbing roots. I always keep the strongest, healthiest seedling per cell, even if it means sacrificing a few.
Hardening off begins here: place trays near a sunny window for 1-2 hours daily, gradually increasing exposure. Watch for leggy growth (long, weak stems)—this means more light is needed. A grow light 2-4 inches above seedlings prevents this issue entirely.
Tips & tricks for perfect seed germination
Common pitfalls—and how to sidestep every one—when growing reliable sprouts from seeds.
Seed Selection: Always check the seed packet for specific germination requirements—some seeds need light to sprout while others prefer darkness. I've learned the hard way that planting seeds with conflicting needs together (like light-loving basil and dark-preferring tomatoes) leads to uneven germination. Group seeds by their light requirements in separate trays for consistent results.
Soaking Strategy: For seeds with hard outer coatings like chives or basil, the overnight soaking in lukewarm water is crucial—but timing matters. I've ruined batches by forgetting to drain them after soaking. Plant immediately after draining to prevent seeds from drying out or developing mold. This step can cut germination time in half for stubborn seeds.
Temperature Control: Maintaining the ideal temperature range (75-85°F for most vegetables) is more important than you might think. I've seen germination rates drop by 50% when seeds are exposed to temperatures below 60°F. If your home runs cooler, invest in a seedling heat mat—it's a game-changer for consistent germination. For cooler-loving seeds like lettuce, keep temperatures between 60-70°F.
Light Transition: That 24-hour window after sprouting to move seedlings to bright, indirect light is critical. I used to rush this step and ended up with scorched seedlings. Watch for those tiny green hooks (the hypocotyl) pushing through the soil—they're your signal to act. Use a grow light 2-4 inches above seedlings if natural light isn't sufficient, as artificial light prevents leggy growth.
Pro Tips for Explain Seed Germination
- Common pitfalls—and how to sidestep every one—when growing reliable sprouts from seeds.
- Seed Selection: Always check the seed packet for specific germination requirements—some seeds need light to sprout wh...
- Soaking Strategy: For seeds with hard outer coatings like chives or basil, the overnight soaking in lukewarm water is...
Frequently asked questions
Got questions about seed germination?
You’re not alone! Here are answers to the most common queries—from impatient gardeners to science-curious sprouts enthusiasts.
How long does it take for seeds to germinate?
Germination time varies wildly by seed type. Fast growers like radishes or beans sprout in 3–7 days, while slowpokes (think almonds or peppers) can take 2–4 weeks. Check your seed packet for specifics—patience is key! Pro tip: Keep soil consistently moist (not soggy) to speed things up.
Can seeds germinate in cold weather?
Some seeds love cold—like lettuce or spinach—thanks to a process called vernalization. Others (tomatoes, peppers) need warmth (70°F+) to wake up. For cold-sensitive seeds, use a seedling heat mat or start indoors near a sunny window. Troubleshoot: If soil feels icy, wait until temps stabilize above 40°F.
What if my seeds just won’t sprout?
Don’t panic! Common culprits:
- Old seeds: Test viability by soaking in water—if they sink, they’re likely good.
- Too deep: Most seeds need ½–1 inch of soil; giant seeds (like beans) can go deeper.
- Dampness drama: Overwatering rots seeds; underwatering starves them. Aim for moist, not muddy.
Do I need special soil for germination?
Nope! Start with light, sterile potting mix (avoid garden soil—it’s too dense and may harbor fungi). A 50/50 mix of peat moss and perlite works wonders. Bonus: Add a slow-release fertilizer (like worm castings) for a nutrient boost once sprouts appear.
Can I reuse leftover seeds from a packet?
Store seeds in a cool, dry, dark place (like a sealed jar in the fridge) for 1–5 years, depending on the type. Pro move: Label them with the date and germination rate (test a few each year to track viability). Just avoid humidity—it’s the enemy of seed longevity.
Wrapping up and next steps
Understanding seed germination unlocks the magic of turning tiny seeds into thriving plants! 🌱 By mastering the right conditions—water, warmth, air, and light—you’ve gained the confidence to nurture life from scratch.
Whether you’re a beginner or a seasoned gardener, every sprout you coax to life is a testament to your green thumb.
Ready to take the next step? Experiment with different seeds—try fast-germinating varieties like radishes or beans first, then challenge yourself with slower growers. Keep a germination journal to track your progress and refine your technique. Happy growing!