
Lawn
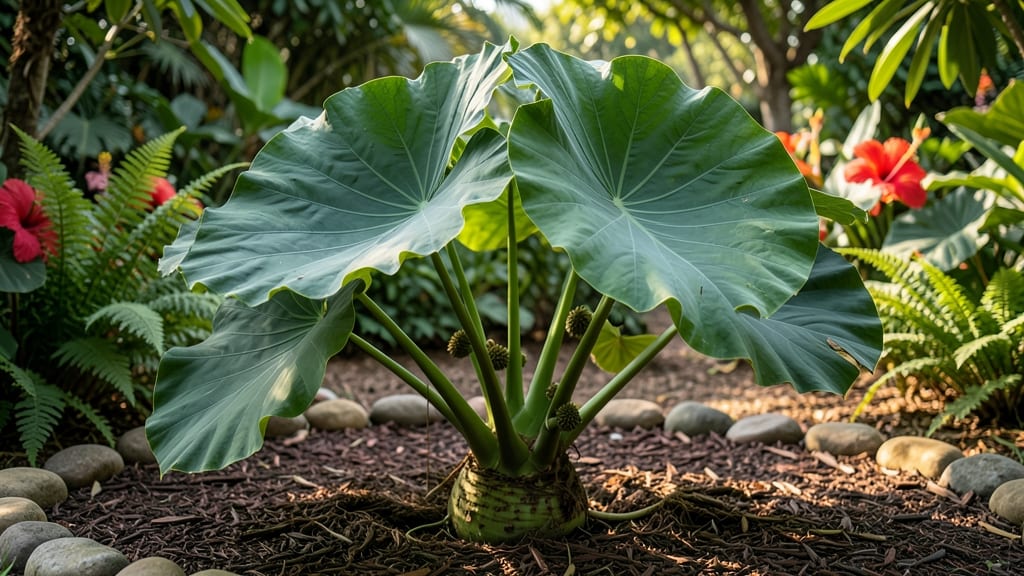
Elephant ear seed pods are the secret to growing your own tropical plants from scratch—but don’t expect miracles. 🌱 I’ve tried growing from seed more times than I can count, and while it’s possible, it’s far from reliable.
The key lies in cold stratification, a process that mimics winter’s natural dormancy period to trick those stubborn seeds into sprouting.
First, you’ll need mature seed pods—bright red and firm to the touch—collected in late fall. Split them open to reveal the small, glossy seeds inside, then store them in a damp paper towel inside a sealed bag in the fridge for 8-12 weeks.
This cold treatment breaks dormancy, but even then, germination rates hover around 30-50%, so patience is key.
When you’re ready to plant, sow the seeds in a warm, humid environment—think a propagator or a sealed plastic container with a heat mat. Keep the soil consistently moist but never soggy, and expect sprouts in 4-8 weeks.
The payoff? You’ll end up with lush, tropical foliage that thrives in shady spots, all from a single seed pod.
Here’s the catch: most gardeners prefer division over seeds because it’s faster and more reliable. But if you’re curious about propagation from scratch—or just love a challenge—this method delivers unexpectedly satisfying results. Just don’t expect perfection, and always be ready to troubleshoot mold or slow germination.
📚 In This Guide
- What you need
- Instructions
- Tips and common mistakes
- Wrapping up and next steps
What you need
- ● Elephant ear seed pods: Fresh or dried (ensure they’re fully mature and slightly dry to the touch). Aim for 2-5 pods per batch.
- ● Cold stratification supplies: Plastic bag or airtight container (e.g., ziplock gallon bag)
- ● Moistened paper towels or peat moss: Enough to surround seeds (keep damp, not soggy).
- ● Refrigerator: Set to 35–45°F (2–7°C) for stratification.
- ● Planting medium: Seed-starting mix: Lightweight, well-draining blend (e.g., 50% peat moss + 50% perlite).
- ● Small pots or trays: 3–4 inch diameter with drainage holes (or a seed tray with individual cells).
- ● Watering can or spray bottle: For gentle hydration.
- ○ Heat mat (optional but helpful): To maintain 70–80°F (21–27°C) post-stratification.
- ● Humidity dome or plastic wrap: To retain moisture during germination.
- ● Grow lights: If natural light is insufficient (12–16 hours/day).
- ● Fertilizer: Balanced liquid fertilizer (e.g., 10-10-10) for young seedlings.
- ● Label markers: To track seed pods and planting dates.
- ● Gloves: For handling prickly seed pods (if needed!).
Step-by-step guide to cold stratifying elephant ear seed pods
This tried-and-true method ensures your elephant ear seeds break dormancy reliably.
🌱 Step 1: Harvest and Prepare the Seed Pods
Collect mature seed pods from your elephant ear plants when they turn brown and begin splitting open. The pods should feel dry and papery to the touch. Gently open each pod and remove the seeds—these are the large, dark brown, bean-like seeds you'll work with. Spread them out on a paper towel to dry completely for 24 hours in a warm, dry place.
Here's the thing—don't rush this drying step. If seeds retain any moisture, they'll rot during stratification. You'll know they're ready when they feel completely dry and make a light rattling sound when shaken in the pod. Store them in a sealed container until you're ready to start the cold treatment.
❄️ Step 2: Mix Seeds with Moist Growing Medium
Fill a small container with a mix of 50% perlite and 50% peat moss—this creates an ideal balance of moisture retention and aeration. Moisten the mix until it feels like a wrung-out sponge: damp but not dripping. Spread your dried elephant ear seeds evenly over the surface.
Gently press each seed into the mix just enough to cover it with ¼ inch of the medium. This light covering protects the seeds while allowing moisture to reach them. I like to label my container with the date and variety—trust me, you'll forget which batch you started first after months of waiting.
❄️ Step 3: Cold Stratify for 6-8 Weeks
Place the container in a plastic bag and seal it loosely—this traps humidity while allowing airflow. Store the bag in your refrigerator's crisper drawer where temperatures stay consistently between 35-45°F. Check the seeds every 2 weeks to ensure the medium remains moist but not soggy.
This cold treatment mimics winter conditions, breaking the seed's natural dormancy. You'll see nothing dramatic at first—just keep the patience. After 6-8 weeks, remove the container from cold storage and place it in a warm spot (70°F) to begin germination. The seeds will need warmth to actually sprout, but they won't germinate until they've completed this cold period.
☀️ Step 4: Pot Up Germinated Seeds
Once the seeds begin sprouting (usually within 1-3 weeks after removing from cold), carefully transfer them to individual pots filled with seed starting mix. Plant each seedling at the same depth it was growing in the stratification mix. Water gently but thoroughly to settle the soil around the roots.
Place the pots under grow lights or in a sunny window where they'll receive 12-14 hours of light daily. Elephant ear seedlings grow quickly once they start, so keep the soil consistently moist but never waterlogged. You'll notice the first true leaves emerging within 3-4 weeks—these will be larger and more defined than the initial seed leaves.
🌿 Step 5: Harden Off and Transplant
After the seedlings develop 4-6 true leaves and reach about 6 inches tall, begin hardening them off. Move the pots outdoors to a sheltered spot for 1-2 hours the first day, gradually increasing their time outside over 10-14 days. This slow transition prevents shock when you eventually plant them in the garden.
Transplant your elephant ear seedlings outdoors after the last frost date when soil temperatures reach at least 60°F. Choose a location with partial shade—these tropical plants appreciate protection from intense afternoon sun. Space them 3-4 feet apart to allow for their large, dramatic foliage to spread comfortably.
Tips & tricks for perfect elephant ear seed germination
These simple strategies will help you maximize your success with elephant ear seeds through cold stratification.
Drying Matters: After harvesting, the 24-hour drying period is non-negotiable. I've learned this the hard way—moist seeds will develop mold during stratification. Place them on a paper towel in a single layer, and check periodically. They're ready when they sound like tiny maracas when shaken. Store them in a sealed container with a silica gel packet to absorb any lingering moisture.
Medium Mix Magic: The 50/50 perlite to peat moss ratio is perfect for moisture balance. Perlite adds aeration while peat moss retains just enough moisture. If you don't have perlite, you can substitute coarse sand or even small gravel (about ¼ inch pieces) for better drainage. Just make sure your mix stays damp like a wrung-out sponge—never soggy.
Stratification Strategy: During the 6-8 week cold treatment, consistency is key. I place a small cup of water in the fridge near my seed containers to maintain humidity. Every 2 weeks when I check moisture levels, I also rotate the container to ensure even exposure to cold temperatures. This prevents uneven germination if one side gets colder than the other.
Lighting Insight: Once you move seeds to warm conditions (70°F) for germination, those 12-14 hours of light become critical. Grow lights work best as they provide consistent, full-spectrum light. If using a sunny window, rotate pots daily so all sides get equal exposure. The first true leaves will appear within 3-4 weeks—look for larger, more defined leaves than the initial seed leaves.
Pro Tips for Elephant Ear Seed Pod
- These simple strategies will help you maximize your success with elephant ear seeds through cold stratification.
- Drying Matters: After harvesting, the 24-hour drying period is non-negotiable. I've learned this the hard way—moist s...
- Medium Mix Magic: The 50/50 perlite to peat moss ratio is perfect for moisture balance. Perlite adds aeration while p...
Frequently asked questions
Got questions about growing elephant ear seed pods? You’re not alone! Here are answers to the most common queries—from timing to troubleshooting—to help you succeed with your cold stratification project.
How long does cold stratification take for elephant ear seed pods?
Cold stratification typically requires 6–12 weeks in the fridge. Place moistened seed pods in a sealed bag with damp peat moss or paper towels, then store them at 34–40°F (1–4°C). Patience is key—some seeds may sprout faster, while others need the full timeline. Check periodically for signs of germination!
Can I skip cold stratification and plant seeds directly outdoors?
While possible, germination rates will likely be low and slow. Elephant ear seeds thrive with cold stratification because it mimics natural winter conditions. If you try direct sowing, plant in early spring in a warm, sheltered spot and keep soil consistently moist. For best results, though, follow the cold stratification steps!
What if my elephant ear seeds don’t germinate after stratification?
Don’t panic! Try these fixes:
- Check moisture: Seeds need consistent dampness (not soggy). Re-moisten if dry.
- Test viability: Cut open a seed—if it’s firm and greenish, it’s likely viable. Brown or mushy seeds are done.
- Extend stratification: Some seeds need up to 16 weeks. Give it more time!
- Try warmth: After stratification, move seeds to 70–75°F (21–24°C) to encourage sprouting.
Are there alternatives to cold stratification for elephant ear seeds?
Yes! If you lack fridge space, try:
- Outdoor winter sowing: Plant seeds in fall in a protected outdoor spot (e.g., under a tree). Nature handles the cold work!
- Heat treatment: Soak seeds in hot water (160°F/71°C) for 24 hours before planting (less effective but worth a try).
- Buy pre-sprouted seeds: Some nurseries sell already-stratified elephant ear seeds for faster growth.
How long does it take for elephant ear plants to mature after germination?
Once sprouted, elephant ear plants grow slowly at first but can reach mature size (6–10 ft tall) in 2–5 years, depending on species and conditions. Young plants focus on root development, so avoid transplanting until they’re at least 6 inches tall with several leaves. Patience pays off with stunning foliage!
Wrapping up and next steps
Growing elephant ear seed pods from scratch is a rewarding journey that combines patience with nature’s magic! 🌱 By mastering cold stratification and nurturing your seeds with care, you’ll soon witness these tropical beauties thrive in your garden.
Whether you’re a seasoned gardener or a curious beginner, every step you take brings you closer to a lush, vibrant landscape.
Ready to turn those tiny seeds into towering plants? Start by gathering your supplies—then dive in! Plant your first pod today and watch your green thumb grow stronger with each sprout. 🌿✨