
Lawn
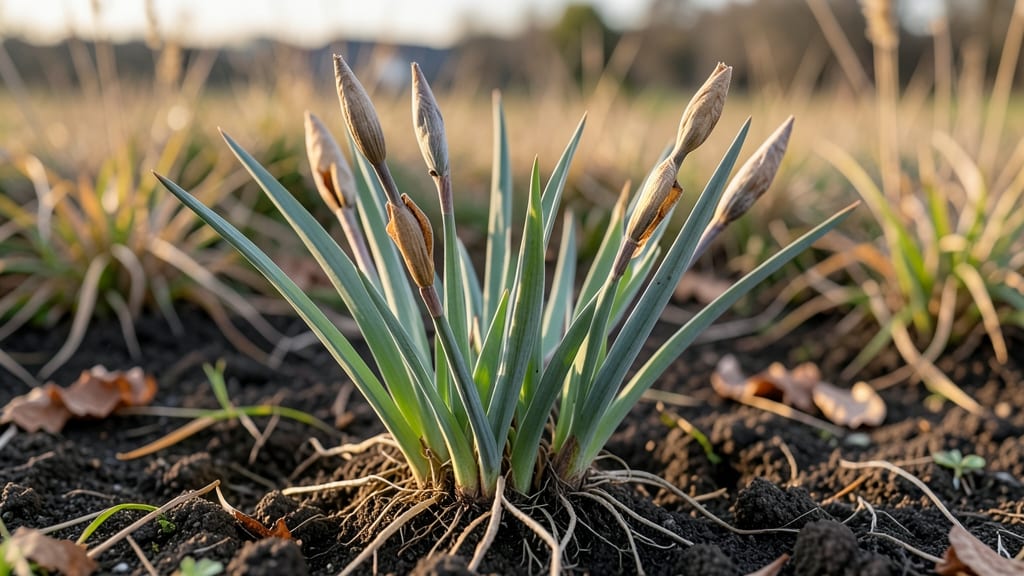
Harvesting dried iris seed pods is like unlocking a free pass to grow new irises year after year—no nursery trips required. 🌱 The secret lies in timing: those papery pods turn from green to tan when ready, and collecting them at the right moment ensures seeds that sprout reliably when you're ready to plant.
You'll need just a few simple tools: sharp pruners for clean cuts, paper bags for drying, and a warm, dry spot to let the pods open naturally. The process takes about 4-6 weeks from harvest to ready-to-plant seeds, and it works whether you're growing bearded, Siberian, or Louisiana irises.
Once dried, the seeds stay viable for 1-2 years if stored properly in a cool, dark place. Plant them in well-draining soil with full sun, and you'll see tiny shoots emerge in 4-6 weeks—no cold stratification needed for iris seeds.
This method transforms what would be garden waste into a low-cost way to expand your iris collection. The first year is all about practice, but once you master it, you'll have more irises than you know what to do with—without spending a dime.
📚 In This Guide
- What you need
- Instructions
- Tips and common mistakes
- Wrapping up and next steps
What you need
- ● Mature iris seed pods: 10–20 fully developed pods (brown, papery, and slightly dried but still intact). Harvest when they’re just starting to split open.
- ● Pruning shears or sharp scissors: 1 pair (sterilized with rubbing alcohol for hygiene). Avoid dull tools—they crush pods!
- ● Paper bags or breathable mesh bags: 2–3 (brown kraft or unbleached cotton works best to prevent moisture buildup).
- ● Drying rack or clean, dry surface: 1 (elevated, like a wire cooling rack or a wooden board with legs for airflow).
- ● Labeling tags & permanent marker: 1 pack (to note pod variety and harvest date).
- ● Patience (and a sunny spot!): 2–4 weeks of consistent drying time.
- ● Dehumidifier or fan: 1 (for low-humidity climates to speed up drying).
- ● Desiccant packets (silica gel): 1–2 (place in bags to absorb excess moisture if humidity is high).
- ● Glass jars with lids: 2–3 (for long-term storage after drying).
- ● Fine-mesh sieve: 1 (to separate seeds from chaff after pods are fully dried).
- ● Notebook or garden journal: 1 (to track germination rates and pod performance year-over-year).
Step-by-Step guide to harvesting and drying iris seed pods
Here's how to collect, dry, and store iris seed pods for reliable germination whenever you're ready to plant.
🌱 Step 1: Identify and Harvest Mature Seed Pods
Look for iris seed pods that have turned a papery brown color and begun to split open naturally—this signals full maturity. I harvest them in late summer or early fall when pods are dry but haven't released seeds yet. Use clean, sharp pruning shears to snip the entire pod from the stalk, leaving about ½ inch of stem attached.
Handle pods gently to avoid crushing them. If you find any pods that have already split open, collect the seeds immediately and dry them separately—they won't store as well as intact pods. Place harvested pods in a paper bag or open mesh container to allow airflow while you prepare them for drying.
🌿 Step 2: Prepare Pods for Drying
Remove any remaining flower stalks or debris from the pods, but avoid touching the seeds inside. Spread the pods out in a single layer on a clean, dry surface like a baking sheet lined with parchment paper. I like to place them in a well-ventilated area with indirect sunlight—direct sun can overheat and damage the seeds.
The goal is to dry the pods slowly over 2-4 weeks until they become completely brittle and crumble easily when pressed between your fingers. This slow drying process preserves seed viability. Check pods daily and stir them gently to ensure even drying on all sides.
💧 Step 3: Complete the Drying Process
Once the pods are thoroughly dry, place them in a sealed container with a desiccant packet to absorb any remaining moisture. I use small glass jars with tight-fitting lids for storage. Store the pods in a cool, dark place where temperatures stay between 40-60°F—this prevents premature germination and maintains seed viability for up to 2 years.
To test if pods are properly dried, gently squeeze one—if it crumbles into powdery fragments, it's ready for storage. If any pods feel slightly damp or pliable, return them to the drying surface for another week. Properly dried pods will keep seeds viable even through winter for spring planting.
☀️ Step 4: Extract and Plant Seeds When Ready
When you're ready to plant, open the dried pods carefully and remove the small, flat seeds inside. Iris seeds are extremely light and can easily blow away, so I work near the planting area to minimize handling. For best results, sow seeds immediately after extraction in well-draining soil mixed with a little sand to prevent rot.
Press seeds lightly into the soil surface—don't bury them—since they need light to germinate. Keep the soil consistently moist but not soggy, and place the container in a warm, bright spot with indirect light until germination occurs, which typically takes 4-8 weeks. Patience is key with iris seeds—they germinate slowly but reliably when stored properly.
Tips & tricks for perfect iris seed pod preservation
Took me years of trial and error to perfect these techniques—here's how to ensure your iris seeds stay viable for planting.
Harvesting Precision: Use your pruning shears to cut pods at the exact ½-inch stem length mentioned in Step 1. This length prevents the pods from falling apart during drying while still allowing the stem to remain attached for easier handling. I've found that pods with stems attached dry more evenly than those completely severed, reducing the risk of moisture pockets forming inside.
Drying Environment: The 2-4 week drying period in Step 2 is crucial, but the environment matters just as much. I've had the best success placing pods in a well-ventilated area with indirect sunlight—think of it like a gentle greenhouse effect. Direct sunlight can create hot spots that cook the seeds, while poor ventilation leads to mold. A simple mesh screen or open window area works perfectly, just avoid closed spaces like closets where humidity builds up.
Storage Wisdom: The cool, dark storage range of 40-60°F in Step 3 isn't just arbitrary—it's the ideal temperature range to prevent premature germination. I store my pods in the back of my refrigerator where it stays consistently around 50°F. This mimics natural winter conditions, which is why iris seeds often germinate best in spring after being stored through winter. The desiccant packets are non-negotiable—without them, moisture can build up inside the container and reduce viability.
Germination Secret: When you're ready to plant, the key is working quickly with those tiny seeds. I've learned to lay out a small tray or shallow container near my planting area and place the dried pods directly on it. This prevents seeds from blowing away during extraction. The 4-8 week germination window in Step 4 is wide for a reason—iris seeds are sensitive to temperature fluctuations, so maintaining that warm, bright spot with indirect light is essential for consistent results.
Pro Tips for Dried Iris Seed Pods
- Took me years of trial and error to perfect these techniques—here's how to ensure your iris seeds stay viable for planting.
- Harvesting Precision: Use your pruning shears to cut pods at the exact ½-inch stem length mentioned in Step 1.
- Drying Environment: The 2-4 week drying period in Step 2 is crucial, but the environment matters just as much.
Frequently asked questions
When is the best time to harvest dried iris seed pods?
The ideal time to harvest iris seed pods is in late summer to early fall (August–September), once the pods turn tan or brown and begin to split open naturally. Avoid harvesting too early—the seeds won’t be fully mature, or too late, as they may scatter or sprout prematurely. Look for pods that are dry and papery to the touch.
How do I store dried iris seed pods to maintain viability?
Store harvested pods in a cool, dry place (like a paper envelope or breathable bag) away from direct sunlight. For long-term storage (up to 2 years), place them in the fridge or freezer in a sealed container with a drying agent (like silica gel) to prevent moisture buildup. Label them with the harvest date!
How long does it take for iris seeds to germinate?
Germination can take 3–12 months—patience is key! Some seeds may sprout within weeks, while others need a cold stratification period (mimicking winter) to break dormancy. Plant them in well-draining soil and keep them moist but not soggy until growth appears. A mini greenhouse or cold frame can help speed up the process.
Can I use dried iris seed pods for anything other than planting?
Beyond gardening, dried iris pods add textural interest to floral arrangements, crafts (like wreaths or potpourri), or even as natural decoration for home decor. Just ensure they’re fully dry and pest-free before using. Bonus: Their unique shape makes them a conversation starter in dried flower bouquets!
What should I do if my iris seed pods develop mold or pests?
If you spot mold, discard the affected pods immediately—moldy seeds won’t germinate and can harm other plants. For pests (like weevils or mites), freeze the pods for 48 hours to kill eggs/larvae, then store them in an airtight container with dried lavender or cedar chips as a natural repellent. Always inspect pods before storage!
Wrapping up and next steps
Harvesting and drying iris seed pods is a simple yet rewarding way to ensure a steady supply of seeds for year-round germination—no stress required! 🌱 With the right timing, tools, and patience, you can transform these delicate pods into a reliable resource for expanding your garden or sharing with fellow green thumbs.
Whether you're a seasoned gardener or just starting out, every dried seed pod is a step toward a thriving, self-sustaining lawn or flowerbed.
Ready to take the next step? Start small—try harvesting a few pods this season, experiment with germination techniques, and watch your confidence (and iris collection!) grow. Happy growing! 🌿✨