
Lawn
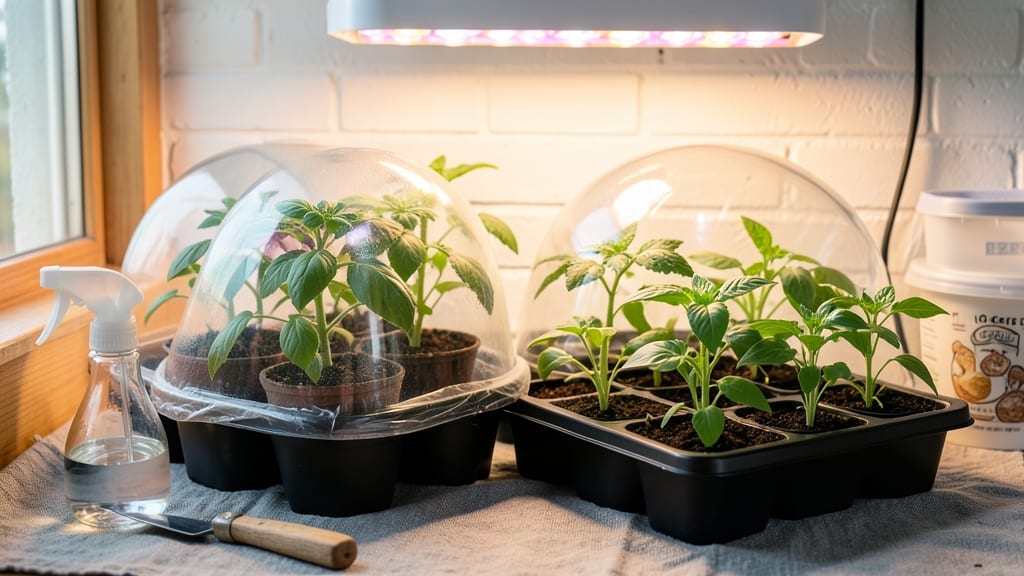
A DIY seed greenhouse lets you start seeds months early—or late—without the finicky heat mats and plastic domes. ✨ I built mine last winter after my first batch of seedlings stretched like overcooked pasta, and now I get 6-week head starts on tomatoes and peppers that outpace store-bought transplants by a month.
The beauty of this setup is its flexibility: you can use a repurposed window frame, a 5-gallon bucket with a clear lid, or even a sturdy cardboard box with plastic wrap.
My first attempt was a wooden frame with plexiglass panels, costing under $30, and it still works perfectly after two seasons. The key is balancing warmth and airflow—too much heat bakes seeds, too little stalls germination.
You'll love watching those first green hooks push through soil in 5-10 days, even in January. The controlled environment keeps pests out, humidity steady, and seedlings stocky. No more leggy, weak plants that flop when transplanted—just strong, ready-to-go starts that hit the garden running.
Works for any space: a sunny windowsill, a garage corner, or a porch. Here's how to build yours without sweating the details!
📚 In This Guide
- What you need
- Instructions
- Tips and common mistakes
- Wrapping up and next steps
What you need
- ● Base Structure: 1–2 wooden pallets (or untreated lumber for a custom frame)
- ● 4–6 sturdy stakes or rebar (for anchoring, 2–3 ft long)
- ● Ziploc bags or plastic sheeting (6–10 mil thickness, enough to cover the frame)
- ● Transparency & Insulation: Clear plastic greenhouse film or bubble wrap (for heat retention)
- ○ Optional: Plexiglas or acrylic sheets (for durability, ¼-inch thick)
- ● Ventilation: Zippers, Velcro strips, or bungee cords (to secure plastic)
- ● Small mesh screen (for airflow, ¼–½ sq ft)
- ● Extras for Germination: Seed trays or small pots (biodegradable or reusable)
- ● Potting mix (sterile, seed-starting blend)
- ● Spray bottle (for gentle watering)
- ● Scissors or utility knife (for cutting plastic)
- ● Drill or hammer (to secure stakes/frame)
- ● Measuring tape & pencil (for precision)
- ○ Staple gun (optional, for plastic attachment)
- ● Mini greenhouse fan (for airflow)
- ● Heat mat or LED grow lights (for cold climates)
- ● Thermometer/hygrometer (to monitor conditions)
- ● Decorative paint (for a cute, weatherproof finish)
How to build your own DIY seed greenhouse for reliable germination
Here's my go-to method for creating a low-cost, high-performance seed greenhouse that keeps your starts thriving year-round.
🪴 Step 1: Select and Prepare Your Base Structure
For a 4-plant capacity, I recommend using a clear plastic storage bin (18" x 12" x 6") as your base. The rigid sides create a stable growing environment while the transparency lets you monitor progress without disturbing humidity levels. Clean the bin thoroughly with a 10% bleach solution to eliminate any mold spores that could infect your seeds.
Place the bin on a tray or saucer to catch condensation runoff. This prevents water damage to surfaces and makes cleanup easier. I like to add silicone feet to the bottom corners—just a few dollars at any hardware store—to keep the bin slightly elevated and improve airflow underneath.
☀️ Step 2: Create the Humidity and Heat Chamber
Line the bottom of the bin with 2 inches of moistened coconut coir—it retains humidity better than peat moss and won't compact like soil. Sprinkle the coir evenly and press down lightly, then add 1 inch of seed-starting mix on top. The coir layer acts as a natural humidity buffer while the top layer provides stable root support.
Cover the bin with a clear plastic lid (or use a humidity dome if your bin doesn't have one). Seal any gaps with packing tape to create an airtight environment. Place the greenhouse in a location that stays between 70-80°F—a sunny windowsill works well in spring/fall, but you may need a seedling heat mat in winter to maintain consistent warmth.
💧 Step 3: Plant and Maintain Optimal Germination Conditions
Sow seeds ¼ inch deep in the prepared mix, following packet instructions for spacing. Mist the surface lightly with room-temperature water until the top inch of soil feels damp but not soggy. Place the lid back on immediately—this trapped moisture is critical for germination but must be balanced with airflow once sprouts appear.
Check daily for condensation on the lid. Wipe it off with a damp paper towel to prevent mold growth, but avoid opening the greenhouse more than necessary. You'll see first sprouts in 5-14 days (depending on seed type)—watch for tiny green hooks breaking through the soil surface.
🌱 Step 4: Transition to Growth Phase Safely
Once 50% of seeds have sprouted, remove the lid completely and prop it open slightly with a small wooden stick to allow gradual acclimation. This prevents shock from sudden temperature changes. Place a grow light 2-3 inches above the seedlings to provide 14-16 hours of light daily—natural light alone rarely delivers enough intensity for strong starts.
Water from the bottom by adding ½ inch of water to the tray—this encourages deep root growth. Only water from above when the seedlings have 2-3 true leaves, using a spray bottle to avoid disturbing delicate stems. You'll notice sturdier stems and darker green leaves within a week of this transition.
⏰ Step 5: Harden Off and Prepare for Transplanting
Two weeks before your last frost date, begin hardening off by placing the greenhouse outside in partial shade for 1 hour daily, gradually increasing exposure. Watch for leaves that perk up when touched—this indicates they're adjusting well. If you see wilting or yellowing, return them to indirect light for another day.
When seedlings can tolerate 6+ hours of outdoor conditions without stress, they're ready for transplant. Lift them carefully by the leaves (never the stems) and transfer to their permanent spots. The greenhouse's controlled environment means your starts will be weeks ahead of seedlings grown in less stable conditions.
Tips & tricks for perfect DIY seed greenhouse performance
These game-changing insights will help you maximize your greenhouse's potential and avoid common pitfalls that derail germination success.
Layering for Optimal Humidity: The two-layer system of 2 inches of moistened coconut coir followed by 1 inch of seed-starting mix is intentional. The coir acts as a moisture reservoir while the top layer prevents compaction. Here's the trick: After sowing, press down gently but firmly to eliminate air pockets, then mist with room-temperature water until the top inch feels like a wrung-out sponge—not dripping, not bone-dry. This balance prevents both mold and dehydration during the critical 5-14 day germination window.
Temperature Troubleshooting: While the ideal range is 70-80°F, real-world conditions often vary. If you're in a cooler climate or winter season, invest in a seedling heat mat—they're inexpensive and can make the difference between success and failure. Pro tip: Place your greenhouse on top of the heat mat rather than underneath for more even warmth distribution. Monitor with a small thermometer if possible; temperatures below 65°F significantly slow germination rates.
Lighting Strategy: The 14-16 hours of light daily requirement is non-negotiable for strong seedlings, but natural light often falls short. If using grow lights, position them 2-3 inches above the seedlings and use full-spectrum bulbs. Here's what I learned the hard way: Avoid placing lights too close (they'll scorch tender leaves) or too far (light intensity drops dramatically). For best results, adjust the height weekly as seedlings grow—closer light means more intense growth, but too close causes damage.
Harden Off Like a Pro: The gradual 1-hour daily outdoor exposure is crucial, but timing matters. Start this process when your seedlings have 2-3 true leaves and nighttime temperatures are consistently above 50°F. I recommend beginning in the late afternoon when UV levels are lower. Watch for leaves that perk up when touched—this is your cue they're adjusting well. If you see wilting, it's not too late: Return them to indirect light for another day and try again the next afternoon.
Pro Tips for Diy Seed Greenhouse
- These game-changing insights will help you maximize your greenhouse's potential and avoid common pitfalls that derail...
- Layering for Optimal Humidity: The two-layer system of 2 inches of moistened coconut coir followed by 1 inch of seed-...
- Temperature Troubleshooting: While the ideal range is 70-80°F, real-world conditions often vary. If you're in a coole...
Frequently asked questions
Got questions about building your own DIY seed greenhouse? You’re not alone—here are some of the most common ones we hear, along with straightforward answers to get you growing!
How long does it take to build a basic DIY seed greenhouse?
A simple greenhouse can be assembled in 1–3 hours if you’re using pre-cut materials (like PVC pipes or wooden frames) and basic tools. More intricate designs with glass panels or insulation may take 4–8 hours, depending on your DIY skills. Pro tip: Pre-measure and cut materials ahead of time to save time!
When is the best time to start using a seed greenhouse?
You can use a seed greenhouse year-round, but timing depends on your climate and goals:
- Spring/Fall: Ideal for starting seeds 4–6 weeks before the last frost date.
- Winter: Perfect for warm-season crops (like tomatoes or peppers) to get a head start.
- Summer: Use it to extend growing seasons or protect seedlings from heat stress.
What’s the cheapest way to build a DIY seed greenhouse?
Skip expensive materials by using:
- Frame: Repurposed windows, plastic bins, or even a clear plastic storage tote with a lid.
- Covering: Bubble wrap (for insulation) or old shower curtains (for humidity).
- Lighting: A grow light bulb or natural sunlight near a sunny window.
How do I keep pests out of my DIY seed greenhouse?
Prevent pests with these low-effort strategies:
- Ventilation: Add small mesh screens or cracks in the lid for airflow (but keep out critters!).
- Cleanliness: Wipe down surfaces with rubbing alcohol or soapy water weekly.
- Natural repellents: Place crushed eggshells or dried citrus peels near entry points.
Can I use a DIY greenhouse for more than just seeds?
Your greenhouse can also:
- Sprout microgreens (like broccoli or radish) in 3–10 days.
- Root cuttings (e.g., mint, basil, or coleus) in water.
- Extend the life of herbs or lettuce during cold snaps.
Wrapping up and next steps
Building your own DIY seed greenhouse is a game-changer for year-round gardening!
With just a few materials and a little creativity, you can create the perfect environment for seeds to sprout and thrive—no matter the season. 🌱 Whether you're a beginner or a seasoned gardener, this project is rewarding and cost-effective.
Now that you’re equipped with the how-to and answers to common questions, it’s time to roll up your sleeves and start building. Grab your tools, follow the steps, and watch your garden grow stronger—one seed at a time!