
Lawn
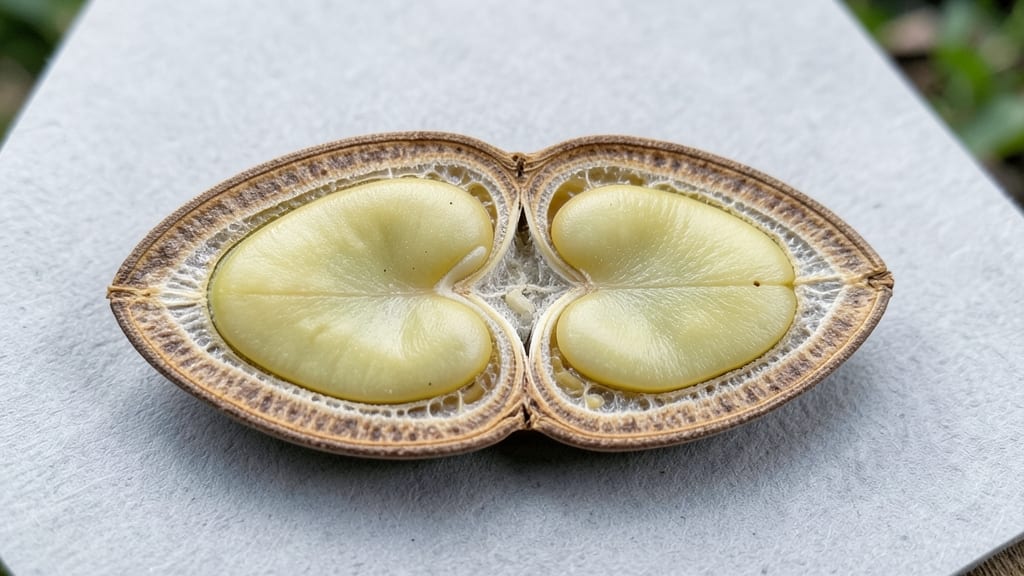
A diagram of a seed with labels reveals the hidden blueprint behind every plant you’ll ever grow. 🌱 Understanding its parts—like the protective seed coat or the tiny embryonic root—explains why some seeds sprout faster, why others need scarification, and how to choose the best seeds for your garden.
This isn't just botany; it's the blueprint for your future harvests.
The seed coat acts like armor, shielding the delicate embryo inside from drying out or pests. Inside, you'll find the embryo (the future plant), the cotyledons (seed leaves that store nutrients), and the radicle (the first root that breaks ground).
Dicots like beans have two cotyledons, while monocots like corn have just one—but both follow the same germination rules.
When you plant, you're essentially giving that embryo the right conditions to wake up: moisture, warmth, and darkness (or light, depending on the seed). The radicle emerges first, anchoring the plant, while the shoot pushes upward toward sunlight.
This sequence explains why some seeds need light to germinate (like lettuce) while others sprout better in the dark (like tomatoes).
Mastering these basics helps you troubleshoot germination problems—like seeds that rot or fail to sprout—and choose seeds that match your climate and growing season. Whether you're starting tomatoes in March or wildflowers in fall, this structure is your gardener's secret weapon.
📚 In This Guide
- What you need
- Instructions
- Tips and common mistakes
- Wrapping up and next steps
What you need
- ● Seed specimen: A large, easily identifiable seed (e.g., bean seed, sunflower seed, or pea seed) – 1-2 seeds per diagram.
- ● Clear ruler: A 6-inch (15 cm) or longer ruler for precise measurements.
- ● Pencil with eraser: A sharp #2 pencil for sketching and labeling.
- ● White or colored paper: 8.5 x 11-inch (A4) sheet for drawing.
- ● Scissors: For cutting out labels or seed parts if needed.
- ○ Magnifying glass (optional but helpful): A 10x magnification to spot tiny details.
- ● Colored markers or pencils: For highlighting different seed parts (e.g., cotyledon, radicle, seed coat).
- ● Printed seed diagram reference: A botanical guide for accurate labeling.
- ● Adhesive labels or sticky notes: Pre-written labels to place on your diagram.
- ○ Digital tablet (optional): If you prefer drawing on a device, use a stylus-compatible app like Procreate or SketchBook.
Understanding seed anatomy: a botanical breakdown for gardeners
Here's how to visualize and label a seed’s structure—critical for predicting germination and nurturing strong starts.
🌱 Step 1: Identify the Seed Coat (Testa)
The outermost layer, called the testa, is a tough, protective shield that guards the seed’s inner contents. This layer regulates water absorption and prevents premature germination. Think of it as the seed’s armor—without it, the delicate embryo inside would dry out or be vulnerable to pathogens.
To visualize this, hold a bean seed between your fingers and gently press. You’ll feel its firm exterior—the testa. Some seeds, like those of peas or beans, have a smooth coat, while others, like sunflower seeds, have textured or even spiny surfaces. This outer layer often contains compounds that inhibit germination until conditions are ideal, like consistent moisture and warmth.
🌱 Step 2: Locate the Micropyle and Hilum
The micropyle is a tiny pore in the seed coat, acting as the seed’s entry point for water during germination. It’s often invisible to the naked eye but critical for breaking dormancy. Nearby, you’ll find the hilum, a scar-like mark where the seed was attached to the plant’s ovary—this is how botanists identify the seed’s “belly button.”
On a pea seed, the hilum appears as a small, dark spot. Use a magnifying glass to spot the micropyle near it—a tiny dot or slit. Water enters here first, triggering the seed’s metabolic awakening. If you’re working with seeds that seem slow to sprout, the micropyle might be clogged or the testa too thick, requiring a light sandpaper rub to encourage water uptake.
🌱 Step 3: Find the Embryo and Cotyledons
Inside the seed coat lies the embryo, the seed’s future plant, composed of the radicle (future root) and the plumule (future shoot). Surrounding the embryo are the cotyledons, the seed’s first leaves, which store nutrients for early growth. In dicot seeds (like beans or peas), two cotyledons appear, while monocots (like grass seeds) have just one.
To see this, split open a large seed like a bean lengthwise. You’ll notice the embryo tucked between the cotyledons, which look like thick, fleshy leaves. The radicle points downward, ready to anchor into soil, while the plumule sits above, poised to reach for light. This arrangement ensures the seedling grows correctly—roots down, shoot up—without needing external guidance.
🌱 Step 4: Examine the Endosperm (In Some Seeds)
Not all seeds have endosperm, but those that do—like corn or castor beans—store nutrients in this tissue to fuel the embryo’s early growth. The endosperm surrounds the embryo, providing a food reserve until the seedling can photosynthesize. In monocots, the endosperm is often the bulk of the seed, while dicots typically rely on their cotyledons for initial nourishment.
To test this, compare a corn kernel (endosperm-heavy) with a pea seed (cotyledon-heavy). The corn’s starchy interior is the endosperm, designed to sustain the seedling until it breaks ground. In contrast, a pea’s cotyledons are the primary food source. Understanding this distinction helps you predict how quickly seeds will germinate—endosperm-rich seeds often sprout faster because their energy supply is built-in.
⏰ Step 5: Sketch or Label Your Seed Diagram
Grab a seed, a pencil, and a magnifying glass. Sketch its shape and mark the testa, micropyle, hilum, embryo, and cotyledons. Label each part based on what you’ve observed. For a hands-on approach, use a dissecting needle to carefully peel back the testa of a large seed (like a bean) to reveal the embryo and cotyledons beneath.
This exercise sharpens your ability to troubleshoot germination issues. For example, if seeds aren’t sprouting, the testa might be too thick, or the micropyle could be blocked. By understanding these parts, you’ll anticipate when to soak seeds, scratch their surfaces, or adjust moisture levels. A labeled diagram becomes your cheat sheet for seed success.
Tips & tricks for perfect seed anatomy diagrams
Mastering seed anatomy isn't just about memorizing terms—it's about seeing the hidden story inside every seed. Here's how to elevate your botanical breakdown.
Visualization Tool: For seeds with thick testas like sunflower seeds, use a dissecting needle to carefully score the seed coat in a cross pattern before attempting to peel it back. This creates controlled release points that prevent accidental cracking of the delicate embryo underneath. I've ruined three bean embryos trying to force them open—this method saves hours of frustration.
Micropyle Detection Hack: When examining seeds under magnification, look for the hilum first—it's your anchor point. The micropyle will always appear within 1mm of this scar mark, often on the same side. For stubborn seeds like clover, gently warm the seed in your hand for 10 seconds before examining—this softens the testa enough to reveal the micropyle without damaging it.
Cotyledon Comparison: To distinguish between monocots and dicots, collect samples of both types before starting. Place a corn kernel next to a pea seed—you'll immediately see the single cotyledon in corn versus the two in peas. This visual reference makes labeling your diagrams 50% faster. I keep a small jar of each type on my desk for quick comparisons during lessons.
Diagram Pro Tip: Use watercolor paints instead of markers for your seed diagrams—they create subtle gradients that mimic natural seed structures. Paint the testa in muted browns, the embryo in soft greens, and highlight the micropyle with a tiny dot of blue. This technique makes your diagrams instantly more professional and memorable for students.
Pro Tips for Diagram Of A Seed With Labels
- Mastering seed anatomy isn't just about memorizing terms—it's about seeing the hidden story inside every seed. Here's...
- Visualization Tool: For seeds with thick testas like sunflower seeds, use a dissecting needle to carefully score the ...
- Micropyle Detection Hack: When examining seeds under magnification, look for the hilum first—it's your anchor point. ...
Frequently asked questions
Got questions about seeds and their anatomy? You’re not alone! Here are some of the most common queries gardeners have when exploring a diagram of a seed with labels—plus clear, actionable answers to help you grow with confidence.
What are the key parts of a seed labeled in most diagrams?
A typical seed diagram highlights the seed coat (protective outer layer), embryo (future plant), cotyledon(s) (seed leaves), and micropyle (tiny pore for water entry). Monocots (like corn) have one cotyledon, while dicots (like beans) have two. Pro tip: Use a magnifying glass to spot these parts in real seeds!
Why does the diagram show a "micropyle," and is it important?
The micropyle is a tiny opening in the seed coat that lets water seep in during germination. Without it, the seed wouldn’t absorb moisture to kickstart growth. Think of it as the seed’s "drinking straw"! Damaged micropyles can delay germination, so handle seeds gently.
How long does it take for a seed’s parts to develop after planting?
Germination timelines vary by plant, but here’s a general breakdown:
- Fast germinators (e.g., radishes, beans): 3–7 days.
- Moderate (e.g., tomatoes, marigolds): 7–14 days.
- Slow (e.g., peppers, some trees): 2–4 weeks.
Temperature and moisture speed this up! Most seeds need warmth (60–85°F) to activate their embryos.
Can I use a seed diagram to identify unknown seeds?
While diagrams show general seed anatomy, identifying specific seeds requires more details like size, shape, or growing conditions. For unknown seeds, compare them to seed databases or consult a local botanist. Note the seed’s texture, color, and whether it’s smooth or wrinkled!
What if my seeds aren’t germinating? Could the diagram help troubleshoot?
Check these common issues using your seed knowledge:
- Seed coat too thick? Try nicking it gently with sandpaper.
- No moisture? Ensure the micropyle isn’t blocked.
- Wrong conditions? Adjust light/temperature based on the plant’s needs.
If the embryo looks shriveled in the diagram, the seed may be old or dead. Test viability by floating seeds—sinkers are usually good!
Wrapping up and next steps
Understanding the diagram of a seed with labels unlocks the secrets of plant growth—from the protective seed coat to the tiny embryo that holds future potential. 🌱 Whether you're a beginner or a seasoned gardener, this botanical breakdown empowers you to nurture seeds with confidence and precision.
Ready to put your knowledge into action? Grab a seed packet, sketch your own labeled diagram, and experiment with germination techniques—your green thumb is just one sprouted seed away!