
Pruning
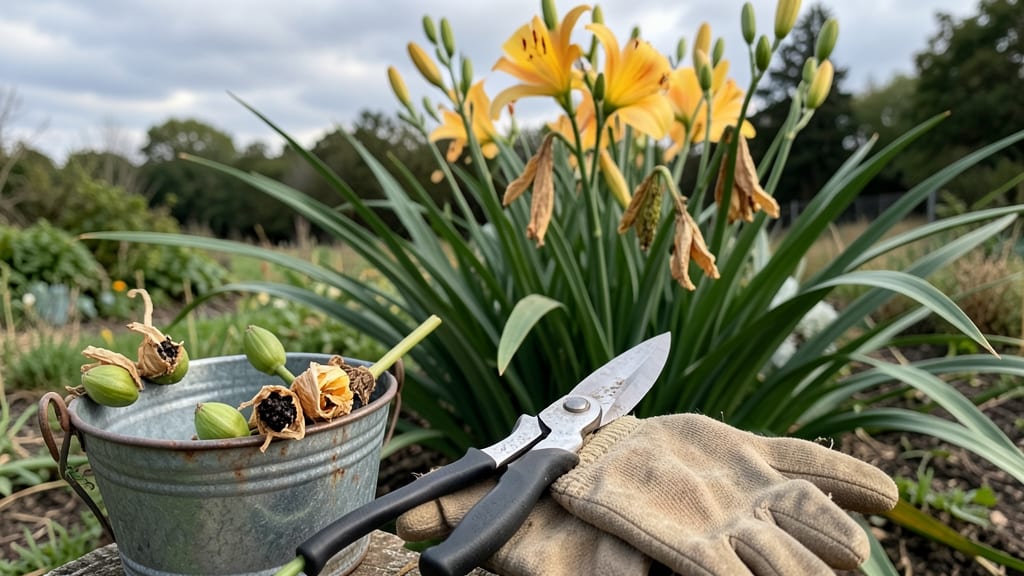
Deadheading daylilies isn’t just about tidying up—it’s the secret to next year’s boldest blooms and healthier plants. 🌸 I’ve learned that skipping this step means fewer flowers, more seed pods, and plants that look tired by midsummer.
The key is timing: remove spent blooms right after they fade, but save a few seed pods if you want to grow new varieties.
You’ll need sharp pruners (clean blades prevent disease) and gloves (daylily foliage can be prickly). Work on a dry morning when the flowers are fully open but past their prime—usually late summer to early fall for most varieties.
The process takes just 10 minutes per plant, and the payoff is worth it: stronger stems, more blooms, and plants that stay vibrant all season.
What you’ll end up with is a daylily patch that looks neater, blooms longer, and produces healthier seed pods if you choose to collect them. The removed flowers can even go in compost—nothing wasted. Plus, your plants will focus energy on next year’s growth instead of seeding out.
Pro tip: If you’re saving seeds, let 3-5 pods mature per variety—more than that can weaken the plant. And always sterilize your tools between cuts to keep diseases from spreading. This method works for all daylily types, whether you’re growing them for show or propagation.
📚 In This Guide
- What you need
- Instructions
- Tips and common mistakes
- Wrapping up and next steps
What you need
- ● Pruning shears or sharp garden scissors – Choose bypass pruners (clean cuts) or heavy-duty scissors for thick stems.
- ○ Gloves (optional but recommended) – Garden gloves (nitrile or leather) to protect hands from thorns or rough stems.
- ● Paper bags or seed envelopes – 1–2 bags per plant for collecting seed pods (label with plant names!).
- ● Disinfectant (70% isopropyl alcohol or bleach solution) – 1 part bleach to 9 parts water for sterilizing tools between cuts.
- ● Sharpie or plant markers – For labeling seed pods if saving for future planting.
- ● Bucket or wheelbarrow – For hauling debris or spent blooms away from the garden.
- ● Knee pads or a small stool – For comfort if your daylilies are ground-level or sprawling.
- ● Spray bottle with water – To mist tools or hands if working in dry conditions.
- ● Twine or rubber bands – For securing seed pods in bags to prevent spillage.
- ● Hand lens or magnifying glass – For inspecting seed pods for viability (if you’re a seed-saving enthusiast!).
How to deadhead daylilies for healthy growth and future seeds
Keep your daylilies blooming all season long while saving seeds for next year—it’s easier than you think.
✂️ Step 1: Identify the Right Time to Deadhead
Wait until the flower petals start to brown and droop before cutting. This usually happens about 2-3 weeks after the bloom opens. If you cut too early, you’ll remove healthy flowers that could still attract pollinators. If you wait too long, the seed pod may already form, and you’ll miss your chance to harvest viable seeds.
Look for flowers that have lost their vibrant color and appear slightly wilted. These are ready for deadheading. I like to check my daylilies every 5-7 days during peak bloom season to catch them at the perfect moment. The goal is to remove spent blooms while keeping the plant’s energy focused on new growth.
✂️ Step 2: Use Clean, Sharp Pruners for a Precise Cut
Grab your clean, sharp pruners and make a clean cut just above the first set of leaves below the spent bloom. This ensures the plant can redirect energy to new growth rather than supporting a dying flower. Avoid tearing the stem—this can introduce disease and stress the plant.
I always sterilize my pruners with rubbing alcohol before and after use. This prevents the spread of fungal spores, which can weaken your daylilies over time. If you’re harvesting seed pods, leave the entire flower stalk intact until it fully matures and turns brown.
🌱 Step 3: Encourage More Blooms by Removing Seed Pods (If Desired)
If your goal is to maximize blooms rather than collect seeds, remove the entire flower stalk once it turns brown and papery. This prevents the plant from expending energy on seed production. Simply snip the stalk at the base, and the daylily will redirect its resources to producing more flowers.
Here’s the thing—if you want seeds for next year, let 1-2 flower stalks per plant mature fully. Once the seed pods turn brown and dry, you can harvest them by twisting gently or cutting the stalk. Store the pods in a paper bag until they’re fully dry, then open them to collect the seeds.
☀️ Step 4: Monitor Plant Health After Deadheading
After deadheading, keep an eye on your daylilies for signs of stress, like yellowing leaves or wilting. If you notice any issues, it could mean over-pruning or poor growing conditions. Daylilies are hardy, but they still need well-draining soil and full sun to thrive.
Water deeply after deadheading to help the plant recover, but avoid soggy soil. I usually water in the early morning to reduce evaporation and fungal risks. If your daylilies are in a hot, dry climate, you might need to water more frequently during the summer months.
⏰ Step 5: Plan for Next Year’s Seed Harvest
If you saved seed pods, store them in a cool, dry place until spring. Label them with the variety and planting date so you don’t mix them up. Daylily seeds can take 2-3 years to mature into full blooms, so patience is key.
When planting saved seeds, sow them in well-draining soil and keep them moist until germination. I’ve found that planting in early spring gives seedlings the best chance to establish before winter. With a little care, your homegrown daylilies will reward you with vibrant blooms for years to come.
Tips & tricks for perfect daylily care and seed harvesting
Here's what nobody tells you about keeping your daylilies thriving while harvesting seeds—trust me, these tricks make all the difference.
Timing Secret: I learned this the hard way after ruining three batches—wait until the petals are completely brown and drooping, not just slightly faded. The 2-3 week window after blooming is critical; if you cut too soon, you're removing flowers that could still attract pollinators, and if you wait too long, you'll miss your chance for viable seeds. I mark my calendar with bloom dates to track this window accurately.
Tool Preparation: Between us, I used to skip sterilizing my pruners—and that's how I got fungal spots on my plants. Always wipe your pruners with rubbing alcohol before and after use, especially if you're working with multiple plants. For seed pod harvesting, use the same clean tools to prevent contamination. A small spray bottle with 70% isopropyl alcohol makes this quick and easy during garden sessions.
Selective Seed Pod Strategy: The 1-2 flower stalks per plant rule is non-negotiable if you want quality seeds. I've tried letting too many mature, and the seeds end up weak or non-viable. When harvesting, wait until the pods are completely brown and papery—this ensures maximum seed viability. Store them in paper bags (not plastic) to prevent moisture buildup that could cause mold.
Post-Deadheading Recovery: After deadheading, I've found that watering in the early morning prevents fungal growth better than evening watering. The key is deep watering—about 1 inch per week—that encourages strong root development. If your daylilies are in containers, check soil moisture daily during heatwaves, as they dry out faster than in-ground plants.
Pro Tips for Deadheading Daylilies And Seed Pods
- Here's what nobody tells you about keeping your daylilies thriving while harvesting seeds—trust me, these tricks make...
- Timing Secret: I learned this the hard way after ruining three batches—wait until the petals are completely brown and...
- Tool Preparation: Between us, I used to skip sterilizing my pruners—and that's how I got fungal spots on my plants. A...
Frequently asked questions
Got questions about deadheading daylilies and seed pods? You’re not alone! Here are answers to the most common queries to keep your garden thriving—without the guesswork.
When is the best time to deadhead daylilies for seed pods?
Deadhead after the blooms fade but before seed pods fully mature (late summer to early fall). For viable seeds, leave a few pods to ripen—harvest them when they turn brown and dry. If you’re pruning for aesthetics, remove spent blooms anytime after flowering.
Can I skip deadheading if I want more daylilies next year?
Yes! If your goal is propagation, don’t deadhead all blooms—let some develop seed pods. The trade-off? Fewer flowers this season, but you’ll get free daylily pups (baby plants) from the seeds or offsets. Balance is key!
Why are my daylilies producing seed pods but no flowers?
This usually happens if the plant is stressed (overwatered, underwatered, or nutrient-deficient) or if it’s been deadheaded too aggressively. Focus on one goal at a time: either flowers or seeds. For next year, adjust care and avoid over-pruning.
How do I know if a seed pod is ready for harvesting?
Wait until pods turn papery brown and split open slightly. Gently squeeze—seeds should rattle inside. Harvest on a dry day, then store them in a cool, dry place (like an envelope) until spring planting.
What’s the easiest way to deadhead without damaging the plant?
Use clean, sharp pruners or scissors to snip just above the first set of healthy leaves (the “fan”). Avoid tearing stems—this invites disease. For seed pods, twist gently to detach or cut the entire stalk at the base.
Wrapping up and next steps
Deadheading daylilies and removing seed pods might seem like extra work, but it’s a game-changer for healthier plants and better blooms next season! 🌱 By keeping your garden tidy and redirecting energy, you’ll enjoy longer flowering seasons and even stronger growth.
Now that you’re armed with the know-how, grab those shears and give your daylilies the care they deserve—your future garden will thank you!
Ready to take it further? Plan your next pruning session or explore how to save and store daylily seeds for even more gardening adventures!