
Picking
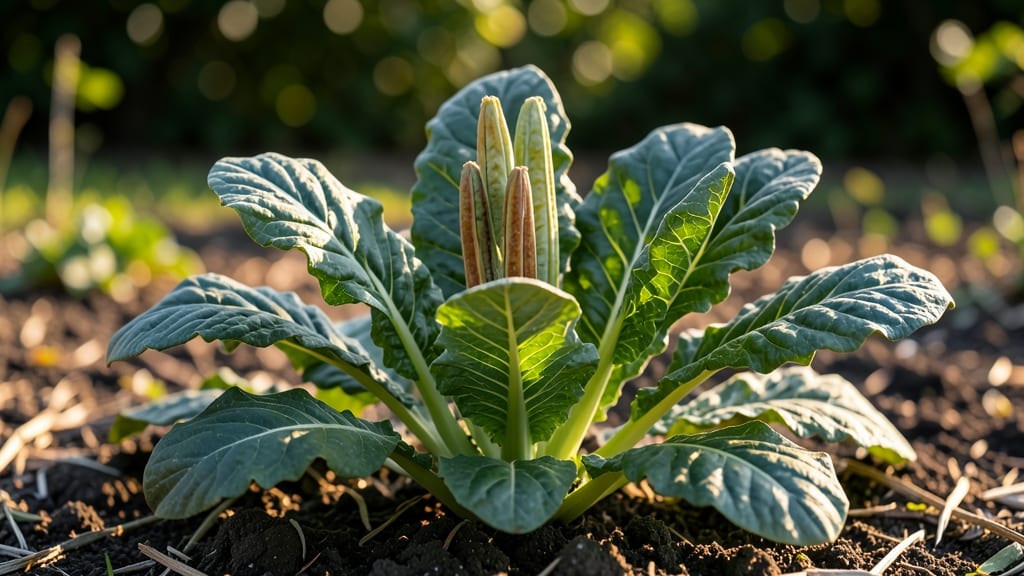
Saving collard greens seed pods means next year’s garden starts with free, homegrown plants that thrive in cold weather. 🌱 I’ve been drying and storing seeds for years, and the difference in my fall harvests is undeniable—plants grow stronger, resist pests better, and produce more greens than store-bought seedlings ever did.
The process is simpler than you’d think: wait for pods to turn brown and crispy, then harvest them on a dry day. Once inside, spread them on paper towels in a cool, dark spot for 2-3 weeks until completely dry.
Store the seeds in labeled envelopes, and they’ll stay viable for 3-5 years—far longer than most gardeners realize.
You’ll end up with a head start on spring planting, saving money and ensuring varieties perfectly suited to your climate. The first flush of tender young leaves in early spring tastes sweeter than anything you’ve grown before, and you’ll never need to buy seedlings again.
Works for any garden size, from small urban plots to sprawling homesteads. Here’s how to make it work without losing a single seed in the process.
📚 In This Guide
- What you need
- Instructions
- Tips and common mistakes
- Wrapping up and next steps
What you need
- ● Mature collard green plants: Choose healthy, disease-free plants with fully developed seed pods (typically late fall/winter).
- ● Pruning shears or sharp scissors: For cleanly harvesting seed pods without damaging the plant.
- ● Paper bags or breathable mesh bags: 1-2 per plant (or per 5-10 pods) to allow airflow and prevent moisture buildup.
- ● Drying rack or screen: A flat, elevated surface (like a wooden rack, wire mesh, or even a clean kitchen towel over a baking sheet).
- ● Permanent markers or labels: To tag seed pods with the variety name and harvest date.
- ● Air-tight storage containers: Glass jars, resealable plastic bags with silica gel, or vacuum-sealed bags for long-term storage.
- ● Harvesting gloves: Protects hands from thorns or rough stems.
- ● Fan or dehumidifier: Speeds up drying in humid climates.
- ○ Food dehydrator: Optional for faster drying (set to 95–105°F).
- ● Seed envelope kit: Pre-folded paper envelopes for organizing saved seeds by variety.
- ● Humidity indicator cards: Ensures storage conditions stay optimal (ideal: <30% humidity).
Step-by-step guide to harvesting, drying, and storing collard greens seed pods
Here’s how to save your favorite collard greens variety for next season—simple, reliable, and foolproof.
🌱 Step 1: Select and Harvest Mature Seed Pods
Wait until collard plants bolt—you’ll see tall flower stalks with seed pods forming. Choose pods that are fully brown and dry to the touch, as green or yellow pods won’t store well. I twist pods gently from the stalk (don’t pull—they’ll snap off at the wrong spot). Place them in a single layer on a clean tray to dry further.
If pods still feel crisp, leave them on the plant for another 2-3 days. Overripe pods crumble when handled, so harvest just before they’re fully dry. Real talk: If you miss the window, pods lose viability quickly—don’t risk it.
☀️ Step 2: Dry Seed Pods Thoroughly
Spread the harvested pods in a warm, dry location with good airflow—like a sunny windowsill or well-ventilated room at 65-75°F. Keep them away from direct sunlight, which can overheat and damage the pods. Stir them daily to ensure even drying, which takes 7-10 days total.
Pods are ready when they’re completely dry, brittle, and rattle when shaken. If moisture remains, mold will ruin your seeds. I know it seems tedious, but this step is non-negotiable for long-term storage success.
🪴 Step 3: Extract and Clean Seeds
Once fully dry, crush the pods between your palms or use a rolling pin to release the seeds. Sift the mixture through a fine mesh screen to separate seeds from chaff. Discard any debris—you’ll want only the plump, dark seeds for planting.
Store seeds in a cool, dark place until ready to package. If you’re impatient, you can skip this step and store whole pods, but seeds last longer when cleaned. I’ve found that collard seeds stay viable for 3-4 years when stored properly.
⏰ Step 4: Package and Store for Next Season
Place clean seeds in airtight containers—glass jars or sealed envelopes work best. Label each with the variety and harvest date. Store in a cool, dark pantry (ideally 50-60°F). Avoid refrigeration unless necessary, as temperature fluctuations can reduce viability.
Check stored seeds annually. If they smell musty or look discolored, compost them and start fresh. You’ll love knowing you’re growing collards from your own saved seeds—nothing beats the satisfaction of a homegrown, nutrient-packed harvest.
Tips & tricks for perfect collard greens seed pod preservation
Here's what nobody tells you—these little details make all the difference between viable seeds and wasted effort.
Harvest Timing: The 2-3 day window for harvesting is tighter than you think. Test pods by gently pressing them—if they feel crisp but not hard, they're ready. Overripe pods crumble instantly when touched, and underripe ones won't dry properly. I learned this the hard way after trying to dry green pods that just turned mushy.
Drying Environment: That 65-75°F range is ideal because it balances evaporation with safety. Too hot and pods overheat (you'll know because they turn gray), too cool and mold becomes a risk. I use a screened tray on my kitchen counter where it gets afternoon sun but stays out of direct rays—perfect for maintaining that temperature range.
Seed Viability Test: Before storing, do this quick test: place a few seeds between damp paper towels in a sealed bag. After 7 days, check for sprouts. If 80%+ sprout, your seeds are good to go. This simple step saves you from planting questionable seeds next spring. I've found collard seeds often test better than their age suggests when stored properly.
Pro Tips for Collard Greens Seed Pods
- Here's what nobody tells you—these little details make all the difference between viable seeds and wasted effort.
- Harvest Timing: The 2-3 day window for harvesting is tighter than you think. Test pods by gently pressing them—if the...
- Drying Environment: That 65-75°F range is ideal because it balances evaporation with safety. Too hot and pods overhea...
Frequently asked questions
Got questions about saving collard greens seed pods for next season? You’re not alone! Here are some of the most common concerns—and their answers—to help you master the process like a pro.
How do I know when collard greens seed pods are fully mature and ready to harvest?
Harvest seed pods when they turn brown and dry to the touch, usually 60–90 days after flowering. If they’re still green or slightly crisp, they need more time. Overripe pods may crack open, so check them regularly!
Can I save seeds from store-bought collard greens?
Unfortunately, no—store-bought collard greens are often hybrid varieties, meaning their seeds won’t grow true to the parent plant. For reliable seed-saving, grow heirloom or open-pollinated collard greens from seed pods. Check the label or ask your local nursery!
What’s the best way to store dried collard green seed pods for long-term viability?
Once fully dry, remove seeds from pods and store them in a cool, dark place (like a sealed jar or envelope) with a desiccant packet to absorb moisture. Label with the variety and date—seeds stay viable for 2–4 years if stored properly.
How do I prevent cross-pollination if I’m growing multiple collard green varieties?
Collard greens are self-pollinating, but for purity, isolate varieties by at least 500 feet or use row covers during flowering. If you’re unsure, grow just one variety to avoid mixed seeds.
What should I do if my seed pods mold or get wet before drying?
If pods mold, discard them immediately—mold spreads quickly and ruins seeds. To prevent this, harvest on dry days and spread pods in a well-ventilated area (like a mesh bag) to dry. Never store damp pods—they’ll spoil fast!
Wrapping up and next steps
Growing your own collard greens from seed pods is a rewarding way to enjoy fresh, nutrient-packed harvests year after year! 🌱 By mastering the drying and storage process, you’ll ensure your seeds stay viable and ready to plant.
Whether you’re a seasoned gardener or just starting out, this simple method opens the door to a bountiful, homegrown crop.
Now that you’re equipped with all the tips and tricks, why not take the next step? Start by harvesting a few pods from your garden today, and give the drying process a try. Soon, you’ll be savoring the taste of homegrown collards—and sharing your success with friends and family!