
Lawn
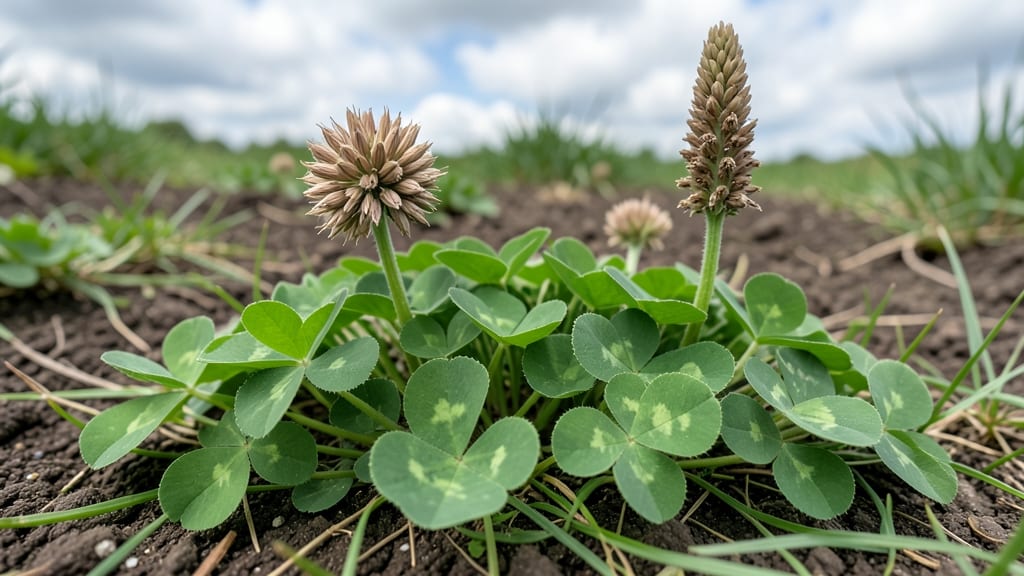
Those fuzzy, golden clover seed heads are nature’s hidden treasure chest—packed with seeds for next year’s garden. 🌱 I’ve harvested them for years, and the trick to saving viable seeds lies in timing and a little patience.
Most people twist them off too early, ending up with empty pods or sprouts that won’t store well.
Look for seed heads that turn from green to a rich golden-brown, often by late summer or early fall, depending on your climate. Use clean scissors or fingers to snip them just as they begin to dry on the plant—this ensures maximum seed viability.
Store them in a paper bag in a cool, dry place until fully dry, then shake out the seeds for planting or sharing.
These seeds are more than just propagation tools—they’re a pollinator magnet, a natural ground cover, and even a crafting material. Spread them in your lawn for a lush, low-maintenance green space, or use them to start new clover patches in neglected areas.
The possibilities are endless once you master the harvest.
One common mistake? Harvesting too wet or too late—either way, you risk losing seed quality. If birds or pests become an issue, cover the seed heads with mesh bags until ready to collect. With the right timing, you’ll have a year-round supply of clover seeds without the frustration.
📚 In This Guide
- What you need
- Instructions
- Tips and common mistakes
- Wrapping up and next steps
What you need
- ● Mature clover plants (red, white, or Dutch clover, ideally in full bloom with seed pods forming). Aim for at least 5–10 plants for a meaningful harvest.
- ● Pruning shears or sharp scissors (clean, sterilized to avoid disease transfer). Opt for bypass blades (4–6 inches long) for precision cuts.
- ● Paper bags or breathable mesh sacks (1–2 per harvest session). Avoid plastic—it traps moisture and promotes mold. Size: 12x16 inches or larger to hold seed heads comfortably.
- ● Labeling tags or masking tape + marker (to note harvest date and clover type). Pro tip: 💡 Use a permanent marker for outdoor durability!
- ● Drying rack or screen (elevated, shaded area with airflow). A wooden grid or hardware cloth works well—just avoid direct sunlight.
- ● Gloves (gardening or thin work gloves to protect hands from prickly stems).
- ● Small hand fan or dehumidifier (speeds up drying in humid climates).
- ● Seed storage jars (airtight, dark glass jars with silica gel packets for long-term viability).
- ● Magnifying glass (to inspect seed pods for pests or damage before storage).
- ● Wait until seed pods turn brown and dry (typically 6–8 weeks after flowering). ✨ Harvest too early = non-viable seeds!
- ● Choose a dry, overcast day to avoid crushing pods or attracting pests.
- ● Ensure your workspace is clean and organized—lay down a tarp or tray to catch stray seeds.
Step-by-Step instructions for harvesting clover seed heads
Here's how to collect and save viable clover seeds without damaging the plant or wasting time.
🌿 Step 1: Identify Mature Seed Heads
Look for clover plants with small, round seed pods that have turned from green to a rich, golden-brown color. These pods should feel dry and papery to the touch—this means the seeds inside are fully mature and ready for harvest. I always check in late summer or early fall, when the weather is warm but not yet rainy.
Gently pull back the leaves to expose the seed heads. If you see any green pods, leave them on the plant—they won’t produce viable seeds yet. Harvesting too early means you’ll end up with seeds that won’t sprout, and that’s a waste of your time and effort.
✂️ Step 2: Cut the Seed Heads Cleanly
Use clean, sharp scissors or pruning shears to snip the seed heads just above the first set of leaves. This prevents damage to the plant and encourages new growth. I like to cut in the early morning when the dew is still on the leaves—it helps the plant recover faster and reduces stress.
Avoid twisting or pulling the seed heads off, as this can uproot the plant or leave behind damaged stems. If you’re harvesting a large patch, work in small sections to keep track of which plants you’ve already collected from. Place the cut seed heads in a paper bag or breathable container to keep them dry.
🪴 Step 3: Dry the Seed Heads Properly
Spread the seed heads out in a single layer on a clean, dry surface, like a mesh screen or a piece of cardboard. Place them in a warm, dry spot with good airflow—this could be a sunny windowsill, a greenhouse, or even a well-ventilated room. The goal is to let the pods dry completely so the seeds release naturally.
Check the seed heads every few days. Once they crumble easily when rubbed between your fingers, they’re ready. If you notice any mold or dampness, move them to a drier location immediately. Proper drying ensures the seeds stay viable and ready for storage.
🌱 Step 4: Extract and Store the Seeds
Once the seed heads are fully dry, place them in a clean cloth bag or paper sack and gently shake or rub them to release the seeds. You’ll see tiny, round clover seeds falling out—this is the moment you’ve been waiting for! I like to do this over a piece of white paper or cardboard so I can easily see when all the seeds have been collected.
Store the seeds in an airtight container, like a glass jar or small plastic bag, in a cool, dark place. Label the container with the date and the type of clover. Seeds stored this way can stay viable for up to two years, giving you a fresh supply for next season’s planting.
⏰ Step 5: Prepare for Next Year’s Planting
In early spring, take out your stored seeds and plant them directly in the garden or in small pots for transplanting. Press the seeds lightly into the soil—clover seeds don’t need to be buried deeply, just covered with a thin layer of soil. Keep the soil consistently moist until the seedlings appear, which usually takes about 10-14 days in warm conditions.
Once the seedlings are established, thin them out to give each plant enough space to grow. You’ll know they’re thriving when you see those familiar three-leaf clover patterns emerging. This method ensures you’ll always have a fresh supply of clover seeds without relying on store-bought options.
Tips & tricks for perfect clover seed harvesting
These simple tricks will help you collect the most viable seeds while keeping your clover plants happy for next year.
Timing is Everything: Harvest in the early morning after the dew has dried but before the sun gets too intense. The seed pods are at their driest then, making them easier to handle and less likely to crack open prematurely. I’ve found that late summer—when the weather is warm but not yet rainy—gives me the best results. This timing also prevents the seeds from scattering before I can collect them.
Handle with Care: When cutting the seed heads in Step 2, use a sharp pair of pruning shears to make clean cuts just above the first set of leaves. Avoid crushing the pods—even a slight squeeze can damage the seeds inside. If you’re harvesting a large area, work in small sections and place the cut seed heads in a breathable container like a paper bag. This keeps them dry and prevents mold from forming before you can dry them properly.
Drying Done Right: In Step 3, spread the seed heads out in a single layer with plenty of space between them. A mesh screen or cardboard works perfectly, but avoid stacking them—this traps moisture and can lead to mold. Check them every few days by gently rubbing between your fingers. When they crumble easily, they’re ready. If you notice any dampness or mold, move them to a warmer, drier spot immediately. Proper drying is the key to keeping those seeds viable for storage.
Pro Tips for Clover Seed Heads
- These simple tricks will help you collect the most viable seeds while keeping your clover plants happy for next year.
- Timing is Everything: Harvest in the early morning after the dew has dried but before the sun gets too intense. The s...
- Handle with Care: When cutting the seed heads in Step 2, use a sharp pair of pruning shears to make clean cuts just a...
Frequently asked questions
Got questions about harvesting and saving clover seed heads?
You’re not alone! Here are answers to the most common queries—so you can master the twist-free method and keep your clover seeds viable all year.
How do I know when clover seed heads are ready to harvest?
Harvest clover seed heads when about 70-80% of the seed pods turn brown but haven’t yet burst open. Use your fingernail to test: if the pod cracks easily, it’s ready! Avoid harvesting when seeds are still green or fully dry—they’ll lose viability.
How long do harvested clover seed heads stay viable for storage?
With proper storage, clover seeds remain viable for 1-2 years in a cool, dry place (50-60°F). For longer-term saving, freeze them in airtight containers or use a desiccant packet to prevent moisture. Check for mold or pests—discard any suspicious seeds!
Can I reuse clover seed heads from previous years?
Yes, but with caution! Seeds lose viability over time—test a small batch first by planting them in a pot. If germination rates drop below 50%, it’s time to harvest fresh seeds. Older seeds may also be weaker, leading to slower-growing clover.
What’s the best way to remove seed heads without twisting them?
Gently pinch the stem just below the seed head with your thumb and forefinger, then pull upward in one smooth motion. Avoid twisting—it can damage the plant’s root system. For stubborn heads, use clean pruning shears for a clean cut.
Are there alternatives to saving clover seed heads?
If harvesting feels tricky, consider buying certified organic clover seeds from local nurseries or online. Another option: propagate clover from cuttings (though this is less reliable for seed production). For large lawns, professional seed suppliers offer bulk options!
Wrapping up and next steps
Clover seed heads are a gardener’s hidden treasure—packed with potential for year-round saving and twist-free harvesting!
Whether you’re aiming for pollinator-friendly lawns or sustainable seed storage, mastering the right techniques ensures viable, high-quality seeds every time. 🌱 With the right tools, patience, and a little know-how, you’re well on your way to becoming a self-sufficient seed saver.
Ready to take the next step? Start small—harvest a few seed heads this season, test their viability, and refine your method. Before you know it, you’ll be sharing your green thumb wisdom (and seeds!) with fellow gardeners. Happy harvesting! 🌿