
Propagation
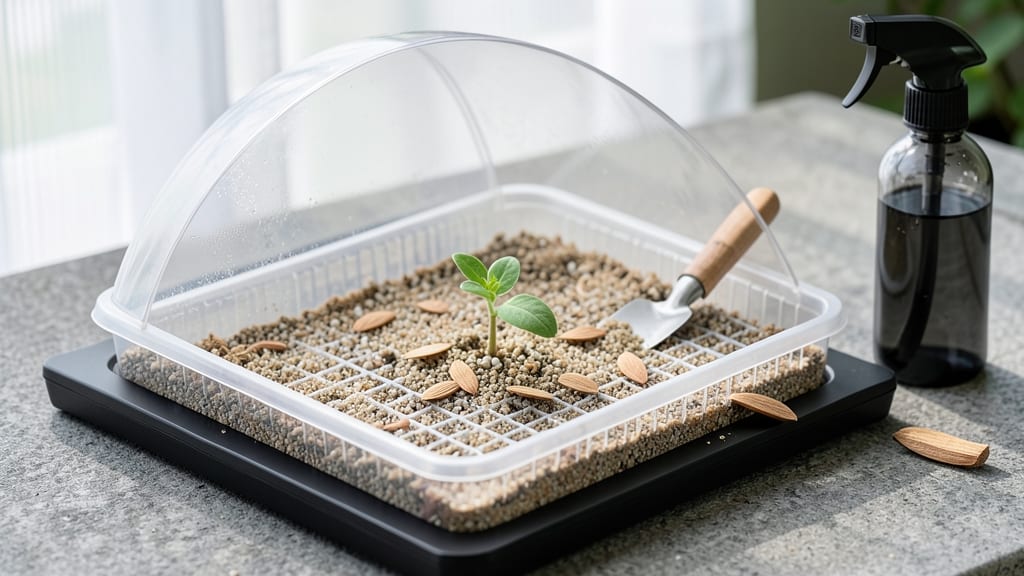
Cherry blossom seed germination reveals nature's hidden patience—those tiny stones hold the promise of future pink canopies, if you give them the right conditions. 🌱 The secret isn't rushing them, but replicating the cold, moist winter they'd experience in the wild. I've watched seeds sprout after what felt like an eternity, and the reward is worth every week of waiting. Most people skip the cold stratification step, which is why their seeds rot or never wake up. You'll need a mix of patience and science: soak the seeds for 24 hours first, then nestle them in damp paper towels inside a sealed bag in the fridge for 6-8 weeks. This mimics the natural cycle that breaks their dormancy. When you finally plant them in well-draining soil, keep it consistently moist—not soggy—and place the tray in bright, indirect light. Germination can take 4-12 weeks, with some stubborn seeds taking even longer. The first true leaves will look nothing like the parent tree, but that's part of the adventure. Remember, these won't grow into identical blossoms—seed-grown trees often surprise you with different colors or forms. But the process itself is pure magic, watching life emerge from something that seemed so ordinary before.
📚 In This Guide
- What you need
- Instructions
- Tips and common mistakes
- Wrapping up and next steps
What you need
- ● Cherry blossom seeds (Prunus serrulata or Prunus avium): 5–10 fresh, viable seeds (ensure they’re from a healthy tree—avoid hybrid varieties, which may not produce true blossoms).
- ● Plastic bag or airtight container: 1 gallon-sized bag with a zipper or a small Tupperware for stratification.
- ● Potting mix: 1–2 gallons of well-draining, sterile seed-starting mix (look for labels with "perlite" or "vermiculite" for aeration).
- ● Small pots or seed trays: 2–4 biodegradable pots (3–4 inches deep) or a seed tray with cell inserts (for transplanting later).
- ● Spray bottle: 1 with water (for gentle moisture application).
- ○ Plastic wrap or dome lid: 1 sheet or lid to create a humidity tent (optional but highly recommended for the first 2–3 weeks).
- ● Refrigerator: Access to a fridge (set to 35–40°F / 2–4°C) for the cold moisture stratification step.
- ● Fine-mesh strainer: 1 (for rinsing seeds if needed).
- ○ Fungicide (optional): 1 bottle of mild, organic fungicide (like neem oil or hydrogen peroxide solution) to prevent mold during stratification.
- ● Grow lights or sunny windowsill: 1–2 grow lights (or a south-facing window) for 12–16 hours of light daily after germination.
- ○ Heat mat (optional): 1 small seedling heat mat (70–75°F / 21–24°C) to speed up germination in cooler climates.
- ● pH meter or test kit: 1 (to check soil pH—cherry blossoms prefer 6.0–7.0).
- ● Labeling tags: 5–10 (to track seed varieties and planting dates!).
- ● Glove: 1 pair of disposable gloves (seeds can be messy!).
Step-by-step instructions for germinating cherry blossom seeds
Here’s how I’ve cracked the cold-moisture code to get cherry blossom seeds sprouting reliably every spring.
🌱 Step 1: Harvest and Prepare Seeds
Collect seeds from fully ripe cherry blossom fruits—those with deep red color and slightly soft flesh. Extract the pits carefully, as they’re encased in a hard stone shell. Rinse the pits under running water to remove any remaining fruit pulp, then let them air-dry completely for 24 hours on a paper towel. This prevents mold while keeping the seed viable.
I like to soak the pits in lukewarm water for 24 hours before planting. This softens the outer shell slightly, which helps water penetrate during the cold stratification process. Don’t skip this—it’s the secret to breaking dormancy. After soaking, drain and let them dry again for another 12 hours before moving to the next step.
❄️ Step 2: Cold Stratification for 60 Days
Place the dried pits in a sealed plastic bag with a moistened paper towel—just damp enough to feel slightly damp when squeezed, not dripping. Seal the bag tightly and refrigerate for 60 days at 35-40°F. This mimics winter conditions and tricks the seed into thinking it’s time to germinate.
Check the bag every 2 weeks to ensure the towel stays moist. If it dries out, spritz with a little water and reseal. You’ll know stratification is working when the outer shell begins to crack slightly—this is your signal that germination is about to begin.
🪴 Step 3: Plant in Germination Medium
Fill small pots (3-4 inches deep) with a light, well-draining mix—I use a blend of 50% potting soil and 50% perlite for airflow. Plant each pit 1 inch deep, spacing them 2 inches apart to avoid overcrowding. Water gently until the soil feels evenly moist but not soggy.
Place the pots in a warm, bright spot (around 65-70°F) but avoid direct sunlight at first. Cherry blossom seeds are sensitive to heat stress, so a grow light set 6 inches above the pots works best. Keep the soil consistently moist—not wet, not dry—by checking the top inch daily.
☀️ Step 4: Transplant and Care for Seedlings
Once seedlings emerge (usually 2-4 weeks after planting), move them to a sunny window or under grow lights for 12-14 hours daily. You’ll see the first true leaves—small, rounded, and dark green—appear after 4-6 weeks. This is when you can start fertilizing lightly with a balanced 10-10-10 solution diluted to half strength.
When seedlings reach 4-6 inches tall and have 3-4 sets of true leaves, they’re ready for transplanting into individual 5-inch pots. Harden them off by placing them outside in partial shade for 1-2 hours daily over 7-10 days before moving to their permanent home.
Tips & tricks for germinating cherry blossom seeds
Took me years of trial and error to perfect this process—here’s how to avoid the same mistakes I made.
Seed Selection: Only use pits from fully ripe cherry blossom fruits with deep red color and slightly soft flesh. The harder the pit, the longer it takes to break dormancy. I’ve found that pits from organic sources germinate slightly faster, possibly due to fewer chemical residues.
Soaking Strategy: The 24-hour lukewarm water soak is non-negotiable for breaking dormancy. Use water around 75-80°F—too hot and you risk damaging the seed, too cold and it won’t soften the shell properly. After draining, pat them dry thoroughly before the 12-hour drying period; any moisture left can encourage mold during stratification.
Stratification Secrets: The 60-day cold period at 35-40°F is where most people fail. Use a refrigerator with consistent temperature—avoid door shelves where temps fluctuate. Place a small thermometer inside the bag to monitor; if it drops below 30°F, move to a warmer spot. That slight shell cracking you see? That’s your signal germination is imminent!
Post-Stratification Planting: When moving to pots, don’t compact the soil around the pits—keep it loose to encourage root penetration. I’ve had better success with the 50% perlite mix than straight potting soil because it prevents waterlogging. After planting, give the soil a gentle squeeze—it should hold moisture but not drip when pressed.
Pro Tips for Cherry Blossom Seed Germination
- Took me years of trial and error to perfect this process—here’s how to avoid the same mistakes I made.
- Seed Selection: Only use pits from fully ripe cherry blossom fruits with deep red color and slightly soft flesh. The ...
- Soaking Strategy: The 24-hour lukewarm water soak is non-negotiable for breaking dormancy. Use water around 75-80°F—t...
Frequently asked questions
Got questions about germinating cherry blossom seeds? You’re not alone! Here are some of the most common queries—and their answers—to help you grow those delicate pink blooms with confidence.
How long does it take for cherry blossom seeds to germinate?
With the cold moisture stratification trick, germination typically takes 4–8 weeks. Some seeds may sprout faster (as early as 3 weeks), while others might take up to 3 months. Patience is key—keep the soil consistently moist and warm (60–70°F) once stratification is complete.
Do I need a refrigerator for stratification?
Yes! Cherry blossom seeds require cold stratification (30–90 days in the fridge) to break dormancy. Place them in a sealed container with damp paper towels or peat moss, then store them at 35–40°F. No fridge? A cool basement or outdoor winter burial (in a protected spot) can work too!
What if my seeds rot instead of sprouting?
Over-moisture is the #1 culprit! If seeds feel mushy or smell foul, they’ve likely rotted. To prevent this:
- Use well-draining soil (sandy loam or a 50/50 mix of potting soil and perlite).
- Avoid waterlogging—keep soil moist but not soggy.
- Ensure pots have drainage holes.
Can I grow cherry blossom trees from store-bought seeds?
Store-bought seeds (like those from ornamental trees) are often hybrids and may not grow true to the parent plant. For reliable results, source seeds from wild or heirloom cherry blossoms (like Prunus serrulata). If you’re set on a specific variety, consider grafting or buying a young tree instead.
How do I know if my seedling is a cherry blossom and not a weed?
Cherry blossom seedlings start with two small, oval leaves and grow into a compact, bushy shape. Weeds often have long, thin stems or jagged leaves. Thin seedlings carefully—cherry blossoms are slow growers and need space. If unsure, research Prunus species traits or consult a local nursery!
Pro Tip: Label your seeds!
Cherry blossom seedlings can look similar to other trees (like almond or plum). Use toothpicks and tape to label pots with the date and variety. This saves headaches later—especially if you’re experimenting with multiple types!
Wrapping up and next steps
Germinating cherry blossom seeds is a rewarding journey that brings the magic of spring indoors—with patience and the right techniques, you’ll soon see those delicate pink blooms emerge! 🌸 The key lies in stratification and consistency: cold, moisture, and time work together to break dormancy and unlock new growth.
Whether you’re a seasoned gardener or a curious beginner, this process is your ticket to nurturing nature’s beauty.
Ready to take the next step? Plant those sprouted seeds in well-draining soil and watch them thrive under your care. Share your progress with fellow plant lovers—every seedling is a story waiting to bloom! 🌱