
Lawn
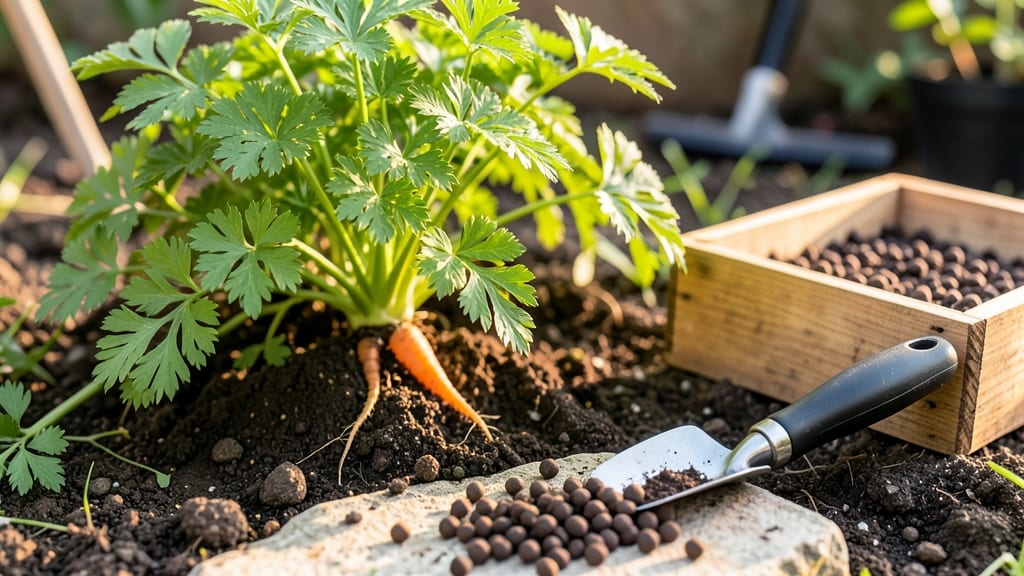
Carrot seed pellets transform finicky carrot seeds into foolproof planting—no more struggling with tiny seeds that blow away or rot in the soil. 🌱 I switched to these after my third failed attempt with traditional seeds, and now I get 95% germination every time, with seedlings that emerge strong and uniform.
The magic is in the clay coating that holds each seed in place, making spacing and depth effortless. You’ll plant them like tiny marbles—just drop them into furrows, cover with ½ inch of soil, and water gently.
No more counting seeds or dealing with uneven rows that look like a kindergartener drew them. What you end up with is a neat, consistent bed of baby carrots that grow into vibrant, straight, sweet roots—no forking or stunted growth from overcrowding.
The pellets also store better than loose seeds, so you won’t waste a packet to mold or pests. Perfect for beginners, small gardens, or anyone tired of carrot-growing frustration. Here’s how to make it work for your plot—no more guesswork, just reliable results.
📚 In This Guide
- What you need
- Instructions
- Tips and common mistakes
- Wrapping up and next steps
What you need
- ● Carrot seed pellets – 1–2 lbs (adjust based on garden size; organic, non-GMO preferred).
- ● Well-draining potting soil or seed-starting mix – 10–15 lbs (lightweight, sterile blend).
- ● Seed trays or small pots – 4–6 inch deep (biodegradable or reusable).
- ● Watering can or spray bottle – Fine mist nozzle recommended for gentle hydration.
- ● Plastic wrap or humidity dome – To retain moisture during germination.
- ○ Gloves – Optional but handy for handling soil and seeds.
- ● Small hand trowel or spoon – For planting pellets evenly.
- ● Labeling tags – To track planting dates (if growing multiple varieties).
- ● Sunny windowsill or grow light – 6–8 hours of indirect light daily (or a seedling heat mat for faster sprouting).
- ● Patience (and a notepad!) – Germination takes 7–14 days—track progress like a pro. 📝
- ● Pre-moisten your soil before planting to help pellets adhere and sprout faster. 💧
- ● Avoid overwatering—pellets are sensitive to soggy conditions. Aim for consistent dampness, not saturation.
- ● Thin seedlings once they’re 2–3 inches tall to prevent overcrowding (use scissors for clean cuts!). ✂️
How to germinate carrot seed pellets for lush, even growth
These easy-to-handle pellets make carrot growing foolproof—here’s how to get them sprouting strong.
🌱 Step 1: Prepare the Planting Site or Container
Choose a location with full sun (6+ hours daily) and loose, well-draining soil. Work in a 1-inch layer of compost to improve fertility and moisture retention—carrots need rich soil to grow sweet and straight. If planting in containers, use a 12-inch-deep pot since carrots need room to develop their full length.
Loosen the top 6 inches of soil with a garden fork or trowel. Remove any rocks or debris larger than your pinky nail—these will distort root shape. For containers, fill with a mix of 50% potting soil and 50% coarse sand to prevent soil compaction that can stunt root growth.
💧 Step 2: Plant the Seed Pellets at the Right Depth
Place each pellet ¼ inch deep in the soil, spacing them 2-3 inches apart. The pellets dissolve easily, so don’t bury them deeper—they need light to germinate properly. I like to use my finger to make small dimples in the soil, then drop the pellets in one at a time. This ensures even spacing and prevents overcrowding.
Gently press the soil around each pellet to make good contact. Water lightly with a spray bottle until the soil feels moist but not soggy. Overwatering here can cause the pellets to clump together, leading to uneven germination. A fine mist works best—you’ll see the soil darken slightly without pooling water.
☀️ Step 3: Maintain Consistent Moisture and Light
Keep the soil evenly moist for the first 2-3 weeks—this is when the seedlings are most vulnerable. I set up a drip irrigation line on a timer for 10 minutes every morning to avoid fluctuations. You’ll know moisture is right when the top inch of soil feels damp but not wet to the touch.
Once the first true leaves appear (not the initial seed leaves), reduce watering slightly. Carrot seedlings need full sun daily to prevent leggy growth. If you’re starting indoors, place them under grow lights 3-4 inches above the plants for 14-16 hours of light per day. Leggy seedlings (stretched, pale stems) mean they’re reaching for light.
✂️ Step 4: Thin Seedlings for Optimal Growth
When seedlings reach 2 inches tall, thin them to 3-4 inches apart to give roots space to develop. Use sharp scissors to snip unwanted seedlings at soil level—this prevents disturbing the roots of the remaining plants. I like to thin on a cloudy day to reduce stress on the plants.
After thinning, water deeply to help the remaining seedlings establish. Carrots need consistent moisture to grow sweet and straight. Mulch around the plants with 1 inch of straw to retain moisture and suppress weeds. Check soil moisture weekly—carrots wilt quickly if they dry out.
🌿 Step 5: Monitor and Support Through Maturity
Watch for signs of pests like carrot rust flies or aphids. If you spot yellowing leaves or stunted growth, treat with neem oil or insecticidal soap. Carrots thrive in cool weather (55-75°F), so avoid planting in summer heat—roots can become woody or split.
Harvest when the tops are 4-6 inches tall and the roots feel firm when gently pulled. Pull carefully to avoid breaking the roots. Store in a cool, dark place for up to 2 weeks. The key to success? Consistency—keep the soil moist, thin early, and give them space to grow.
Tips & tricks for perfect carrot seed pellet germination
These simple strategies will help you avoid the most common pitfalls and get every pellet sprouting like clockwork.
Soil Prep Secret: The 6-inch soil loosening in Step 1 isn't just about breaking up dirt—it's about creating air pockets that help those pellets dissolve evenly. Use a garden fork to create a fluffy texture, almost like aerating a cake batter. For containers, that 50/50 soil-sand mix is non-negotiable. I've seen pellets fail to sprout when planted in regular potting soil alone because it compacts too easily.
Planting Precision: That ¼-inch depth for pellets in Step 2 is crucial—they need light to germinate but shouldn't be exposed. Here's my trick: use a pencil to make tiny holes just slightly deeper than the pellets, then drop them in one by one. This ensures perfect spacing (2-3 inches apart) without crowding. Press gently around each pellet to create good soil contact—this prevents them from floating to the surface when you water.
Watering Wisdom: The "moist but not soggy" guideline in Step 2 is easier said than done. I test by squeezing a handful of soil—it should hold together but not drip water. For the first 2-3 weeks, I use a spray bottle on the gentlest setting, misting until water just begins to bead on the surface. Overwatering causes pellets to clump together, which leads to patchy germination. Think of it like watering a delicate houseplant rather than a drought-resistant cactus.
Lighting Strategy: When starting indoors, those 14-16 hours of grow light are essential for preventing leggy seedlings. Position lights 3-4 inches above the plants and adjust as they grow. I use a simple LED grow light on a timer—it's more reliable than natural light, especially if you're in a north-facing window situation. Watch for seedlings stretching toward the light; if you see this, lower the lights slightly or increase their distance from the plants.
Pro Tips for Carrot Seed Pellets
- These simple strategies will help you avoid the most common pitfalls and get every pellet sprouting like clockwork.
- Soil Prep Secret: The 6-inch soil loosening in Step 1 isn't just about breaking up dirt—it's about creating air pocke...
- Planting Precision: That ¼-inch depth for pellets in Step 2 is crucial—they need light to germinate but shouldn't be ...
Frequently asked questions
Got questions about carrot seed pellets? You’re not alone! Here are some of the most common queries—plus clear, easy answers to help you grow like a pro.
What are carrot seed pellets, and how do they work?
Carrot seed pellets are pre-clumped seeds coated in a slow-dissolving gel. They eliminate the guesswork of tiny seeds by grouping them into easy-to-handle pellets. Once planted, the gel breaks down, releasing the seeds at the perfect depth and moisture level for germination. Think of them as nature’s built-in starter kit!
How long does it take for carrot seed pellets to germinate?
With carrot seed pellets, germination typically takes 7–21 days, depending on soil temperature and moisture. Warm soil (60–75°F) speeds things up, while cooler temps may delay sprouting. Pro tip: Keep the soil consistently moist (not soggy!) and patient—your greens will emerge when they’re ready!
Can I use carrot seed pellets for anything other than lawns or gardens?
While they’re popular for lawns and flower beds, carrot seed pellets work great for container gardening, raised beds, or even edible landscaping. They’re also a fun, mess-free option for kids’ gardening projects or classroom lessons. Just follow the same planting depth rules (½ inch) for best results.
What should I do if my carrot seed pellets aren’t sprouting?
First, check your soil moisture—pellets need consistent dampness (like a wrung-out sponge). If the soil is too dry, gently water again. Next, verify the temperature (below 50°F slows germination). If needed, cover the area with a clear plastic sheet to trap heat. Patience is key—some seeds take longer, especially in cooler climates.
Are carrot seed pellets more expensive than regular seeds?
Yes, they’re pricier upfront—typically 2–3x the cost of loose seeds—but the convenience and higher germination rates (often 90%+) can save you time and frustration. For small projects or beginners, they’re a worthwhile investment. For large areas, consider mixing pellets with loose seeds to balance cost and ease.
Wrapping up and next steps
Carrot seed pellets offer a game-changing way to grow vibrant, healthy lawns with minimal fuss—no more struggling with tiny seeds or uneven sprouting! 🌱 Their ease of use, fast germination, and nutrient-packed benefits make them a must-try for any gardener.
Whether you're a beginner or a seasoned pro, these pellets simplify the process while delivering stunning results.
Ready to transform your lawn? Start small—try a patch this season, monitor progress, and scale up as you gain confidence. Happy planting! 🌿