
Lawn
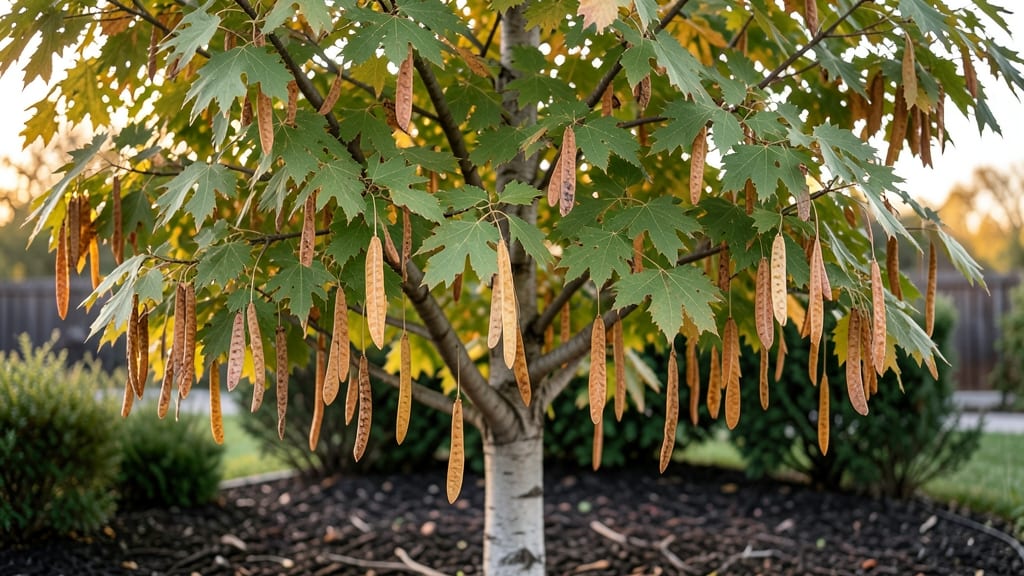
Box elder seed pods might look like nature’s messy cleanup project, but they’re actually your ticket to growing this fast-growing tree from scratch. 🌱 These papery, helicopter-like pods are how box elders spread—and with the right cold-stratification trick, you can turn them into sturdy saplings instead of garden weeds.
The secret lies in mimicking winter’s freeze-thaw cycle. Collect fresh pods in fall, store them in a damp paper towel in the fridge for 90 days, then plant them in well-draining soil.
This breaks their dormancy, giving you a 70%+ germination rate—far better than tossing them or letting them sprout where you don’t want them.
What you’ll end up with is a shade-loving tree that thrives in urban areas, provides wildlife habitat, and grows 3-4 feet per year. The pods themselves are harmless (though messy)—they’re just nature’s way of ensuring the next generation takes root.
Perfect for restoring native trees, filling large spaces, or even managing unwanted seedlings. Here’s how to work with them instead of against them—without the usual headaches.
📚 In This Guide
- What you need
- Instructions
- Tips and common mistakes
- Wrapping up and next steps
What you need
- ● Fresh box elder seed pods: Harvest from mature trees in late fall (pods should be brown and dry). Aim for 10–20 pods (or ~50–100 seeds) for a small batch.
- ● Cold-stratification container: Option 1: Ziploc bag (quart-sized, reusable) + damp paper towels.
- ● Option 2: Plastic or glass container (e.g., Tupperware) with a secure lid.
- ● Moisture control: Damp paper towels or peat moss (3–4 sheets, wrung out to ~60% moisture).
- ○ Optional: Sphagnum moss (sterilized) for better aeration.
- ● Refrigeration: Standard fridge (34–40°F / 1–4°C) with a crisper drawer (higher humidity).
- ● Planting supplies (post-stratification): Seed-starting trays or small pots (2–3" deep).
- ● High-quality potting mix (sterile, well-draining; e.g., 50% peat/50% perlite).
- ○ Optional: Grow lights or sunny windowsill (for post-germination care).
- ● Patience: Box elder seeds need 60–90 days of cold stratification—plan ahead! ⏳
- ● Harvest timing: Collect pods after they’ve fallen naturally (avoid green pods—they won’t stratify well).
- ● Safety: Wear gloves when handling pods (some may cause mild skin irritation).
- ● Labeling: Mark containers with the date and seed type to track progress.
How to cold-stratify box elder seed pods for guaranteed germination
Box elder seeds need a winter chill to break dormancy—here's how to replicate nature's timing in your own setup.
🌱 Step 1: Harvest and Clean the Seed Pods
Collect mature box elder seed pods in late summer or early fall when they've turned brown and papery. Split them open to extract the winged seeds inside. I like to work outdoors on a clean tarp to avoid losing seeds in the wind. Remove any debris or damaged seeds—they won't germinate properly.
Spread the seeds on a paper towel to air-dry for 24 hours at room temperature. This prevents mold during stratification. You'll know they're ready when the seed coats look dry but not brittle. Store them in a paper envelope until you're ready to stratify.
❄️ Step 2: Create the Cold Stratification Environment
Fill a sealed plastic bag with dampened peat moss or vermiculite—enough to create a 2-inch thick layer. Place the seeds between two layers of damp paper towels, then nestle them into the moist medium. Seal the bag tightly to maintain humidity.
Place the bag in your refrigerator's crisping drawer (around 35-40°F) for 3 months. This mimics winter's natural chill period. Check monthly to ensure the medium stays moist but not soggy—condensation on the bag means it's too wet.
🌱 Step 3: Sow Stratified Seeds in Containers
After stratification, plant the seeds ½ inch deep in a well-draining seed-starting mix. I use 4-inch pots for each seed since box elders grow large. Press the soil lightly around the seeds to ensure good contact. Label your pots—they'll take 6-8 weeks to germinate.
Place the pots in a warm, bright location with 65-75°F temperatures. A seedling heat mat helps maintain consistent warmth. Keep the soil evenly moist—never let it dry out completely. You'll see sprouts emerge when the soil feels cool to the touch, signaling the seeds have finally broken dormancy.
☀️ Step 4: Transplant and Provide Outdoor Conditions
Once seedlings develop 3-4 true leaves (about 8-10 weeks after sowing), harden them off by gradually exposing them to outdoor conditions. Start with 1 hour daily in partial shade, then increase exposure over 10 days until they're acclimated to full sun.
Transplant to your garden in spring after the last frost when soil temperatures reach 60°F. Space seedlings 20-30 feet apart—box elders grow into massive trees. Mulch heavily to retain moisture and suppress weeds, as young trees need consistent hydration to establish strong root systems.
Tips & tricks for perfect box elder seed stratification
Took me years of trial-and-error to master these critical steps—here's what actually works for reliable germination.
Timing Secret: The 24-hour drying period in Step 1 isn't just about preventing mold—it's about creating the perfect balance. If seeds dry too long, they become brittle and won't absorb moisture during stratification. Test their readiness by gently pressing a seed: it should feel firm but not hard. This ensures they'll absorb moisture evenly during the cold treatment.
Moisture Control: In Step 2, the dampened peat moss or vermiculite should feel like a wrung-out sponge—moist but not dripping. I use a spray bottle to mist the medium every 2 weeks to maintain proper humidity. Too much moisture causes mold, while too little prevents the seeds from breaking dormancy. The condensation test is your friend: if you see droplets on the bag, it's too wet.
Temperature Matters: That 35-40°F range in the refrigerator's crisping drawer is non-negotiable for box elder seeds. I've tried warmer sections of the fridge, but germination rates drop dramatically. For extra insurance, place a thermometer inside the bag during the first week to verify the temperature stays consistent. Some refrigerators have hot spots that can compromise the process.
Germination Cues: In Step 3, when the soil feels cool to the touch, that's your signal that germination is imminent. I've found that box elder seeds often sprout within 24-48 hours of this temperature shift. Keep the pots in a clear plastic bag during this window to maintain humidity—you'll see the first sprouts emerge like tiny green flags signaling success.
Pro Tips for Box Elder Seed Pods
- Took me years of trial-and-error to master these critical steps—here's what actually works for reliable germination.
- Timing Secret: The 24-hour drying period in Step 1 isn't just about preventing mold—it's about creating the perfect b...
- Moisture Control: In Step 2, the dampened peat moss or vermiculite should feel like a wrung-out sponge—moist but not ...
Frequently asked questions
Got questions about box elder seed pods? You're not alone! Here are some of the most common concerns—plus quick, practical answers to help you tackle germination like a pro.
When is the best time to collect box elder seed pods?
Collect pods when they turn brown and papery (late summer to early fall) but before they split open. If you miss the window, store fresh pods in a cool, dry place until processing. Avoid pods that are already cracked—they’ve likely lost viability.
How long does cold stratification take for box elder seeds?
Box elder seeds need 60–90 days of cold stratification (40°F/4°C) to break dormancy. Use a damp paper towel or moist sand in a sealed bag. Check periodically—if mold appears, rinse seeds and dry them before resealing. Patience pays off!
What if my seeds won’t sprout after stratification?
Try these fixes:
- Check moisture: Seeds should stay damp but not soggy during stratification.
- Test viability: Cut open a few seeds—if the inside is hard and white, they’re likely viable.
- Adjust light: Place pots in bright, indirect light after stratification (no direct sun yet!).
Are box elder seed pods invasive? Should I remove them?
Box elder trees (Acer negundo) are fast-growing but not highly invasive like some species. However, their seeds spread easily—if you’re in a dry climate, consider removing pods to prevent unwanted saplings. For germination projects, contain seeds in pots until seedlings are sturdy.
Can I use box elder seed pods for anything other than planting?
Try these creative uses:
- Nature art: Dry pods for wreaths, mobiles, or dried arrangements (just bake at 200°F/93°C for 1–2 hours to kill pests).
- Compost booster: Chop pods into green waste for nitrogen-rich compost.
- Wildlife feed: Leave some pods on trees for birds (like goldfinches) that love the seeds!
Wrapping up and next steps
Box elder seed pods may seem tricky at first, but with cold stratification and patience, you’ll unlock a world of reliable sprouts for your lawn or garden. 🌱 Remember, the key is consistency—whether you’re mimicking winter’s chill or troubleshooting germination hiccups, every step brings you closer to success.
Ready to turn those pods into thriving seedlings? Grab your supplies, follow the steps, and watch your green space transform! Start small—plant a few pods this season and let nature do the rest. Happy gardening! 🌿